background image

IMPORTANT SAFETY INSTRUCTIONS

3

206-3921

Important safeguards for you and your new product

Your product has been manufactured and tested with your safety in mind. However, improper use can result
in potential electrical shock or fire hazards. To avoid defeating the safeguards that have been built into your
new product, please read and observe the following safety points when installing and using your new prod-
uct, and save them for future reference.

Observing the simple precautions discussed in this booklet can help you get many years of enjoyment and
safe operation that are built into your new product.

This product complies with all applicable U.S. Federal safety requirements, and those of the Canadian
Standards Association.

(Continued on next page)

1. Read Instructions

All the safety and operating instructions should be
read before the product is operated.

2. Follow Instructions

All operating and use instructions should be fol-
lowed.

3. Retain Instructions

The safety and operating instructions should be
retained for future reference.

4. Heed Warnings

All warnings on the product and in the operating
instructions should be adhered to.

5. Cleaning

Unplug this product from the wall outlet before clean-
ing. Do not use liquid cleaners or aerosol cleaners.
Use a damp cloth for cleaning.

6. Water and Moisture

Do not use this product near water - for example, near
a bath tub, wash bowl, kitchen sink, or laundry tub, in
a wet basement, or near a swimming pool.

7. Accessories, Carts, and Stands

Do not place this product on an unstable cart, stand,
tripod, bracket, or table. The product may fall, causing
serious injury to a child or adult, and serious damage
to the product. Use only with a cart, stand, tripod,
bracket, or table recommended by the manufacturer,
or sold with the product. Any mounting of the product
should follow the manufacturer’s instructions, and
should use a mounting accessory recommended by
the manufacturer.

8. Transporting Product

A product and cart combination should be moved
with care. Quick stops, excessive force, and uneven
surfaces may cause the product and cart combina-
tion to overturn.

9. Attachments

Do not use attachments not recommended by the
product manufacturer as they may cause hazards.

10. Ventilation

Slots and openings in the cabinet are provided for
ventilation and to ensure reliable operation of the
product and to protect it from overheating, and these
openings must not be blocked or covered. The open-
ings should never be blocked by placing the product
on a bed, sofa, rug, or other similar surface. This
product should not be placed in a built-in installation
such as a bookcase or rack unless proper ventilation
is provided or the manufacturer’s instructions have
been adhered to.

11. Power Sources

This product should be operated only from the type
of power source indicated on the marking label. If
you are not sure of the type of power supply to your
home, consult your product dealer or local power
company. For products intended to operate from bat-
tery power, or other sources, refer to the operating
instructions.

12. Power-Cord Polarization

This product is equipped with a three-wire grounding
type alternating-current line plug (a plug having one
blade wider than the other). This plug will fit into the
power outlet only one way. This is a safety feature. If
you are unable to insert the plug fully into the outlet,
contact your electrician to replace your obsolete out-
let. Do not defeat the safety purpose of the polarized
plug.

13. Power-Cord Protection

Power-supply cords should be routed so that they
are not likely to be walked on or pinched by items
placed upon or against them, paying particular atten-
tion to cords at plugs, convenience receptacles, and
the point where they exit from the product.

PORTABLE CART WARNING

Содержание L20V26C Series

Страница 1: ... Copyright 2003 Zenith Electronics Corporation Installation Setup Operating Guide I Warranty Model Number L20V26C LCD TV ...

Страница 2: ...s been tested and found to comply with the limits for a Class B digital device pursuant to Part 15 of the FCC Rules These limits are designed to provide reasonable protection against harm ful interference when the equipment is operated in a residential installation This equipment generates uses and can radiate radio frequency energy and if not installed and used in accordance with the instruc tion...

Страница 3: ...mounting of the product should follow the manufacturer s instructions and should use a mounting accessory recommended by the manufacturer 8 Transporting Product A product and cart combination should be moved with care Quick stops excessive force and uneven surfaces may cause the product and cart combina tion to overturn 9 Attachments Do not use attachments not recommended by the product manufactur...

Страница 4: ... qualified service personnel 20 Damage Requiring Service Unplug this product from the wall outlet and refer ser vicing to qualified service personnel under the fol lowing conditions a If the power supply cord or plug is damaged b If liquid has been spilled or objects have fallen into the product c If the product has been exposed to rain or water d If the product does not operate normally by follow...

Страница 5: ...er Connections 18 DTV Set top Box Connections 19 Turning the TV On 20 TV Mode Menus 21 Menu Language Selection 22 Auto Programming Finding Erasing Channels 23 Favorite Channel Memory 25 Closed Captions 39 Parental Control 42 Auto Off 45 Key Lock 46 Video Picture Setup 30 Audio Sound Setup 33 Clock Setup 26 Off Timer Setup 27 On Timer Setup 28 Sleep Timer Setup 29 Maintenance 47 Product Specificati...

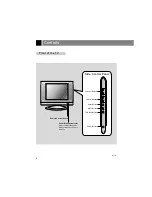
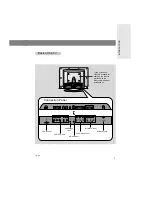
Страница 6: ... enter menu tv video on off Side Control Panel Side Control Panel TV Video Button Enter Button Channel Buttons Power Button Menu Button Volume Buttons Remote Control Sensor Power Standby indicator Glows red in Standby mode Glows green when the TV is turned on ...

Страница 7: ... COMPONENT 480i 480p L R AUDIO S VIDEO IN MONITOR OUT H P R L VIDEO VIDEO AUDIO R L AUDIO MONO Power Input Antenna Input DVD DTV Input Headphone Jack Audio Video Input S Video Input Monitor Output Connection Panel Connection Panel These 4 threaded holes are available for attaching the bracket provided with the accessory wall mount installation kit ...

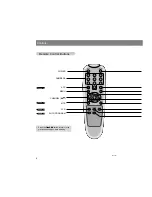
Страница 8: ... 7 1 mts fcr memory erase a prog flashbk dasp 206 3921 Controls 8 POWER NUMBERS APC MENU CHANNEL DE MTS FCR AUTO PROGRAM Remote Control Buttons Remote Control Buttons Press the flashbk button to return to the previous channel you were watching PAGE 30 PAGE 37 PAGE 25 PAGE 23 ...

Страница 9: ...GE 24 TV VIDEO Button TV VIDEO Button on Remote Control on Remote Control Each press of this button changes the view ing source as indicted below Video S Video Component Select each mode for watching the corre sponding external equipment TV programs Cable TV Video S Video Component PAGE 15 19 DASP FLASHBK MEMORY ERASE ...

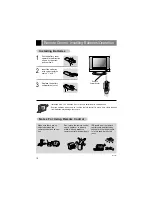
Страница 10: ...rol Notes For Using Remote Control Pull the battery cover upward in the direction shown by the arrow and remove it 1 2 3 Insert the batteries with correct polarity match and Replace the battery compartment cover Install two AAA 1 5V batteries Don t mix used batteries with new batteries Remove batteries when you won t use the remote control for a long time Liquid leakage from batteries may damage t...

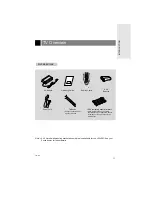
Страница 11: ... 0 2 3 5 6 4 8 9 7 1 mts fcr memory erase a prog flashbk dasp Note A UL Listed wall mounting bracket assembly is also available for the L20V26C See your Zenith dealer for further details Tie Bands Arrange the device wires with the tie bands VESA compatible adapter interface While mounting the TV on a VESA specifications mount attach this adapter to the back of the TV and then to the VESA mount ...

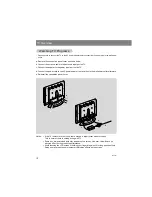
Страница 12: ...first and then to the wall power outlet afterward e Reinstall the connection panel cover b c d W Watching atching TV Programs TV Programs Notes If the TV feels cold to the touch there may be a slight flicker when turned on This is normal there is nothing wrong with TV Some tiny pin point sized dots may appear on the screen However this will have no adverse effect on the monitor s performance Avoid...

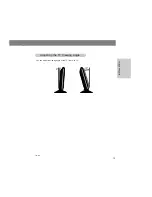
Страница 13: ...13 206 3921 INSTALLATION You can adjust the viewing angle of the TV from 2 to 13 Adjusting the Adjusting the TV V TV Viewing iewing Angle Angle 2 13 ...

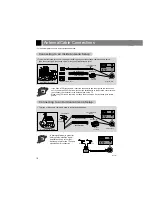
Страница 14: ... 75Ω round cable insert the bronze wire and then tighten the connection nut If you have a 300Ω flat wire connect the twisted wire to the antenna converter and then connect the converter to the antenna jack on the TV When using 75Ω round cable do not bend the bronze wire It may cause poor picture quality In poor signal areas to get better picture quality install the signal amplifier as shown to the...

Страница 15: ...utton on the remote control to select TV Ant In or Video source depending on connection setup 1 or 2 Connection 1 Set cable box switch to 3 or 4 and then tune TV to the same channel number Connection 2 Select VIDEO source input to use Audio Video In connections b Select channels with the cable box DC IN 15V ANT IN 75Ω L L Y PB PR DVD DTV IN COMPONENT 480i 480p L R AUDIO S VIDEO IN MONITOR OUT H P ...

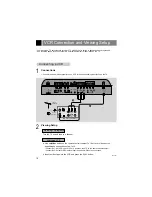
Страница 16: ...R a Use tv video button on the remote control to select TV Ant In or Video source depending on connection setup 1 or 2 Connection 1 Set VCR switch to 3 or 4 and then tune TV to the same channel number Connection 2 Select VIDEO source input to use Audio Video In connections b Insert a video tape into the VCR and press the PLAY button Connecting a VCR Connecting a VCR DC IN 15V ANT IN 75Ω Y PB PR DV...

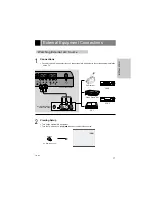
Страница 17: ...ing Setup Camcorder CDGP VCDP Video Game Set CDI tv video Video Turn on the external A V equipment Turn the TV on and use the tv video button to select Video source On Remote Control W Watching External atching External A V Source A V Source ANT IN 75Ω L L S VIDEO IN MONITOR OUT R L VIDEO VIDEO AUDIO R L AUDIO MONO R AUDIO VIDEO L TV Connection Panel External Equipment Connection Panel ...

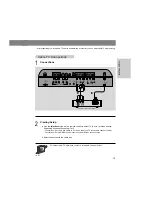
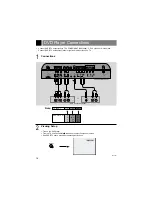
Страница 18: ...output jacks to TV s COMPONENT 480i 480p Y PB PR jacks or S Video jack Connect DVD DTV audio output jacks to right and left input jacks on TV DC IN 15V ANT IN 75Ω L L Y PB PR DVD DTV IN COMPONENT 480i 480p L R AUDIO S VIDEO IN MONITOR OUT H P R L VIDEO VIDEO AUDIO R L AUDIO MONO AUDIO Y PB PR L R AUDIO S VIDEO L R TV Connection Panel DVD Connection Panel or TV INPUT Y PB PR DVD OUTPUT Y Y Y Y Cb B...

Страница 19: ...AUDIO Y PB PR L R Component Turn on the DTV receiver Set top Box Turn the TV on and use tv video button to select Component source On Remote Control Connect DVD DTV output to COMPONENT 480i 480p Y PB PR jack inputs on the TV Connect DTV L R audio outputs to the TV s AUDIO L R input jacks Note A DTV set top box is required to receive DTV programming TV Connections Panel DTV Receiver Set top Box Con...

Страница 20: ...h the adapter At this moment the TV is switched to standby mode 1 Press power on the remote control to turn the TV on 2 Select the viewing source by pressing tv video repeatedly 3 After viewing press the power button on the remote control or on off on the TV side panel The TV screen goes dark and it reverts to standby mode Note See page 23 if you have not auto programmed the TV to receive channels...

Страница 21: ...nu option DE Move F G Adjust Menu Captions Off Caption Text CC 1 Key lock Off Parental ctl Language English DE Move G Next Menu Balance 0 AVL Off DE Move G Next Menu Manual program Favorite channel Auto program DASP DE Move G Next Menu Off timer On timer Auto off Off Clock AM DE Move F G Adjust Menu Contrast 85 Brightness 50 Color 70 Sharpness 50 Tint 0 APC Clear ...

Страница 22: ...uage 2 Use the volume F G buttons to select the language for the menus to appear in DE Move F G Adjust Menu Captions Off Caption Text CC 1 Key lock Off Parental ctl Language English DE Move F G Adjust Menu Captions Off Caption Text CC 1 Key lock Off Parental ctl Language English Each press of volume F G buttons selects languages in the order shown below ...

Страница 23: ...A button during auto programming the function will stop and only chan nels found and programmed up to that time will remain in memory Auto programming function can memorize only the channels which are being received at that time some stations have limited broadcast hours Channel Search Auto Programming Channel Search Auto Programming 1 Press the a prog button on the remote control Wait for auto pr...

Страница 24: ... buttons to select Memory add or Erase delete Press the memory erase button on the remote control 3 Press the enter A button to save Each time you press the volume F G buttons you toggle between Memory and Erase as shown The current channel is added to Memory or Erased from the channel list Memory Erase Memorizing Erasing Channels Memorizing Erasing Channels Manual program TV 7 Memory F G The curr...

Страница 25: ...he channel D E buttons to select the first favorite channel position Use the volume F G buttons to set the channel number for the first favorite channel 4 Press the enter A button to save i e To change channel 2 to channel 30 Repeat this step to memorize the other 4 channels Use the volume F G buttons To tune to a favorite channel press the fcr Favorite Channel Review button repeatedly The five fa...

Страница 26: ...nd use the channel D E buttons to set the cur rent minutes If you hold the channel D button the minute display is changed in the sequence of 00 01 02 58 59 and changed in the reverse sequence for channel E button The clock starts when you press the menu button DE Move G Next Menu Clock AM Off timer On timer Auto off Off Clock FG Move DE Adjust Menu Clock 00 AM Off timer On timer Auto off Off FG Mo...

Страница 27: ...rn off hour 6 Press the menu button to save 4 Press the volume G and use the channel D E buttons to set the min utes If you hold the channel D button the minute display is changed in the sequence of 00 01 02 58 59 and changed in the reverse sequence for channel E button FG Move DE Adjust Menu Clock Off timer 00 PM On timer Hold Auto off FG Move DE Adjust Menu Clock Off timer 10 PM On timer Hold Au...

Страница 28: ... On Timer setup is complete Clock Off timer On timer 00 AM Auto off TV 2 Vol 30 Hold FG Move DE Adjust Menu Clock Off timer On timer 8 30 AM Auto off TV 2 Vol 30 Hold TV 2 6 Press the volume G button and then use the channel D E buttons to select the volume you want 7 Press the volume G button and then use the channel D E buttons to select Hold or Run Each press of channel D E button changes the m...

Страница 29: ...tedly to select Sleep 0 Sleep timer turns the TV off at the preset time When the sleep time you want is displayed on the screen don t press the sleep button again To check the remaining sleep time press the sleep button once To change sleep time setting press the sleep button repeatedly to select time setting you want If you turn the TV off after setting the Sleep Timer the setting is erased Sleep...

Страница 30: ...ess the enter A button to save Each press of volume F G button selects a different picture appearance Clear Optimum User Soft APC Auto Picture Control APC Auto Picture Control APC adjusts the TV for the best picture appearance If adjusting picture options contrast brightness color sharpness and tint manually APC automatically changes to the User option APC Clear FG ...

Страница 31: ... adjustments 4 Press the menu button to save Manual Picture Control User Option Manual Picture Control User Option DE Move FG Adjust Menu Contrast 85 Brightness 50 Color 70 Sharpness 50 Tint 0 APC Clear Contrast 35 Use the channel D E button to select other picture options Contrast Brightness Color and Sharpness are adjustable from 0 to 100 Tint is adjustable from Red 50 to Green 50 ...

Страница 32: ...2 Use the channel D E buttons to select the Manual program option 5 Press the menu button to save DE Move G Next Menu Manual program Favorite channel Auto program DE Move FG Adjust Menu Memory Erase Memory Channel 13 Fine 0 Fine 0 3 4 Press the volume G and then use the channel D E buttons to select the Fine option Use the volume F G buttons to adjust the picture appearance to your preference ...

Страница 33: ...utton to save Audio Setup DASP Audio Setup DASP 1 Press the dasp button on the remote control to access the dasp menu 2 Use the dasp button or volume F G button to select the desired setting for the sound DASP User FG Each press of volume F G button changes the DASP sound option as shown Flat Movie User Music Sports ...

Страница 34: ...you want to adjust and then use the channel D E but tons to adjust the band level 6 Press the menu button to save 3 Use the channel D E button to select the User option DE Move G Next Menu Balance 0 AVL Off DASP FG Move DE Adjust Menu 0 1 0 5 1 5 5 0 10KHz Flat Movie Music Sports User 2 Use the channel D E button to select the DASP option then press the volume G button ...

Страница 35: ... the channel D E button to select the Balance option 3 Sound Balance Sound Balance Use the volume F G button to adjust the balance Balance is preset at 0 DE Move G Next Menu Balance 0 AVL Off DASP DE Move FG Adjust Menu DASP Balance 0 AVL Off Balance 0 4 Press the menu button to save ...

Страница 36: ...low 2 Use the channel D E buttons to select the AVL option 3 A AVL VL Auto V Auto Volume Leveler olume Leveler Use the volume F G buttons to select On or Off Each press of volume F G buttons changes the screen display as below On Off DE Move G Next Menu Balance 0 AVL Off DASP DE Move FG Adjust Menu DASP Balance 0 AVL Off AVL Off 4 Press the menu button to save ...

Страница 37: ...n to the primary language There are primary and secondary language and stereo modes in bilingual signals MONO The primary language is heard from left and right speakers in mono sound STEREO The primary language is heard from left and right speakers in stereo sound SAP The secondary language is heard from both left and right speakers in mono sound Mono Stereo SAP Selecting the Second Selecting the ...

Страница 38: ...sound is restored current volume level is displayed on the screen Plug headphones into the H P input jack as shown Adjust sound level to the headphones using the volume F G buttons While you are listening to sound through the headphones the TV speakers will not be heard Mute removes the speaker sound Using mute is convenient if the user needs to answer a phone call while viewing the TV Mute Mute M...

Страница 39: ... aid in teaching language skills The picture at left shows a typical caption IGNITION Picture may flutter drift suffer from black spots or horizon tal streaking Usually caused by interference from automo bile ignition systems neon lamps electrical drills and other electrical appliances GHOSTS Ghosts are caused when the TV signal splits and follows two paths One is the direct path and the other is ...

Страница 40: ...teps 1 3 on the next page 2 Use the volume F G buttons to select Text 1 Text 2 Text 3 or Text 4 3 Press the menu button to save T Text Setup ext Setup DE Move FG Adjust Menu Language English Captions Off Caption Text CC 1 Key lock Off Parental ctl Caption Text CC 1 1 Press the cc button on the remote control to select Captions 2 Use the cc button or the volume F G buttons to select On and press th...

Страница 41: ...n to save With each press of the volume F G but tons the caption mode changes This TV is programmed to remember the caption text mode it was last set to when you turn the POWER off Operating the Captions Operating the Captions DE Move FG Adjust Menu Captions Off Caption Text CC 1 Key lock Off Parental ctl Language English DE Move FG Adjust Menu Language English Captions Off Caption Text CC 1 Key l...

Страница 42: ...ters Movie Ratings Unblocked G and Above general audience PG and Above parental guidance suggested PG 13 and Above 13 years and up R and Above restricted NC 17 and Above 18 years and up X adult If you set PG 13 and Above G and PG movies will be available PG 13 R NC 17 and X will be blocked For Television programs including made for TV movies General TV Ratings Unblocked TV G and Above general audi...

Страница 43: ...lock Off Parental ctl Language English For Canadian English French language rating system Canadian English language rating system C and Above Children C8 and Above 8 years and up G and Above General programming Suitable for all audiences PG and Above Parental guidance suggested 14 and Above Viewer 14 years and up 18 Adult programming Canadian French language rating system G and Above General 8 ans...

Страница 44: ...n press the volume F G buttons to select on or off 6 Use the channel D E buttons to select the blocking option Use the volume F G buttons to set the ratings that will be blocked Age block Content block and Canadian options also have sub menus In those sub menus repeat steps above to select and set types of blocking and rating Press the menu button to return from Age block or Content block options ...

Страница 45: ...E buttons to select the the Auto off option 3 Use the volume F G buttons to select On or Off 4 Press the menu button to save Each press of volume F G buttons toggles between On and Off On Off 1 Use the menu button to select the menu shown DE Move G Next Menu Off timer On timer Auto off Off Clock AM DE Move FG Adjust Menu Clock Off timer On timer Auto off Off Auto off Off ...

Страница 46: ...so that it can only be used with the remote control This feature can prevent unauthorized viewing 1 Use the menu button to select the menu shown 2 Use the channel D E buttons to select the the Key lock option 3 Use the volume F G buttons to select On or Off 4 Press the menu button to save Each press of volume F G buttons tog gles between On and Off On Off This TV is programmed to remember which op...

Страница 47: ...e the cloth and wipe the cabinet again 3 Let the cabinet air dry before turning your TV on If you intend to leave your TV unused for a long time such as a vacation it s a good idea to unplug the power cord to protect against possible damage from lightning or power surges If you use an antenna you may also want to disconnect it from the back of your TV before leaving Early malfunctions can be preve...

Страница 48: ...a impedance 75 Ω Audio output 3 0W 3 0W External input ports VIDEO input port set 1 VIDEO output port set 1 Component 480i 480p input set 1 S VIDEO input 1 Headphone jack 1 Power DC 15V input 1 Antenna input 1 Adapter DC power In AC 100 240V 1 6A 0 7A 50 60Hz Out DC 15V 4 5A CAUTION For use only with Model No SAD7015SE AC Adapter manufactured by H E CO LTD Power supply cordset Standard North Ameri...

Страница 49: ... multiple images Remote control does not work Cannot tune desired channel CHECK THESE THINGS Is power cord plugged in Is television turned on Check batteries in remote control Try another channel station trouble Check antenna connections Check for local interference Adjust the antenna Adjust the picture control Program channels using AUTO PROGRAM ...

Страница 50: ...Notes 50 206 3921 ...

Страница 51: ...Notes 51 206 3921 MISC ...

Страница 52: ...enance or failure to maintain or separate system components and Damages or operating problems that result from normal wear and tear misuse abuse operation out side environmental specifications or contrary to the requirements or precautions in the Operating Guide accident lightning strikes or other natural causes unauthorized modification or alteration incorrect elec trical current or voltage signa...

Отзывы: