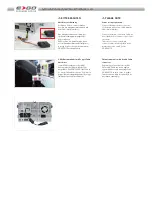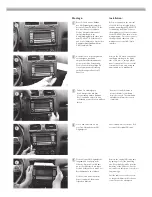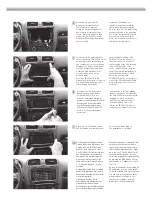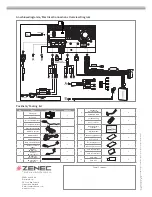
➜
Das Fahrzeug ist mit einem Eigendiagnosegerät (DME)
ausgestattet.
Um Fehlermeldungen zu vermeiden, muss vor
Montagebeginn unbedingt der negative Pol der
Fahrzeugbatterie abgehängt werden.
➜
Eine einwandfreie Funktion des ZE-NC2011D kann nur
dann gewährleistet werden, wenn Sie das im Lieferumfang
enthaltene Zubehör verwenden.
➜
Es ist nicht nötig, am originalen Anschlusskabel
Veränderungen irgendwelcher Art vorzunehmen.
➜
Achten Sie bei der Installation darauf, dass die
verschiedenen Anschlusskabel und Zubehörteile nicht
durch scharfe Kanten beschädigt und die Anschlusskabel
nicht geknickt werden.
➜
Je nach Präferenz und Wahl des geräteinternen oder
des externen (zu montierenden) Mikrofons, muss im
„Setup Menü“ die Mikrofonquelle für den Bluetooth
Modus entsprechend angepasst werden.
➜
Achten Sie vor der finalen Montage des ZE-NC2011D
darauf, dass alle Steckverbindungen auf der Geräte-
rückseite richtig verbunden und fest eingerastet sind.
➜
Bei Fragen oder Problemen wenden Sie sich an
Ihren ZENEC-Händler, bei dem Sie das Gerät gekauft
haben. Zusätzlich finden Sie unter www.zenec.com eine
ausführliche FAQ Datenbank, wo viele der Fragen und
Probleme, welche während der Installation auftreten
könnten, entsprechend beantwortet werden.
➜
Da Updates (Software und Kartenmaterial) für
das Navigationssystem nur über den USB-Anschluss
installiert werden können und sich der USB-
Anschluss an der Rückseite des ZE-NC2011D befindet,
sollten Sie die im Lieferumfang befindliche Media
Link Box unbedingt an einem leicht zugänglichen Ort
installieren. Die Media Link Box verfügt über einen
entsprechenden USB Port.
Bitte Beachten/Please Note
➜
Tampering with the on-board electrical system might
cause error codes to be stored in the DME.
It is thus recommended to disconnect the GND wire of the
negative battery pole before you start with any installation
work.
➜
The flawless function of the ZE-NC2011D can only
be guaranteed, when the original accessories and wire
harnesses contained in the set are deployed as described in
this installation manual.
➜
The ZE-NC2011D is a plug and play product,
modifications on the original wire loom of the vehicle are
not required at all.
➜
When mounting the ZE-NC2011D always pay proper
attention not to damage any of the wires, plugs or other
parts. Avoid applying too much mechanical force especially
when pushing the unit back into the slot.
➜
Depending on the preference and selection of the
device internal or external (to be installed) microphone,
the BT microphone source must be checked and chosen
accordingly, in the setup menu.
➜
Please check if all plug-and-socket connections on the
rear of the ZE-NC2011D are properly seated before you lock
the unit in place.
➜
Please contact your authorized ZENEC dealer or the
distributor of the country, where you have purchased your
E>GO unit, if you have any technical problems or further
questions.
In addition, you can look up a detailed FAQ data base on
www.zenec.com, where most of the questions revolving
around the connectivity or the installation of a given E>GO
model are explained in detail.
➜
Any update of the main unit software or the
navigation system (software and map data) requires
the USB port of the media link box to be present and
accessible. For this purpose, the installation of the
media link box is mandatory. The media link box is
contained in the ZE-NC2011D set – just make sure you
find a good and suitable mounting location that is easy
to access (i.e. glove compartment, arm rest box etc.).
Содержание ZE-NC2011D
Страница 1: ...MOUNTING INSTRUCTIONS VW ZE NC2011D...


