background image

Warnings and Precautions

•  CAUTION

: TO PREVENT ELECTRIC SHOCK, 

MATCH WIDE BLADE OF PLUG TO WIDE SLOT, 

FULLY INSERT.

•  WARNING: 

To reduce the risk of fire or electric shock, 

do not expose this apparatus to rain or moisture.

•  AVERTISSEMENT:

 Pour réduire le risque d’incendie 

ou de choc électrique, ne pas exposer cet appareil sous la 

pluie et l’humidité.

•  WARNING:

 Changes or modifications to this unit 

not expressly approved by the party responsible for 

compliance could void the user’s authority to operate the 

equipment.

•  WARNING: 

Do not place this unit directly onto furniture 

surfaces with any type of soft, porous, or sensitive finish. 

As with any rubber compound made with oils, the feet 

could cause marks or staining where the feet reside.  We 

recommend using a protective barrier such as a cloth or a 

piece of glass between the unit and the surface to reduce 

the risk of damage and/or staining.

•  PRÉCAUTION: Danger d’explosion si les piles sont 

remplacées de façon incorrect. Remplacer les piles 

seulement par le même type de pile ou l’équivalent.

•  WARNING: 

The battery, batteries, and battery pack shall 

not be exposed to excessive heat such as sunshine, fire, 

or the like.

•  WARNING: 

Lithium batteries, like all rechargeable 

batteries are recyclable and should be recycled or 

disposed of in normal household waste. Contact your 

local government for disposal or recycling practices in 

your area. They should never be incinerated since they 

might explode.

•  WARNING

: Shock hazard - Do Not Open.

•  AVIS: RISQUE DE CHOC ÉLECTRIQUE - NE PAS 

OUVRIR

Mains Plug or Direct plug-in adapter is used as disconnect 

device and it should remain readily operable during 

intended use. In order to disconnect the apparatus from 

the mains completely, the Mains Plug or Direct plug-in 

adapter should be disconnected from the mains socket 

outlet completely.

La fiche d’alimentation ou adaptateur de courant est 

utilisé comme dispositif de déconnexion et doit rester 

accessible pendant l’utilisation. Pour mettre l’appareil 

hors tension, la fiche ou adaptateur de courant doit être 

débranché de la prise 
de courant.

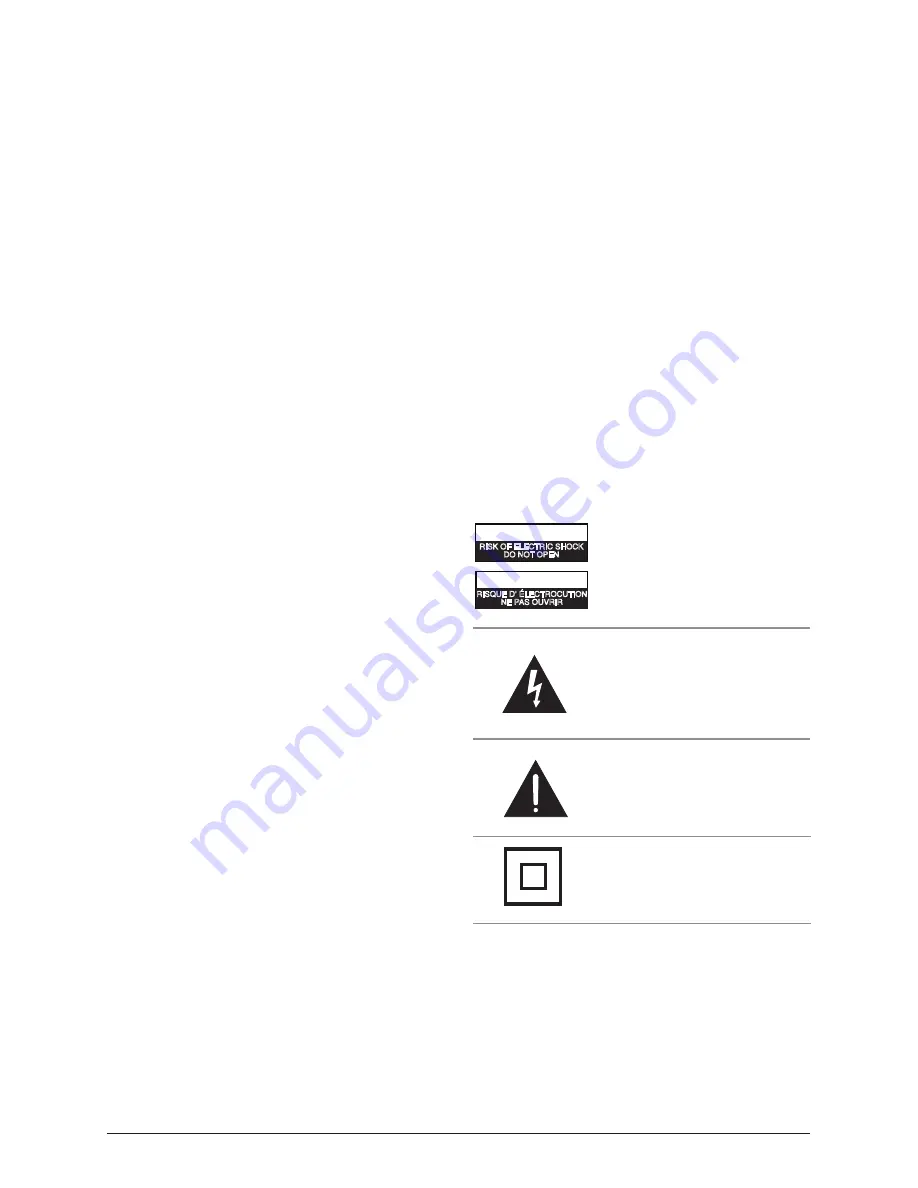
The lightning flash with arrowhead 

symbol, within an equilateral triangle, is 

intended to alert the user to the presence of 

uninsulated "dangerous voltage" within the 

product's enclosure that may be of sufficient 

magnitude to constitute a risk of electric 

shock to persons.

WARNING

: TO REDUCE THE 

RISK OF ELECTRIC SHOCK, 

DO NOT REMOVE COVER (OR 

BACK). NO USER-SERVICEABLE 

PARTS INSIDE. REFER SERVIC-

ING TO QUALIFIED SERVICE 

PERSONNEL.

ATTENTION

RISQUE D' ÉLECTROCUTION

NE PAS OUVRIR

CAUTION

RISK OF ELECTRIC SHOCK

DO NOT OPEN

The exclamation point within an equilat-

eral triangle is intended to alert the user to 

the presence of important operating and 

maintenance (servicing) instructions in the 

literature accompanying the appliance.

This symbol indicates that this prod-

uct incorporates double insulation 

between hazardous mains voltage 

and user accessible parts.

• 

Your device is designed to be in compliance with 

Radio Waves exposure regulations and does not 

exceed the limits for exposure to radio waves (radio 

frequency electromagnetic fields) in accordance with 

the Federal Communications Commission (FCC) . A 

substantial safety margin is set to assure the safety of 

all persons, regardless of health. A unit of measure-

ment known as the Specific Absorption rate, or SAR 

is utilized for the radio wave exposure guidelines. The 

SAR measurement for devices does not exceed 1.6W/

kg. The actual SAR values for your device, while 

in use, are normally well below the stated values. 

The operating power of your device is automatically 

decreased when full power is not needed for the wire-

less connection to increase system efficiency and to 

minimize interference on the network. The lower the 

power output of the device the lower its SAR value.

Customer Support: 1-888-999-4215

2

Содержание TBDG874B

Страница 1: ...USER S GUIDE V 955 02 For the most up to date version of this User s Guide go to www zekitablet com TBDG874B 8 Capacitive Multi touch Tablet...

Страница 2: ...he d alimentation ou adaptateur de courant est utilis comme dispositif de d connexion et doit rester accessible pendant l utilisation Pour mettre l appareil hors tension la fiche ou adaptateur de cour...

Страница 3: ...n accordance with the manufacturer s instructions 8 Do not install near any heat sources such as radiators heat registers stoves or other apparatus including amplifiers that produce heat 9 Do not defe...

Страница 4: ...tion 8 9 Basic Use 10 Unlocking the Screen Customizing the Lock Screen Orienting Your Tablet Connecting to the Internet 11 Connecting to Wireless Internet Getting to Know Your Tablet 12 Touch Screen N...

Страница 5: ...om the Home Screen Managing Apps Removing Apps Camera Video Camera 19 Using the Camera Using the Video Camera Accessing Saved Photos and Videos Transferring Files 20 Transferring Files with a Computer...

Страница 6: ...Clock Chrome Calculator Calen dar Camera App Store Opera Google Play Store eBook Reader Socio Play Book Play Magazines Email Build in email Soc io Gmail Google Apps Maps Google Messenger Google Youtub...

Страница 7: ...e screen stating that the battery is low Note It is normal for the tablet surface to become warm during charging or long periods of use Note If the tablet is not being used regularly it is recommended...

Страница 8: ...pon initial use press and hold to power on the tablet This may take several minutes Press to put the device into standby mode Press and hold to completely power the unit on or off Volume Press to turn...

Страница 9: ...Customer Support 1 888 999 4215 9 Introduction Camera...

Страница 10: ...tablet can oriented horizontally or vertically To change the orientation rotate the tablet to the desired position The screen will rotate automatically Orienting Your Tablet 1 To add a password PIN o...

Страница 11: ...efresh the list of available net works press the Scan button To manually add a network select the Add Network button 4 Select Connect from the pop up menu 5 If the network is secured with a password e...

Страница 12: ...and hold an item such as a photo in your internet browser to see additional menu options Pinch to Zoom Fig 3 Place two fingers on the screen and slide them apart to zoom in Slide them back together t...

Страница 13: ...ternet before attempting to use the browser 1 Press the Browser icon 2 Tap the navigation bar at the top of the page 3 The on screen keyboard will automatically appear 4 Type in a web address or a sea...

Страница 14: ...heck your provider s website or phone support for individual provider information 2 The first thing you will need to determine is the server type While most servers are POP3 IMAP and Exchange are also...

Страница 15: ...ndicator Indicates if a WiFi signal is available and the strength of a connected signal Lock Indicates the tablet is locked The tablet will not function unless unlocked Back Press to return to a previ...

Страница 16: ...fault to the home screen However by swiping the screen you can access screens to the left and right of the home screen Apps and widgets may be dragged onto these screens as well Changing Screens By pr...

Страница 17: ...from the figure shown 1 Press the App Menu button in the upper right hand corner 2 Press and hold on an icon and wait for the screen to appear Drop the icon wherever it is desired To add the icon to...

Страница 18: ...sk you if you re certain you want to uninstall this app select Ok 6 The app will be uninstalled Warning The selected app and all related content will be completely removed from the tablet Note The app...

Страница 19: ...eo button to switch to Video mode 3 Press the red Capture but ton to begin taking a video 4 Press the button again to end the recording To view the recording just cap tured press the small preview in...

Страница 20: ...cord into the unit and the other into the USB port on a computer 2 Then the Connected as a media device will appear on the upper left corner of screen 3 Portable Device window will appear on computer...

Страница 21: ...icon 5 Press External Storage Card to view the contents of the card 1 Press the Settings button to access the settings menu 2 Select Storage 3 Select Unmount Micro SD CARD 4 Remove the card from the...

Страница 22: ...aging Focusing on protecting for today and sus taining for tomorrow DPI Inc has commit ted to reducing packaging size increasing the usage of recyclable plastics and ensuring that packaging and manual...

Отзывы: