background image

Customer Support: 1-888-999-4215

2

•  WARNING: 

The battery, batteries, and battery pack 

shall not be exposed to excessive heat such as sunshine, 

fire, or the like.

•  WARNING: 

Lithium batteries, like all rechargeable 

batteries are recyclable and should be recycled or 

disposed of in normal household waste. Contact your 

local government for disposal or recycling practices in 

your area. They should never be incinerated since they 

might explode.

•  WARNING

: Shock hazard - Do Not Open.

•  AVIS: RISQUE DE CHOC ÉLECTRIQUE - NE PAS 

OUVRIR

Mains Plug or Direct plug-in adapter is used as disconnect 

device and it should remain readily operable during intended 

use. In order to disconnect the apparatus from the mains 

completely, the Mains Plug or Direct plug-in adapter should 

be disconnected from the mains socket outlet completely.

La fiche d’alimentation ou adaptateur de courant est utilisé 

comme dispositif de déconnexion et doit rester accessible 

pendant l’utilisation. Pour mettre l’appareil hors tension, la 

fiche ou adaptateur de courant doit être débranché de la prise 

de courant.

Do not mix old and new batteries.

Do not mix alkaline, standard (carbon-zinc), or rechargeable 

(ni-cad, ni-mh, etc) batteries.

No mezcle baterías viejas y nuevas.

No mezcle baterías alcalinas, estándar (carbono-zinc) o 

recargables (ni-cad, ni-mh, etc.).

•  CAUTION

: TO PREVENT ELECTRIC SHOCK, 

MATCH WIDE BLADE OF PLUG TO WIDE SLOT, 

FULLY INSERT.

•  WARNING: 

To reduce the risk of fire or electric shock, 

do not expose this apparatus to rain or moisture.

•  AVERTISSEMENT:

 Pour réduire le risque d’incendie 

ou de choc électrique, ne pas exposer cet appareil sous la 

pluie et l’humidité.

•  CAUTION:

 Use of any controls or adjustments or 

performance of procedures other than those herein 

specified may result in hazardous radiation exposure.

•  WARNING:

 Changes or modifications to this unit 

not expressly approved by the party responsible for 

compliance could void the user’s authority to operate the 

equipment.

•  WARNING:

 Do not place the unit on top of any soft, 

porous, or sensitive surfaces to avoid damaging the 

surface. Use a protective barrier between the unit and 

surface to protect the surface.

•  WARNING:

 Use of this unit near fluorescent lighting 

may cause interference regarding use of the remote. If 

the unit is displaying erratic behavior move away from 

any fluorescent lighting, as it may be the cause.

•  CAUTION:  

Danger of explosion if battery is incorrectly 

replaced. Replace only with the same or equivalent type.

•  PRÉCAUTION: Danger d’explosion si les piles sont 

remplacées de façon incorrect. Remplacer les piles 

seulement par le même type de pile ou l’équivalent.

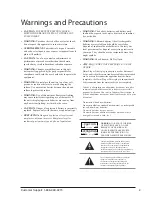
Warnings and Precautions

The lightning flash with arrowhead symbol, 

within an equilateral triangle, is intended to 

alert the user to the presence of uninsulated 

"dangerous voltage" within the product's 

enclosure that may be of sufficient magnitude to 

constitute a risk of electric shock to persons.

WARNING

: TO REDUCE THE RISK 

OF ELECTRIC SHOCK, DO NOT 

REMOVE COVER (OR BACK). 

NO USER-SERVICEABLE PARTS 

INSIDE. REFER SERVICING TO 

QUALIFIED SERVICE PERSONNEL.

ATTENTION

RISQUE D' ÉLECTROCUTION

NE PAS OUVRIR

CAUTION

RISK OF ELECTRIC SHOCK

DO NOT OPEN

The exclamation point within an equilateral 

triangle is intended to alert the user to 

the presence of important operating and 

maintenance (servicing) instructions in the 

literature accompanying the appliance.

Содержание TB782B

Страница 1: ...USER S GUIDE V 625 01 For the most up to date version of this User s Guide go to www zekitablet com TB782B 7 Capacitive Multi touch Tablet ...

Страница 2: ...oser cet appareil sous la pluie et l humidité CAUTION Use of any controls or adjustments or performance of procedures other than those herein specified may result in hazardous radiation exposure WARNING Changes or modifications to this unit not expressly approved by the party responsible for compliance could void the user s authority to operate the equipment WARNING Do not place the unit on top of...

Страница 3: ... 2 Keep these Instructions 3 Heed all Warnings 4 Follow all instructions 5 Do not use this apparatus near water 6 Clean only with a dry cloth 7 Do not block any ventilation openings Install in accordance with the manufacturer s instructions 8 Do not install near any heat sources such as radiators heat registers stoves or other apparatus including amplifiers that produce heat 9 Do not defeat the sa...

Страница 4: ...0 Connecting to WiFi Getting to Know Your Tablet 11 Touch Screen Notifications On Screen Introduction 12 Icons You Should Know Basic Use 13 Unlocking the Screen Customizing the Lock Screen Orienting Your Tablet Screen 14 Changing the Background Changing Screens Viewing Open items Apps 15 16 Accessing the App Menu Adding Apps to the Home Screen Removing Apps from the Home Managing Apps Adding Apps ...

Страница 5: ...ing Files 19 Transferring Files with a Computer Connectivity 21 Connecting to a TV Connecting a Micro SD card Removing a Micro SD card Support FAQ 22 How do I Troubleshooting Support FAQ 23 Company Information 24 International Support Contact Information Warranty Green Initiative Customer Support 1 888 999 4215 5 Table of Contents ...

Страница 6: ...MVB FLV WMV MP4 VOB Digital audio MP3 WMA non DRM WAV eBooks PDF PDF DRM TXT EPUB DRM HTML Expandable memory 8GB installed flash memory Built in speaker Micro SD memory card reader supports JPEG MP3 Mini USB port for battery recharge Mini HDMI output 1080p Battery life 3 5 hours DC battery power 2800 mAH battery DC battery power built in rechargeable battery Mini USB to USB cable One set of stereo...

Страница 7: ... FID BN Setup When the Battery Indicator signals that the power is running low connect the tablet to a power source using the included Mini USB to USB charging cable A warning will also display on the screen stating that the battery is low Connect the tablet to an AC outlet using the included adaptor or connect the included Mini USB to USB to the USB port on a powered on computer to charge Chargin...

Страница 8: ...ut the device into standby mode Press and hold to completely power the unit on or off Volume Press to turn the volume up or down Mini USB Port Connect the included cable to begin charging Card Slot DC Power input Stereo Headphone Jack HDMI Port Used to connect a TV ...

Страница 9: ...Customer Support 1 888 999 4215 9 Introduction Tablet front w screen Camera Back Press to return to the previous screen Home Press to return to the home screen Menu Press to access the menu ...

Страница 10: ...efresh the list of available networks press the Scan button To manually add a network select the Add Network button 4 Select Connect from the pop up menu 5 If the network is secured with a password enter the password to continue 6 Once finished connecting the display will show Connected under the name of the network To conserve battery life turn off Wi Fi when not in use Connecting to Wireless Int...

Страница 11: ...til it becomes active then move your finger to drag it Hold Press and hold an item such as a photo in your internet browser to see additional menu options Pinch to Zoom Place two fingers on the screen and slide them apart to zoom in Slide them back together to zoom out Touch Screen Getting to Know Your Tablet Items will display in the lower right hand corner of your screen alerting you to activity...

Страница 12: ...ging Wifi Indicator Indicates if a WiFi signal is available and the strength of a connected signal Press to Lock Indicated the tablet is locked The tablet will not function unless unlocked Back Press to return to a previous screen Home Press to return to the home screen Screens Press to view all running applications and windows Menu Press to view the menu Icons You Should Know ...

Страница 13: ...nlocking the Screen Basic Use 1 To add a password PIN or unlock pattern select the Menu button 2 Select Security from the menu 3 Select the desired security method and follow the instructions on screen Customizing the Lock Screen The tablet can oriented horizontally or vertically To change the orientation rotate the tablet to the desired position The screen will rotate automatically Orienting Your...

Страница 14: ...ct a picture and select Set as background Changing the Background Screen When the tablet is turned on it will default to the home screen However by swiping the screen you can access screens to the left and right of the home screen Apps and widgets may be dragged onto these screens as well Changing Screens By pressing the Screens button you can see all running applications Viewing Open items ...

Страница 15: ...in the upper right hand corner 2 Press and hold on an icon and wait for the screen to appear Drop the icon wherever it is desired To add the icon to a screen other than the home screen drag it to the left or right 1 Press and hold the desired icon 2 Drag it to the Remove option at the top of the screen Accessing the App Menu Adding Apps to the Home Screen Removing Apps from the Home Screen Apps ...

Страница 16: ...t to uninstall 4 Press the Uninstall button 5 The tablet will prompt ask you if you re certain you want to uninstall this app select Ok 6 The app will be uninstalled 1 Press the Menu button 2 Select Manage Apps 3 From this menu you can view and modify all installed apps Removing Apps Adding Apps Managing Apps ...

Страница 17: ...ideo button to switch to Video mode 3 Press the red Capture button to begin taking a video 4 Press the button again to end the recording To view the recording just captured press the small preview in the upper right hand corner Using the Camera Using the Video Camera Camera Video Camera 1 Press the Gallery icon 2 Select the desired folder 3 Select an individual photo or video to enlarge and view i...

Страница 18: ...mera icon 2 Press the Video button to switch to Video mode 3 Press the green Capture button to start recording a panorama 4 Pan slowly around the desired area 5 Press the button again to end the recording Using Panorama Mode Advanced Camera Operations ...

Страница 19: ...on a computer 2 Press the USB icon in the lower right hand corner 3 Select USB Connected 4 Press the Turn On USB Storage button Using the native controls accept any prompts on the connected computer 5 You will now be able to transfer files to and from your computer 6 To end the sessions press the Turn Off USB Storage button Transferring Files with a Computer Transferring Files ...

Страница 20: ...ess the content on the Micro SD Card go to the Apps menu by pressing the Apps Menu button 4 Press the Explorer icon 1 Press the Settings button to access the settings menu 2 Select Storage 3 Select Unmount Micro SD CARD 4 Remove the card from the tablet by gently pushing it until it pops out Connecting to a TV Connecting a Micro SD card Removing a Micro SD card SERIAL NO MODEL NO TB782B INPUT DC5V...

Страница 21: ...g strangely What do I do Why can t I hear any audio Why won t my video picture music file play Why is my tablet so hot My screen is frozen what do I do How long will it take to fully charge my tablet How do I unlock my tablet if I forgot the password How do I reset my tablet to factory default How do I set up my email How do I update the tablet apps How do I share my pictures videos How do I insta...

Страница 22: ...Customer Support 1 888 999 4215 22 Support FAQ ...

Страница 23: ......

Страница 24: ... meet general RF exposure requirement The device can be used in portable exposure condition without RF striction FCC Statement Co located Statement This device and its antenna s must not be co located or operation in conjunction with any other antenna or transmitter ...

Отзывы: