background image

12

Wireless Settings

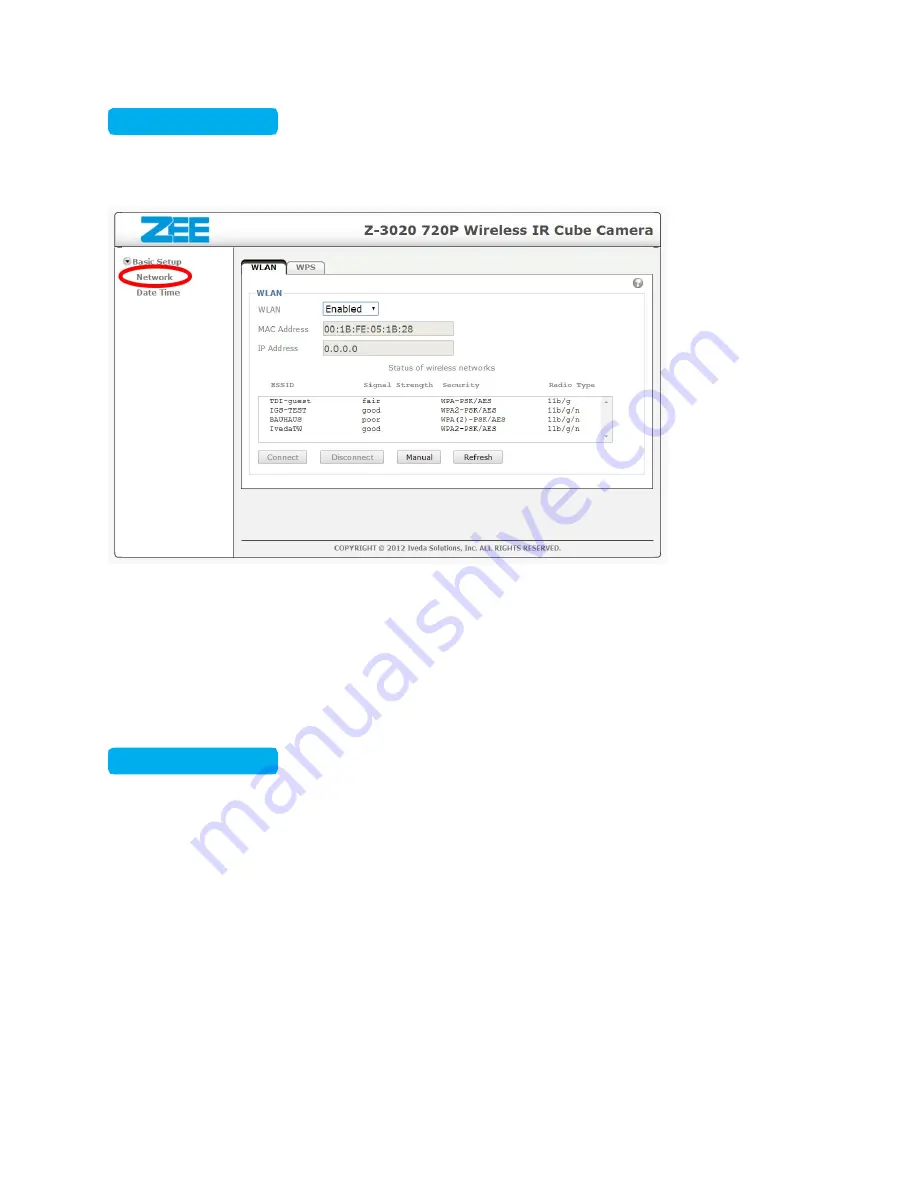
After logging into the camera user interface using the user login click on Basic Setting, and then go to the
WLAN section on the right. Make sure WLAN is enabled and select the appropriate SSID for your network.

Important Note:

1. Please plug in the antenna inside the box

2. You need to set the WLAN while your network cable is plugged in.

3. After you set the WLAN setting and a pop-up window says “Savings Applied Successfully”, please

unplug the network and power cable first. Then plug the power cable back to do a HW reset so
WLAN can be functional.

Local Event Backup

If SD card is inserted, you can view and download event video from the SD card in the “Local Event
Backup” section. These video recordings are saved in the SD card locally so even if internet connection
is lost, the recordings will still be at the SD card. Please follow the steps below to view or download your
local event video.

Содержание Z-3020

Страница 1: ...1 Z 3020 Installation Guide and User Manual...

Страница 2: ...chors and 1 camera bracket Accessory 4 pin terminal block for DI DO antenna for connection of IEEE 802 11 b g n wireless network Adaptor 5V DC 1A Ethernet Cable 1 meter 3 feet Physical Overview Focus...

Страница 3: ...ed 30 seconds when WPS configure Blue Steady blue for booting up completion Purple Flash purple then steady Red during firmware upgrading or when wireless is connecting Unlit When reset button pressed...

Страница 4: ...ghten the lock ring Connect cables and power supply 1 Connect the power adapter to the IP Camera 2 Use a standard RJ 45 network cable to connect the IP Camera to the Network connector port on the came...

Страница 5: ...nsure your router s DHCP is activated 3 Visit the hosting URL of your service provider given when you purchased your camera 4 If you do not have an account click on Create Account 5 After filling out...

Страница 6: ...se click Settings at the bottom of the page 8 Clicking will pop up a reminder to ensure the IP camera you are going to bind has already been connected to the network properly Then follow the binding m...

Страница 7: ...d adding properly The IP camera is now displayed on the setting table 11 Clicking Config button will lead to a Modify page which listed each device s registration information where users can alter its...

Страница 8: ...at the bottom of the screen will show all cameras that belong to other accounts that are shared with your account 13 Watching your Cameras Click the Matrix at the bottom of the page and you will view...

Страница 9: ...n is blank 2 Full Screen The Full screen button is to lead you to a new screen layer where the video is displayed in full screen for larger image and event play back function Control buttons When view...

Страница 10: ...screen Otherwise the panel will be displayed in grey to indicate it is not functioning Each angle adjustment requires one click to make Clicking takes you back to the original setting position while i...

Страница 11: ...trol whether the users would like to hear the audio via the camera or not 5 Refresh The refresh button is for you to refresh or reload the IP camera s video Direct Access to Camera To set your wireles...

Страница 12: ...n 3 After you set the WLAN setting and a pop up window says Savings Applied Successfully please unplug the network and power cable first Then plug the power cable back to do a HW reset so WLAN can be...

Страница 13: ...13...

Отзывы: