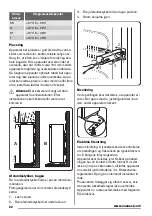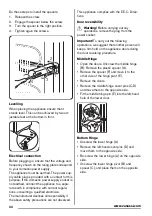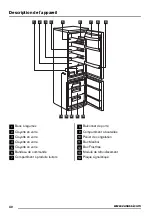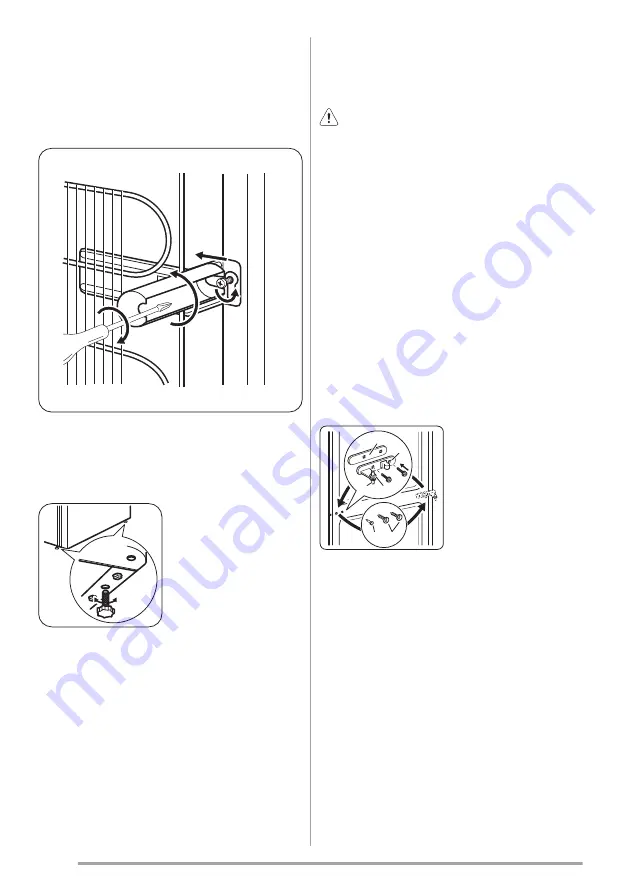
Do these steps to install the spacers:
1.
Release the screw.
2.
Engage the spacer below the screw.
3.
Turn the spacer to the right position.
4.
Tighten again the screws.
2
4
3
1
Levelling
When placing the appliance ensure that it
stands level. This can be achieved by two ad-
justable feet at the bottom in front.
Electrical connection
Before plugging in, ensure that the voltage and
frequency shown on the rating plate correspond
to your domestic power supply.
The appliance must be earthed. The power sup-
ply cable plug is provided with a contact for this
purpose. If the domestic power supply socket is
not earthed, connect the appliance to a sepa-
rate earth in compliance with current regula-
tions, consulting a qualified electrician.
The manufacturer declines all responsibility if
the above safety precautions are not observed.
This appliance complies with the E.E.C. Direc-
tives.
Door reversibility
Warning!
Before carrying out any
operations, remove the plug from the
power socket.
Important!
To carry out the following
operations, we suggest that another person will
keep a firm hold on the appliance doors during
the door reversing procedure.
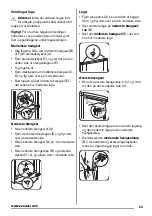
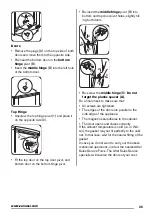
Middle Hinge
• Open the doors. Unscrew the middle hinge
(B). Remove the plastic spacer (A).
• Remove the spacer (F) and move it to the
other side of the hinge pivot (E).
• Remove the doors.
• Remove the middle hinge cover pins (C,D)
and move them to the opposite side.
• Fit the middle hinge pin (E) into the left-hand
hole of the lower door.
D
C
E
F
A
B
Bottom Hinge
• Unscrew the lower hinge (A)
• Remove the left-hand cover pins (D) and
move them to the opposite side.
• Re-screw the lower hinge (A) on the opposite
side.
• Unscrew the lower hinge pivot (B) and
spacer (C), and place them on the opposite
side.
34
www.zanussi.com
Содержание ZRB934FW2
Страница 65: ...65 www zanussi com ...
Страница 66: ...66 www zanussi com ...
Страница 67: ...67 www zanussi com ...
Страница 68: ...www zanussi com shop 280152006 A 282013 ...

