background image

15

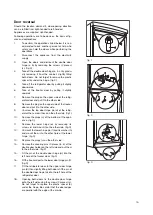
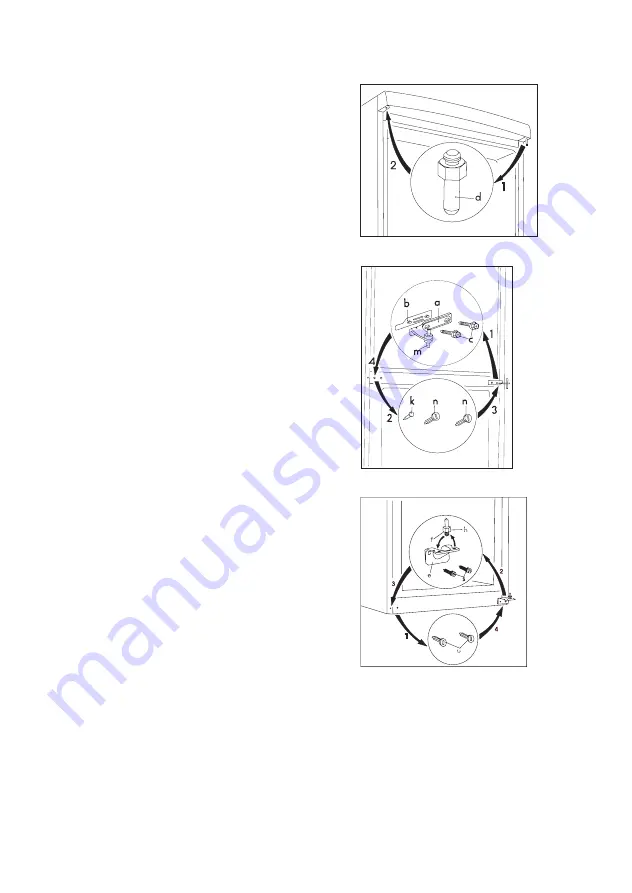
fig. 1. 

fig. 2. 

fig. 3. 

Door reversal

Should the location demand it, door-opening direction
can be refitted from right-handed to left-handed.

Appliances are supplied  right-handed.

Following operations are to be done on the basis of fig-
ures and explanations:

1.

To perform the operations listed below it is rec-
ommended to ask another person for help who
safely can hold the doors while performing the
operations.

2.

Disconnect the appliance from the electricity
supply.

3.

Open the doors and dismount the double door
hinge (a, b) by removing the screws (2 pieces)
(c). (fig.2)

4.

Take off the double door hinge (a, b, c) by gradu-
ally removing it from the cabinet, slightly tilting
both doors. Do not forget to remove the plastic
spacer (b) under the hinge. (fig.2)

5.

Take off the refrigerator door by pulling it slightly
downwards.

6.

Take of the freezer door by pulling it slightly
upwards.

7.

Remove the plug on the upper side of the refrig-
erator door and put it to the other side.

8.

Remove the plug on the upper side of the freezer
door and put it to the other side.

9.

Unscrew the top door hinge pin (d) of the refrig-
erator then screw it back on the other side. (fig.1)

10.

Remove the plugs (u) at the bottom of the appli-
ance. (fig.3)

11.

Remove the lower hinge (e) by removing its
screws (s) and mount it on the other side. (fig.3)

12.

Unmount the lower hinge pin (f) and its washer (h)
and mount them into the other hole of the lower
hinge. (fig.3)

13.

Replace the plugs (u) on the other side.

14.

Remove the covering pins (3 pieces) (n, k) of the
double door holder on the left side and put them
to the other side. (fig.2)

15.

Fit the pin of the double door hinge (m) into the
left hole of the freezer door. (fig.2)

16.

Fit the freezer door to the lower door hinge pin (f).
(fig.3)

17.

Fit the refrigerator door to the upper door hinge
pin (d) then slightly tilting both doors fit the pin of
the double door hinge (m) into the left hole of the
refrigerator door.

18.

Opening both doors fix the double door hinge
onto the left side using the screws (2 pieces) (c).
Do not forget to replace the plastic spacer (b)
under the hinge. Be careful that the door edges
are parallel with the edge of the mantle.

Содержание ZNB 404W

Страница 1: ...ZNB 404W ZNB 404S Instruction book Fridge Freezer ...

Страница 2: ...ach year to a value of approx USD 14 billion in more than 150 countries around the world This instruction book contains safety precautions information on use and helpful hints and tips To ensure you use this appliance effectively and safely please read this instruction book carefully before installing or using this appliance and retain for future reference The symbols below help you to find things...

Страница 3: ...rigerant isobutane R 600a is contained with in the refrigerant circuit of the appliance a natural gas with a high level of environmental compatibility which is nevertheless flammable Keep ventilation openings in the appliance enclo sure or in the built in structure clear of obstruction Do not use mechanical devices or other means to accelerate the defrosting process other than those recommended by...

Страница 4: ...reezing baskets from the freezer 9 Frozen Food Storage 9 Defrosting 9 To Make Ice Cubes 9 Hints and Tips 10 Normal Operating Sounds 10 Food Storage 10 Energy Saving Advice 10 In the Event of a Power Failure 10 Maintenance and Cleaning 11 Internal Cleaning 11 External Cleaning 11 When the Appliance is Not in Use 11 Defrosting 11 To Change the Light Bulb 11 Something Not Working 12 Instructions for ...

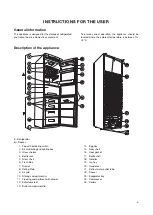
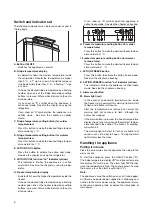
Страница 5: ...perature is between 10 32 C A Refrigerator B Freezer 1 Top with indicating switch 2 Air distributing and lighting box 3 Glass shelves 4 Bottle rack 5 Glass shelf 6 Fresh Box 7 Drawer 8 Rating Plate 9 Air grid 10 Storing compartment s 11 Freezing compartment with drawer 12 Adjustable feet 13 Butter compartment lid 14 Egg tray 15 Door shelf 16 Door gasket 17 Bottle shelf 18 Handles 19 Ice tray 20 Co...

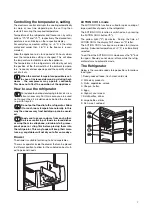
Страница 6: ... appliance in action freeze mode See also the chapter on freezing H Freezer temperature setting button for colder temperatures Press this button to make the desired freezer temper ature colder by 1 C I Freezer temperature setting button for warmer temperatures Press this button to make the desired freezer temper ature warmer by 1 C J ACTION FREEZE button Press this button to activate the action fr...

Страница 7: ...equate cooling developing interior air circu lation is necessary For this reason you are asked not to cover the air circulation gaps behind the shelves e g with tray etc Do not put hot food into the refrigerator Allow it to reach room temperature naturally In this way the unnecessary frost building up can be avoid ed Foods can take over odours from each other So it is essential to put foods in clo...

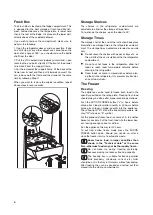
Страница 8: ...t of the drawer to remove it from the support frame 3 For the removal of the support frame lift the back of the frame from its nest and then pull it towards yourself You can remove both the frame and the drawer at the same time by following Step 3 When you want to restore the original condition repeat above steps in reverse order The Freezer Freezing The appliance can be used to freeze fresh food ...

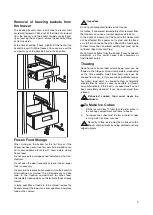
Страница 9: ...w seconds Never try to free an ice tray that is frozen to the freezer compartment by using pointed or sharp edged objects Important Do not put carbonated liquids in the freezer Ice lollies if consumed immediately after removal from the freezer can cause a low temperature skin burn In the event of a power cut the food in the freezer will not be affected if the power cut is short and the freez er is...

Страница 10: ...ed and can then be refrozen as cooked dishes Chicken Should also be cooked and refrozen as a fresh dish Hints T Hints Tips ips Normal Operating Sounds You may hear faint gurgling or bubbling sounds when the refrigerant is pumped through the coils or tubing When the compressor is on the refrigerant is being pumped round and you will hear a whirring sound or pulsating noise from the compressor A the...

Страница 11: ...ong odour External Cleaning Wash the outer cabinet with warm soapy water Once or twice a year dust the condenser black grille and the compressor at the back of the appliance with a brush or vacuum cleaner as an accumulation of dust will affect the performance of the appliance and cause excessive electricity consumption When the Appliance is not in Use When the appliance is not in use for long peri...

Страница 12: ... Check there is power at the socket Check there is not a power cut by check ing the household lights Check the fuse has not blown Check the thermostat setting Check the ambient temperature is within the appliances operating limits of 10 C to 32 C Check that the thermostat control knob is turned to the correct setting relative to ambient conditions Adjust the thermostat control knob Close the door ...

Страница 13: ...hould be positioned in a well ventilated dry room Energy use is affected by the ambient temperature The appliance should therefore not be installed next to radiators cookers or other sources of heat only be installed at a location where the ambient tem perature corresponds to the climate classification for which the appliance is designed The climate classification can be found on the rating plate ...

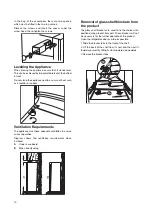
Страница 14: ...ments The appliance must have adequate ventilation to ensure correct operation Diagram shows the ventilation requirements when installed A Under a cupboard B When freestanding Removal of glass shelf blockers from the product The glass shelf blockers are used to fix the shelves into position during product transport These blockers will not be necessary for the further operation of the product Open ...

Страница 15: ...emove the plug on the upper side of the freezer door and put it to the other side 9 Unscrew the top door hinge pin d of the refrig erator then screw it back on the other side fig 1 10 Remove the plugs u at the bottom of the appli ance fig 3 11 Remove the lower hinge e by removing its screws s and mount it on the other side fig 3 12 Unmount the lower hinge pin f and its washer h and mount them into...

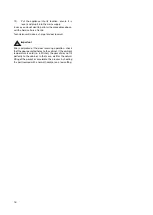
Страница 16: ...will make a charge for door reversal Important After completion of the door reversing operation check that the door gasket adheres to the cabinet If the ambient temperature is cold i e in Winter the gasket may not fit perfectly to the cabinet In that case wait for the natural fitting of the gasket or accelerate this process by heating the part involved with a normal hairdryer on a low setting ...

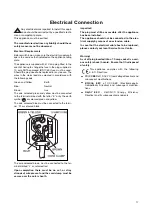
Страница 17: ... the letter E or by the earth symbol or coloured green and yellow The wire coloured blue must be connected to the termi nal N or coloured black The wire coloured brown must be connected to the ter minal marked L or coloured red Upon completion there must be no cut or stray strands of wire present and the cord clamp must be secure over the outer sheath This appliance complies with the following E E...

Страница 18: ...sh duck goose X X X x x x cling film airtight Roasted duck goose X X X X x x x dish covered Butter unopened X X X X X X X original packaging Butter opened X X X X X X X original packaging Milk X X X x x original packaging Cream X X x x plastic box Sour cream X X X X x x x plastic box Cheese hard X X X X X X X aluminium foil Cheese soft X X X X x x x cling film Egg X X X X X X X Spinach sorrel X X ...

Страница 19: ...19 ...

Страница 20: ...200372347 00 11032008 933 012 147 www electrolux com www zanussi co uk ...

Отзывы: