background image

25

Contents 

Operating Instructions

 . . . . . . . . . . . . . . . . . . . . . . . . . . . . . . . . . . . . . 

26

Safety

 . . . . . . . . . . . . . . . . . . . . . . . . . . . . . . . . . . . . . . . . . . . . . . . . . . . . . . . 

26

Disposal

. . . . . . . . . . . . . . . . . . . . . . . . . . . . . . . . . . . . . . . . . . . . . . . . . . . . . 

28

The Key Features of Your Appliance

. . . . . . . . . . . . . . . . . . . . . . . . . . . . . . 

28

Description of the Appliance

 . . . . . . . . . . . . . . . . . . . . . . . . . . . . . . . . . . . . 

29

Cooking zones and control panel . . . . . . . . . . . . . . . . . . . . . . . . . . . . . . . . . . 

29

Before Using for the First Time

 . . . . . . . . . . . . . . . . . . . . . . . . . . . . . . . . . . 

30

Initial Cleaning. . . . . . . . . . . . . . . . . . . . . . . . . . . . . . . . . . . . . . . . . . . . . . . . . 

30

Operating the Hob

. . . . . . . . . . . . . . . . . . . . . . . . . . . . . . . . . . . . . . . . . . . . . 

31

Ring Switches . . . . . . . . . . . . . . . . . . . . . . . . . . . . . . . . . . . . . . . . . . . . . . . . . 

31

Cooking on the Zones. . . . . . . . . . . . . . . . . . . . . . . . . . . . . . . . . . . . . . . . . . . 

31

Residual heat indicator . . . . . . . . . . . . . . . . . . . . . . . . . . . . . . . . . . . . . . . . . . 

32

Uses, Tables and Tips

. . . . . . . . . . . . . . . . . . . . . . . . . . . . . . . . . . . . . . . . . . 

33

Pans  . . . . . . . . . . . . . . . . . . . . . . . . . . . . . . . . . . . . . . . . . . . . . . . . . . . . . . . . 

33

Cleaning and Care

. . . . . . . . . . . . . . . . . . . . . . . . . . . . . . . . . . . . . . . . . . . . . 

35

Hob . . . . . . . . . . . . . . . . . . . . . . . . . . . . . . . . . . . . . . . . . . . . . . . . . . . . . . . . . 

35

Hob Frame  . . . . . . . . . . . . . . . . . . . . . . . . . . . . . . . . . . . . . . . . . . . . . . . . . . . 

36

What to do if …

 . . . . . . . . . . . . . . . . . . . . . . . . . . . . . . . . . . . . . . . . . . . . . . . 

37

Rectifying faults . . . . . . . . . . . . . . . . . . . . . . . . . . . . . . . . . . . . . . . . . . . . . 

37

Installation Instructions

 . . . . . . . . . . . . . . . . . . . . . . . . . . . . . . . . . . . . 

38

Technical Data. . . . . . . . . . . . . . . . . . . . . . . . . . . . . . . . . . . . . . . . . . . . . . . . . 

38

Regulations, Standards, Directives . . . . . . . . . . . . . . . . . . . . . . . . . . . . . . . . . 

39

Safety Instructions for the Installer . . . . . . . . . . . . . . . . . . . . . . . . . . . . . . . . . 

40

Electrical Connection  . . . . . . . . . . . . . . . . . . . . . . . . . . . . . . . . . . . . . . . . . . . 

40

Rating Plate. . . . . . . . . . . . . . . . . . . . . . . . . . . . . . . . . . . . . . . . . . . . . . . . . . . 

42

Service

. . . . . . . . . . . . . . . . . . . . . . . . . . . . . . . . . . . . . . . . . . . . . . . . . . . . . 

43

Assembly

 . . . . . . . . . . . . . . . . . . . . . . . . . . . . . . . . . . . . . . . . . . . . . . . . . .  106

Содержание ZKF 650 LN

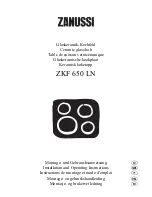
Страница 1: ...cuisson vetrocéramique Ceramic glass hob Glaskeramik Kochfeld ZKF 650 LN Montasje og brukerveiledning Montage en gebruikshandleiding Instructions de montage et mode d emploi Installation and Operating Instructions Montage und Gebrauchsanweisung n l f g d ...

Страница 2: ...liance The following symbols are used in the text 1 Safety instructions Warning Information concerning your personal safety Important Information on how to avoid damaging the appliance 3 Information and practical tips 2 Environmental information 1 These numbers indicate step by step how to use the appliance 2 3 These operating instructions contain information on steps you can take yourself to rect...

Страница 3: ...tial Cleaning 30 Operating the Hob 31 Ring Switches 31 Cooking on the Zones 31 Residual heat indicator 32 Uses Tables and Tips 33 Pans 33 Cleaning and Care 35 Hob 35 Hob Frame 36 What to do if 37 Rectifying faults 37 Installation Instructions 38 Technical Data 38 Regulations Standards Directives 39 Safety Instructions for the Installer 40 Electrical Connection 40 Rating Plate 42 Service 43 Assembl...

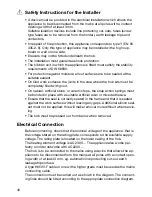
Страница 4: ...ollowing installation in suitable installation cabinets and workplaces which conform to the rele vant standards This ensures sufficient protection against contact for elec trical units as required by the VDE Association of German Electrical Engineers If your appliance malfunctions or if fractures cracks or splits appear switch off all cooking zones disconnect the hob from the electricity supply Ch...

Страница 5: ...a rough burred or damaged base Scratching may occur if the pans are slid across the surface Do not place any pans on the hob frame Scratching and damage to the paint may occur Make sure that no acidic liquids e g vinegar lemon or descaling agents are spilt onto the hob frame since these cause dull spots If sugar or a preparation with sugar comes into contact with the hot cook ing zone and melts th...

Страница 6: ... dis posed of in the correct manner The appliance must not be disposed of with household rubbish You can obtain information about collection dates or public refuse dispos al sites from your local refuse department or council The Key Features of Your Appliance Appliance Ceramic glass cooking surface The appliance has a ceramic glass cooking surface and 4 rapid response cooking zones The particularl...

Страница 7: ...ooking Zone 1200W Single Cooking Zone 1800W Control Knobs Four Residual Heat Indicators separate for each zone Single Cooking Zone 2300W Control Knob for Front Left Cooking Zone Control Knob for Front Right Cooking Zone Control Knob for Rear Left Cooking Zone Control Knob for Rear Right Cooking Zone ...

Страница 8: ...30 Before Using for the First Time Initial Cleaning Wipe the ceramic glass surface with a damp cloth 1 Important Do not use any caustic abrasive cleaners The surface could be damaged ...

Страница 9: ...uously vari able between settings 1 10 1 lowest power 10 highest power Cooking on the Zones 1 Select a high setting for heating up browning 2 As soon a steam starts to form or the oil is hot turn back to the heat setting necessary for further cooking 3 To stop cooking turn back to the zero position 2 Switch off the cooking zone approx 5 10 minutes before the end of the cooking to make use of the r...

Страница 10: ...en the cooking zone has cooled down even when the cooking zone is switched Off 2 You can use the residual heat for melting and keeping food warm 1 Important As long as the residual heat indicator is illuminated there is a risk of burns 1 Important If the power supply is interrupted the residual heat indicator also go out and information about residual heat will no longer be available How ever it i...

Страница 11: ...hen cold pan bases are normally bowed slightly inwards concave They should never be bowed outwards con vex If you wish to use special types of pan e g a pressure cooker simmering pan wok etc please observe the manu facturer s instructions 2 Energy saving tips You can save valuable energy by observing the following points Always position pots and pans before switching on the cooking zone Dirty cook...

Страница 12: ...kes Fillet of pork and beef steaks goulash 7 8 Roasting Frying with out crust Frying of meat schnitzel cutlets meat balls sausages liver fish fillet in deep fat Frying eggs or chops 5 6 Boiling Braising Boiled potatoes stews soups hot pot sauces in large quantities 4 5 Simmering Stewing Simmering of vegetables braising of meat lightly cooking small amount of fruit with little liquid 3 4 Gentle sim...

Страница 13: ...rcially available ceramic glass or stainless steel cleaner such as Hob Brite Light Soiling 1 Wipe the ceramic glass surface with a damp cloth and a little washing up liquid 2 Then rub dry with a clean cloth Remnants of cleaner must not be left on the surface 3 Thoroughly clean the entire ceramic glass cooking surface once a week with a commercially available ceramic glass or stainless steel cleane...

Страница 14: ... cooking zone on which something has melted has already cooled down warm it up again for cleaning Scratches or dark marks on the ceramic glass surface caused for example by a pan base with sharp edges cannot be removed However they do not impair the function of the hob Hob Frame 1 Important Do not put vinegar lemon juice or scale removers on the hob frame otherwise dull spots will appear 1 Wipe th...

Страница 15: ...e needs repairing please contact your spe cialist dealer or customer service What to do when the cooking zone does not function Check whether the fuses in the house installation fuse box are intact If the fuses switch off or blow several times please call an authorized electrical technician the corresponding cooking zone is switched ON and the desired degree of heat has been set for cooking zones ...

Страница 16: ...ll not cover any damage that may occur Technical Data Appliance dimensions Worktop cut out dimensions Cooking rings Width 572 mm Depth 502 mm Height 47 mm Width 560 mm Depth 490 mm Corner radius R5 Position Diameter Power Front left 210mm 2300W Rear left 145mm 1200W Rear right 180mm 1800W Front right 145mm 1200W Connection voltage 230 V 50Hz Max total connection value 6 5kW ...

Страница 17: ... 44547 44548 relating to the operating features of electric cookers hobs ovens and grills for household use EN 55014 2 EN 55014 EN 61000 3 2 EN 61000 3 3 relating to basic requirements for electro magnetic compatibility protec tion EMC 5 This appliance complies with the following EU Directives 73 23 EWG dated 19 02 1973 Low Voltage Directive 89 336 EWG dated 03 05 1989 EMC Directive including Amen...

Страница 18: ...tion springs must be bonded in place with a suitable artificial resin or mixed adhesive Ensure that the seal is correctly seated in the frame and that it is seated against the work surface without leaving any gaps Additional silicon seal ant must not be applied this will make removal more difficult when servic ing The hob must be pressed out from below when removed Electrical Connection Before con...

Страница 19: ...tened securely Finally the connecting cable is to be secured with the mains cable cleat and the covering closed by pressing firmly lock into place Before switching on for the first time any protective foil or stickers must be removed from the glass ceramic surface 1 Once connected to the mains supply check that all cooking zones are ready for use by briefly switching each on in turn at the maximum...

Страница 20: ...42 Rating Plate ...

Страница 21: ...Under what circumstances does the fault occur Prior to the telephone call it is important that you make a note of the following ap pliance code numbers that are given on the rating plate model description PNC code 9 digits S No code 8 digits We recommend that you record the code numbers here so that you always have them to hand When do you incur costs even during the warranty period if you could h...

Страница 22: ...106 Montage Assembly Montage Montage Montasje ...

Страница 23: ...107 ...

Страница 24: ...108 Ausbau Removal Démontage Demontage Demontering ...

Страница 25: ...ion Electrolux Group products such as refrigerators cookers washing machines vacuum cleaners chain saws and lawn mowers are sold each year to a value of approx USD 14 billion in more than 150 countries around the world 319 626 800 NO 230802 04 Med forbehold om endringer Wijzigingen voorbehouden Sous réserve de modifications Subject to change without notice Änderungen vorbehalten ...

Отзывы: