Zanussi ZCE 650, Инструкция пользователя
Пользовательский мануал к плитe Zanussi ZCE 650 доступен для бесплатного скачивания с manualshive.com. Инструкция по эксплуатации содержит подробную информацию о функциях и использовании устройства. Скачайте свой инструктажный буклет прямо сейчас и наслаждайтесь безупречной работой вашей кухонной плиты Zanussi.
Поделиться
Скачать


Отзывы:
Нет отзывов
Похожие инструкции для ZCE 650

SR-W15FP
Бренд: Panasonic Страницы: 16

SR-42HZP
Бренд: Panasonic Страницы: 14

SR-MM10N
Бренд: National Страницы: 26

Professional 60
Бренд: Cannon Страницы: 40

Quantum
Бренд: FALMEC Страницы: 72

BGM604
Бренд: Bellini Страницы: 28

JEC8430ADS
Бренд: Jenn-Air Страницы: 28

ICS500VB0
Бренд: IKEA Страницы: 16

KP-6185
Бренд: TriStar Страницы: 48

HAP5200 532 Series
Бренд: Rangemaster Страницы: 32

HP-02S.015A
Бренд: HAEGER Страницы: 32

EK 18
Бренд: Eltac Страницы: 8

33300
Бренд: HAMILTON BEACH/PROCTOR SILEX Страницы: 22

MB20077218
Бренд: Masterbuilt Страницы: 28

C220E
Бренд: Hotpoint Страницы: 40

W90IND MFE
Бренд: Bertazzoni Страницы: 16
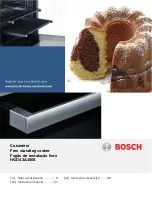
HGD43A120S/03
Бренд: Bosch Страницы: 76

SRM 1500WH
Бренд: Sencor Страницы: 10


