background image

- 7 -

Which program should I use?

Timed drying
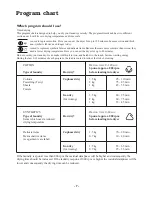
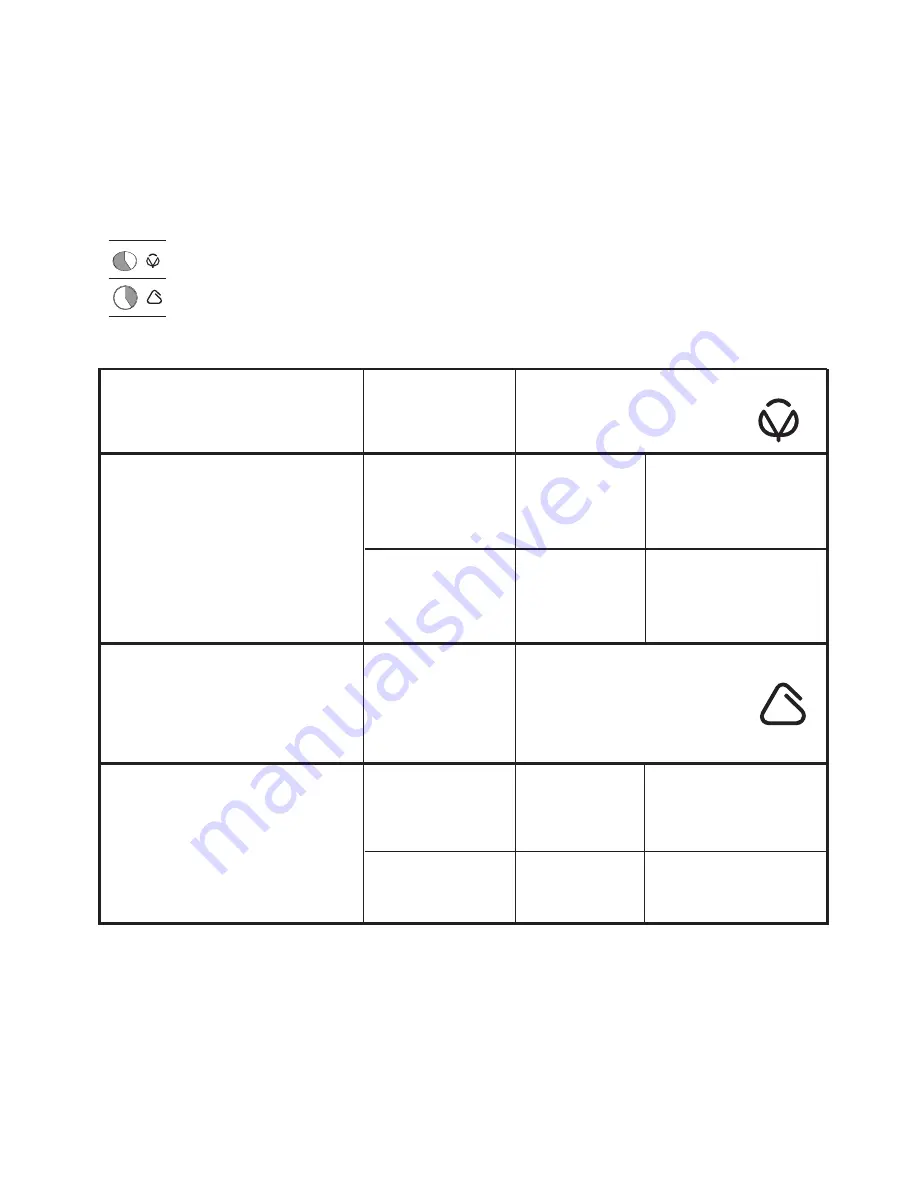
This program chart is designed to help you dry your laundry correctly. The program/timer knob has two different
sections, each with its own drying temperature and time scale:

is used to represent cotton. Here you can set the dryer for up to 120 minutes, because cotton and thick
non-synthetic fabrics need longer to dry.

is used to represent synthetic fabrics and delicate items. Because these are more sensitive than cotton, they
need a lower drying temperature. Here you can set the dryer for up to 80 minutes.

Do not overdry your laundry. It can make it difficult to iron, and harsher to the touch, besides wasting energy.
During the last 8-12 minutes of each program, the load is cooled to reduce the risk of creasing.

COTTON

D

RYING TIME

0 - 120 

MIN

Spun at approx. 800 rpm

Type of laundry

How dry?

before loading into dryer

Cottons

Cupboard dry

3.5 kg

95 - 110 min

Towelling (Terry)

2 kg

75 - 85 min

Sheets

1 kg

45 - 55 min

Towels

Iron dry

3.5 kg

80 - 95 min

(for ironing)

2 kg

60 - 75 min

1 kg

35 - 45 min

SYNTHETICS

D

RYING TIME

0 -80 

MIN

Type of laundry

How dry?

Spun at approx. 800 rpm

Items which need a reduced

before loading into dryer

drying temperature

Delicate items

Cupboard dry

1.5 kg

70 - 80 min

Heat-sensitive items

0.7 kg

30 - 40 min

(see garment care label)

Iron dry

1.5 kg

55 - 65 min

(for ironing)

0.7 kg

25 - 35 min

If the laundry is spun at less than 800 rpm, the residual dampness will be higher and consequently the
drying time should be increased. If the laundry is spun at 1000 rpm or higher the residual dampness will be
lower and consequently the drying time can be reduced.

Program chart

Содержание TCS 65W

Страница 1: ...INSTRUCTION BOOKLET TUMBLE DR Y ER T C S 6 5 W 822 90 12 93 ...

Страница 2: ...liance after use Care must be taken when removing or replacing the condensor as it can be awkward and heavy This product should be serviced by an authorised Zanussi Service Centre and only genuine Zanussi spare parts should be used Do not overload the appliance Never tumble dry items that have had contact with chemicals such as dry cleaning fluid These are of a volatile nature and could cause an e...

Страница 3: ...r tumble dryer The filters 9 The condenser 9 Emptying the water tank 10 Something not working 11 Service and spare parts 12 Customer Care 12 Guarantee Conditions 13 For the installer Installation instructions 14 17 Technical specifications 14 Consumption according to the IEC 1121 international standard 14 Choosing where to install the dryer 15 Worktop installation 15 Electrical supply 15 Wall moun...

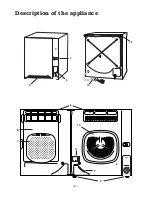
Страница 4: ...0 60 40 20 Important Please read the instruction book before using this appliance T C S 6 5 W 11 10 9 8 7 6 5 4 3 2 2 1 Description of the appliance 13 12 MADE IN SWEDEN TYPE PROD NO SER NO FD XX XX XX MOD XXXXXXXXX xxxxxxxx M 170 W 1850 W XXX V 2020 W 50 Hz 4 ...

Страница 5: ...ll mounted the feet need to be adjusted so that the dryer is level 6 Air ducts These should not be obstructed 7 Filters The fluff filter is behind the coarse filter Should be cleaned before or after each load The fluff filter is behind the coarse filter and can be removed for cleaning 8 Condenser This is built into the door and needs to be cleaned at regular intervals 9 Water tank This fills up wi...

Страница 6: ...off timer knob E to start the dryer and choose a suitable drying time on either the Cotton or the Synthetics time scale Capacity dry items Cotton max 3 5 kg Synthetics max 1 5 kg Examples of laundry item weights dry items Here is a list of common laundry items and their approximate weights Sheet 700 to 1000g Pillowcase 100 to 200g Tablecloth 400 to 500g Table Napkin 50 to 100g Kitchen Towel 70 to ...

Страница 7: ... load is cooled to reduce the risk of creasing COTTON DRYING TIME 0 120 MIN Spun at approx 800 rpm Type of laundry How dry before loading into dryer Cottons Cupboard dry 3 5 kg 95 110 min Towelling Terry 2 kg 75 85 min Sheets 1 kg 45 55 min Towels Iron dry 3 5 kg 80 95 min for ironing 2 kg 60 75 min 1 kg 35 45 min SYNTHETICS DRYING TIME 0 80 MIN Type of laundry How dry Spun at approx 800 rpm Items...

Страница 8: ...shed by hand or machine fibres and fluff are released but remain on the surface of the material If dried outdoors on a line these fibres will be blown away by the wind In a tumble dryer the fluff is collected in the filter and accumulates through the drying process Shrinkage To avoid shrinking garments should not be overdried Always check the care labels on your fabrics Items which should not be t...

Страница 9: ...rds 2 Remove the fluff filter and close the coarse filter again 3 Grasp the recesses at the top of the condenser with your fingers and use your thumbs to press against the door Fig C D The condenser will come free allowing you to lift it outwards upwards Be careful not to damage the sensitive aluminium section 4 Turn it upside down and clean it on both sides using a vacuum cleaner Remove the red d...

Страница 10: ...stop automatically until the tank is emptied It is a good idea to get into the habit of emptying the tank either before or after each load To empty the tank 1 Open the door 2 Pull out the tank Fig A 3 Open the tank lid and pour the water out Fig B 4 Close the lid and push the tank back into place Press it home until you can feel that it is properly engaged in place A B ...

Страница 11: ...ing temperature Is the temperature in the room too high Is the room too small Improve the room ventilation open a door or window or choose another site for the dryer Symptom Check Certain problems are due to lack of simple maintenance or oversights which can be solved easily without calling out an engineer Before contacting your local Service Force Centre please carry out the checks listed below I...

Страница 12: ...e fault is not a mechanical or electrical breakdown Please note that proof of purchase is required for any in guarantee service calls When you contact the Service Centre you will need to give the following details 1 Your name address and post code 2 Your telephone number 3 Clear and concise details of the fault 4 The model and serial number of the appliance found on the rating plate 5 The purchase...

Страница 13: ...lass or plastic Costs incurred for calls to put right an appliance which is improperly installed or calls to appliances outside the United Kingdom Appliances found to be in use within a commercial environment plus those which are the subject to rental agreements Products of Zanussi manufacture which are not marketed by Zanussi Limited European Guarantee If you should move to another country within...

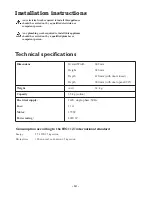
Страница 14: ...ried out by a qualified electrician or competent person Any plumbing work required to install this appliance should be carried out by a qualified plumber or competent person Technical specifications Dimensions Overall Width 605 mm Height 686 mm Depth 420 mm with door closed Depth 900 mm with door opened 90 Weight net 32 kg Capacity 3 5 kg cotton Electrical supply 240V single phase 50 Hz Fuse 13 A ...

Страница 15: ...ear to prevent it from tipping forwards Method Begin by placing the dryer on the worktop in the position where it is to be installed Level the dryer with the aid of its adjustable feet On the wall mark the position of the hole needed for the screw eye The correct place is opposite the centre of the left hand bracket on the top rear of the dryer Drill a hole for a 5 5 mm diameter plastic wall plug ...

Страница 16: ... you are installing the dryer between wall mounted cupboards you should use the wall mounting kit If the adjacent cupboards are more than 370 mm deep don t forget to leave a space at least 30 mm wide on the left of the dryer so that the door can open wide enough There should be a clear space at least 200 mm high between the top of the dryer and the ceiling or any cupboard above the dryer to ensure...

Страница 17: ...onnect the Green and Yellow earth wire to the terminal in the plug which is marked with the letter E or the earth symbol or coloured green and yellow Connect the Blue neutral wire to the terminal in the plug which is marked with the letter N or coloured black Connect the Brown live wire to the terminal in the plug which is marked with the letter L or coloured red The plug moulded onto the lead inc...

Страница 18: ...m x A 98 09 ...
Отзывы: