FIRST START
MAIN MENU
After completing all connections and powering the recorder and the cameras, the monitor should display the home screen with the
ZAMEL logo, meaning that the system was started. After a few seconds, the device will start the system and the main screen with the
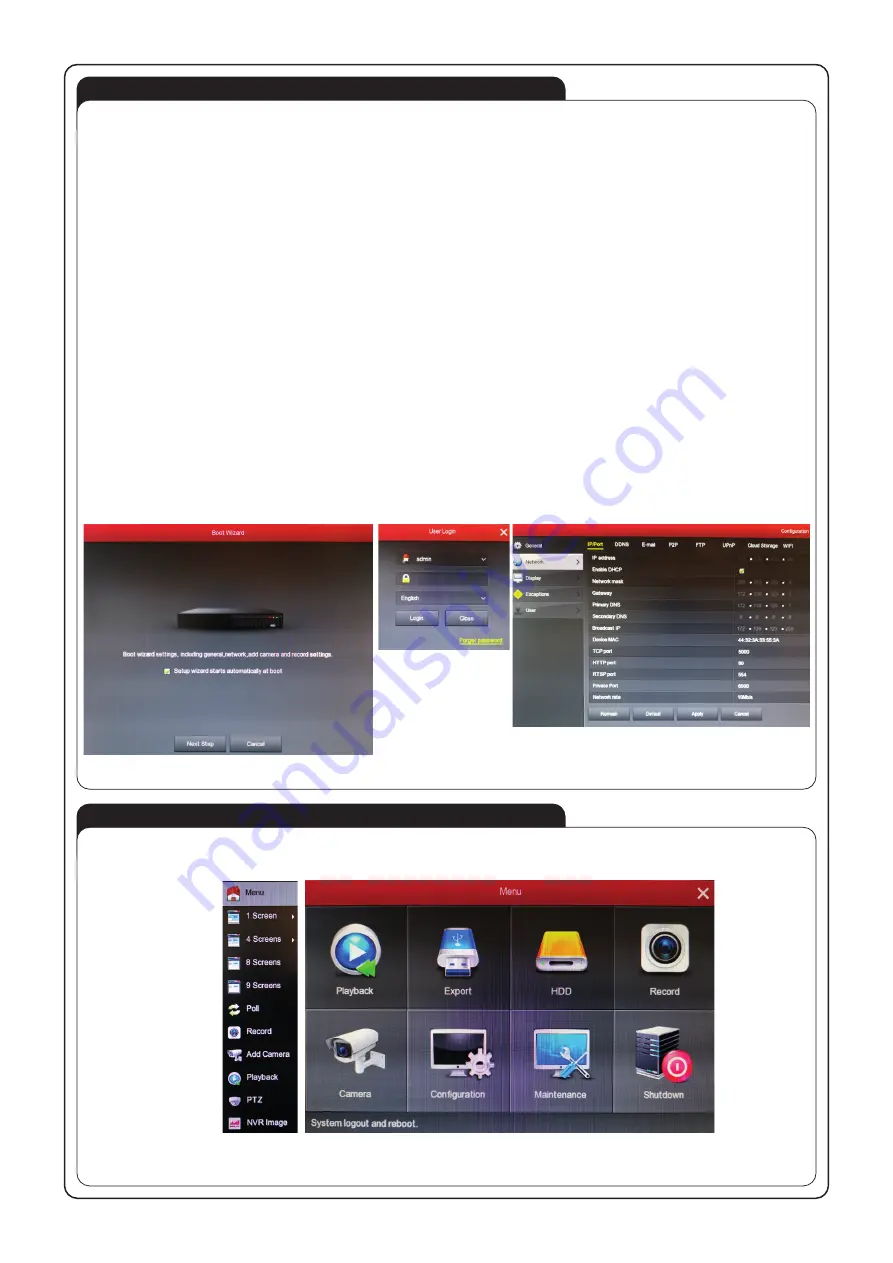
configuration wizard will be displayed (Fig. 6). The wizard can be disabled by unchecking the “Start the wizard during startup” box.
When starting the system for the first time, use the wizard to configure the device in the following manner:
• Click on “DALEJ/NEXT” in the configuration wizard.
• The login window will be displayed (Fig. 7). Enter the user name and the password.
The default settings are:
User: admin
Password: 12345
• Click on the “Log in” key. A notification will be displayed, saying that the password is too simple and should be changed. Change the
password by clicking on “Modify”.
The password should be changed after the monitoring system is placed in service in order to block unauthorized access
to the device.
• The next screen in used to change the basic settings, such as language, video standard, date and hour, etc.
• The next screen is used to adjust network settings. In the case of a permanent IP address, enter it in corresponding fields. In the
majority of cases, dynamic DHCP address assignment should be enabled by checking the “Enable DHCP” box and default port set-
tings (Fig. 8).
• The next wizard screen is used to add cameras.
By standard, the cameras included in the system are already configured to support the recorder and should automatically
upload on the list.
If the system does not see any of the cameras or if additional cameras are to be added (a maximum of 9 cameras
can be programmed for a single recorder), proceed according to the instructions in “Adding cameras”.
• The last window of the wizard is used to enter the recording settings to determine the hours and days, on which the camera is to
record image. By standard, continuous recording is set on all cameras. To change the time and recording type, proceed according
to instructions in “Recording settings”.
• After entering the basic settings and clicking on “Close” on the wizard, the system will switch to normal operation. The image from
all cameras should be displayed.
• Double-click on the image to display it in full screen mode.
• Right-click to display the pop-up menu with links to basic settings and to switch the image display mode to multiple cameras, as well
as to go to the main menu.
To go to the Main menu (Fig. 10), open the pop-up menu by clicking on the mouse and selecting the “Menu” icon (Fig. 9).
Fig.6
Fig.9
Fig.10
Fig.7
Fig.8


