7
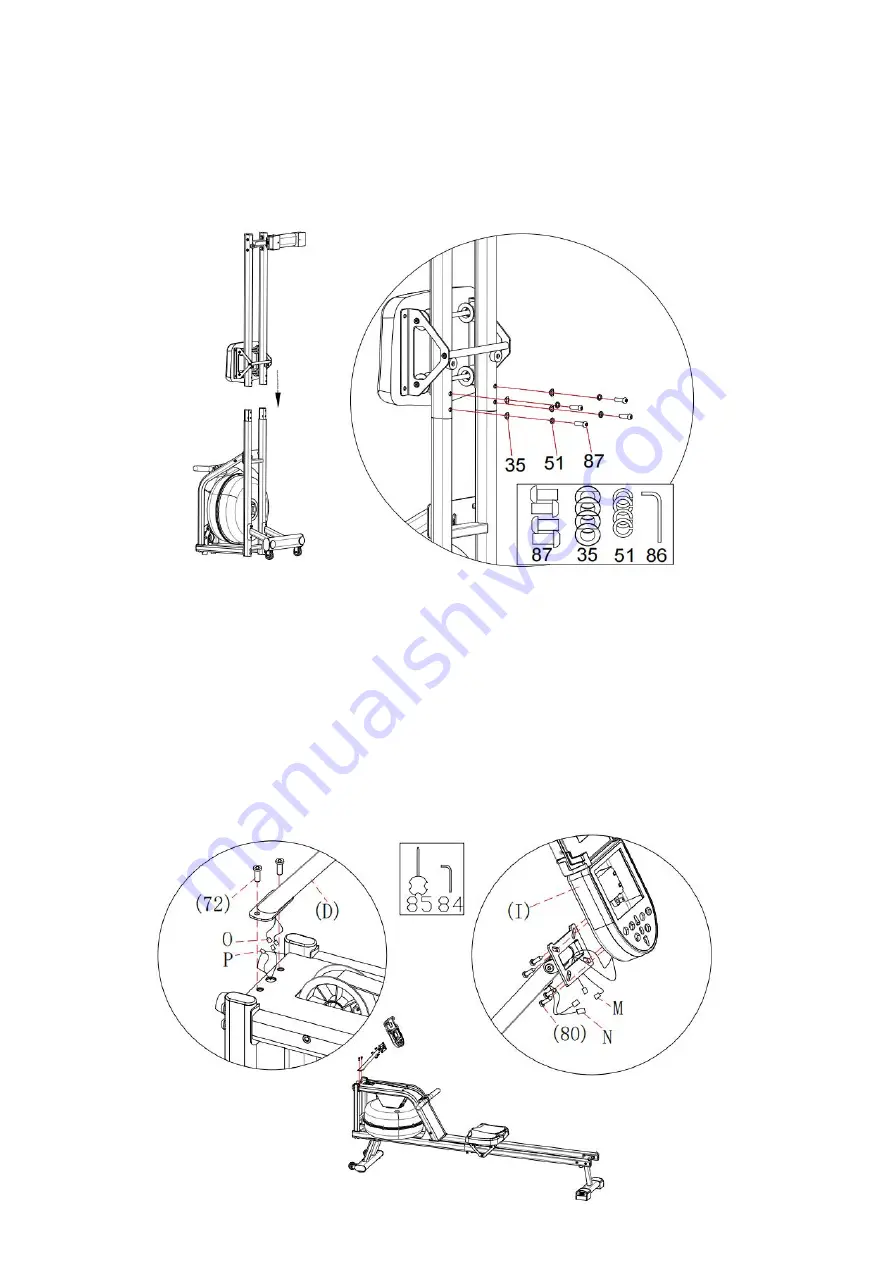
5. Take out the hexagonal pan head screw M8*30 (87)4PCS, spring washer
φ
8 (51)4PCS, and wave
gaskets (35)4PCS from the accessory kit. Lock the front assembly and rear assembly together with allen
wrench # 5 (86), and lock the unlocked screws in step 1 tightly at the same time.
6. Unscrew the inner hexagonal flat round head screw M6 * 10 (72) 2PCS on the main frame with allen
wrench #4 (84). Then connect the interfaces O and P, and plug them into the electronic gauge assembly
pipe, Install the electronic monitor support assembly (D) into the main frame with Allen wrench #4 (84)
and the inner hexagonal flat round head screw M6 * 10 (72) 2PCS. Using the cross spanner (85) to
remove the cross pan head screw (80) 4PCS which were preinstalled on the electronic monitor (I), then
connect the wire head M through the center hole in the support plate, and connect the electronic monitor
support assembly (D) of the electronic monitor (I) as shown.
Содержание RW207-01
Страница 15: ...Accessory Kit...
Страница 16: ...Explosion Diagram...
Страница 19: ...87 Screw M8 30 M8 30 S5 4 88 Open type core rivet 3 2 9 4...


