IM 701450-02E
4
Names and Functions of Front Panel Controls
Names and Functions of Front Panel Controls
Names and Functions of Front Panel Controls
Names and Functions of Front Panel Controls
This section introduces the names of the various keys and knobs that appear on the front panel, and provides a brief
explanation of what functions they control. For details about specific items introduced in the pages within, refer to the
corresponding chapter or section in the user's manual as indicated by the arrows ( ).
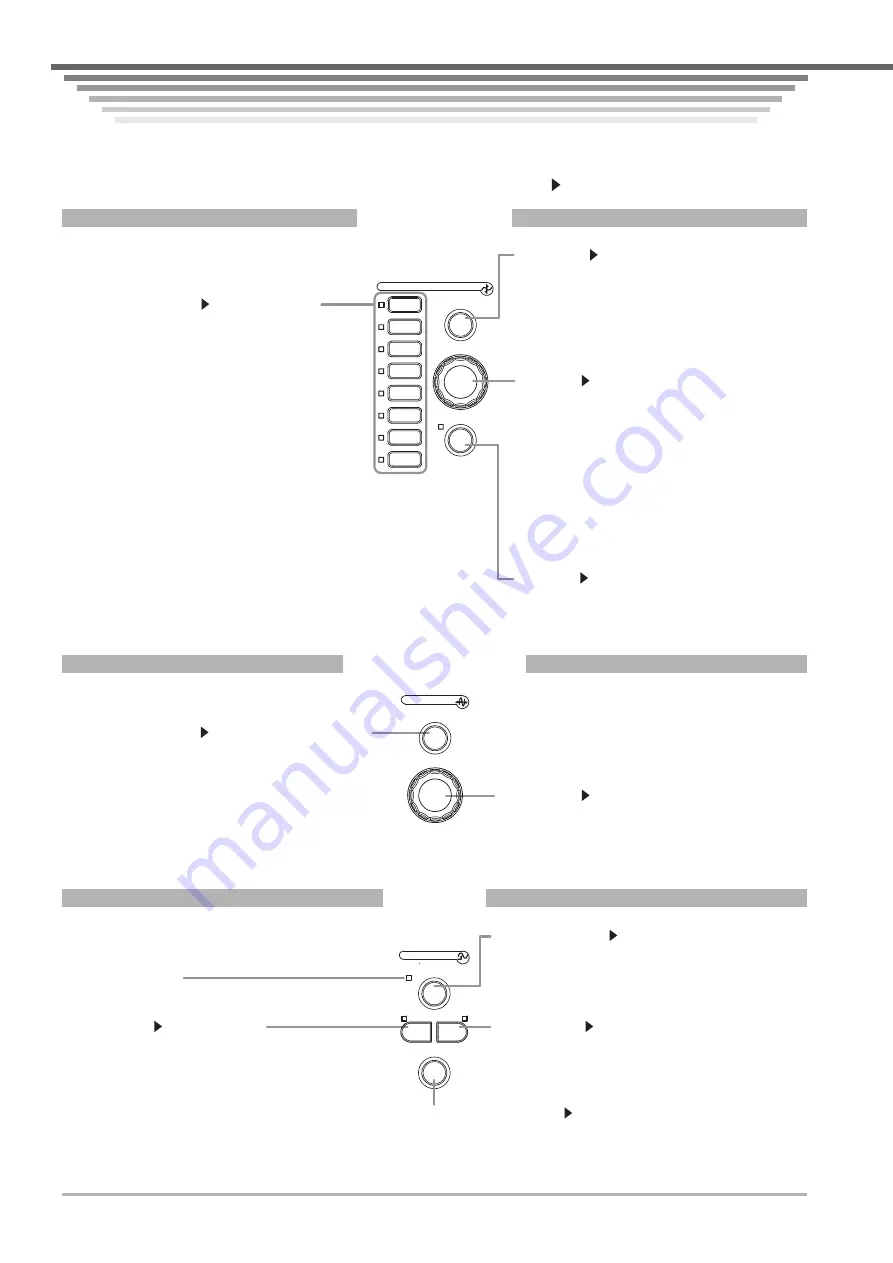
Vertical Axis
PRESET
LOGIC
CH
1
CH
2
CH
3
CH
4
CH
5
CH
6
CH
7
CH
8
V/DIV
VERTICAL
CH1 to CH8(4)* keys
Sections 5.1 to 5.10
Turns the corresponding channel ON/OFF, and
displays a setting menu for the channel’s vertical
position, coupling, probe attenuation/current-voltage
conversion ratio, offset voltage, bandwidth limit,
vertical axis zoom, linear scaling, and waveform labels.
Pressing a channel key displays the channel’s menu.
If you then turn the V/DIV knob, the V/DIV setting will
apply to that channel. The indicator to the left of each
channel key illuminates when the channel’s display is
ON.
* The DL7440 has four channel keys, and the DL7480
has eight. Hereafter, the expression CH1 to CH8(4) will
be used to mean channels 1 through 8 on the DL7480,
or channels 1 through 4 on the DL7440.
V/DIV knob
Section 5.2
Sets the vertical axis sensitivity*. Before turning the
knob, you can press a CH1 to CH8(4) key to select the
channel and display its menu. If you change the vertical
axis sensitivity setting while waveform acquisition is
stopped, the new setting takes effect when you start
waveform acquisition again.
* In the probe attenuation ratio/current-to-voltage
conversion ratio settings, the voltage axis sensitivity is
set when setting the probe attenuation ratio, and the
current axis sensitivity is set when setting the current-
to-voltage conversion ratio.
PRESET key
Section 5.7
Displays a menu for automatically setting the probe
attenuation/current-to-voltage conversion ratio, V/div,
offset voltage, trigger level and other items to CMOS
or ECL signal values (or other desired values).
Presets can also be assigned to all channels at once.
LOGIC key
Section 5.10
Displays a menu for optional logic input settings such
as display ON/OFF, display format, threshold level,
and waveform level.
Horizontal Axis
(SHIFT +) ZOOM key
Sections 8.4, 10.4, and 10.11
Displays a menu for waveform zoom settings.
Pressing the ZOOM key after the SHIFT key displays a
setting menu for waveform searching (the Search and Zoom
function) and SPI signal analysis/search.
TIME/DIV knob
Section 5.12
Sets the horizontal axis (time axis) scale. If you change
the setting while the waveform acquisition is stopped, the
new setting takes effect when you start waveform
acquisition again.
SEARCH
ZOOM
TIME/DIV
HORIZONTAL
Triggers
SIMPLE key
Sections 6.5 to 6.7
Displays a menu for setting a simple trigger, which is
usually the edge trigger.
The indicator on the upper left of the SIMPLE key
illuminates when the simple trigger is active.
ENHANCED key
Sections 6.8 to 6.15
Displays a setting menu for enhanced triggers such as the
pattern trigger or other complex triggers.
The indicator on the upper right of the ENHANCED key
illuminates when the enhanced trigger is active.
TRIG’D indicator
Illuminates when a trigger has been activated.
(SHIFT +) POSITION key
Sections 6.2, 6.3
Displays a setting menu for the trigger position.
If you press the POSITION key after the SHIFT key, a setting menu is
displayed for the trigger delay.
(SHIFT +) MODE key
Sections 6.1, 6.16, and 7.6
Displays a setting menu for trigger modes and sequential
store.
If you press the MODE key after the SHIFT key, a setting
menu is displayed for the action trigger.
MODE
POSITION
ENHANCED
SIMPLE
TRIGGER
TRIG D
ACTION
DELAY


