13
CONFIGURING WIFI
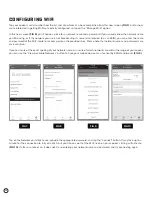
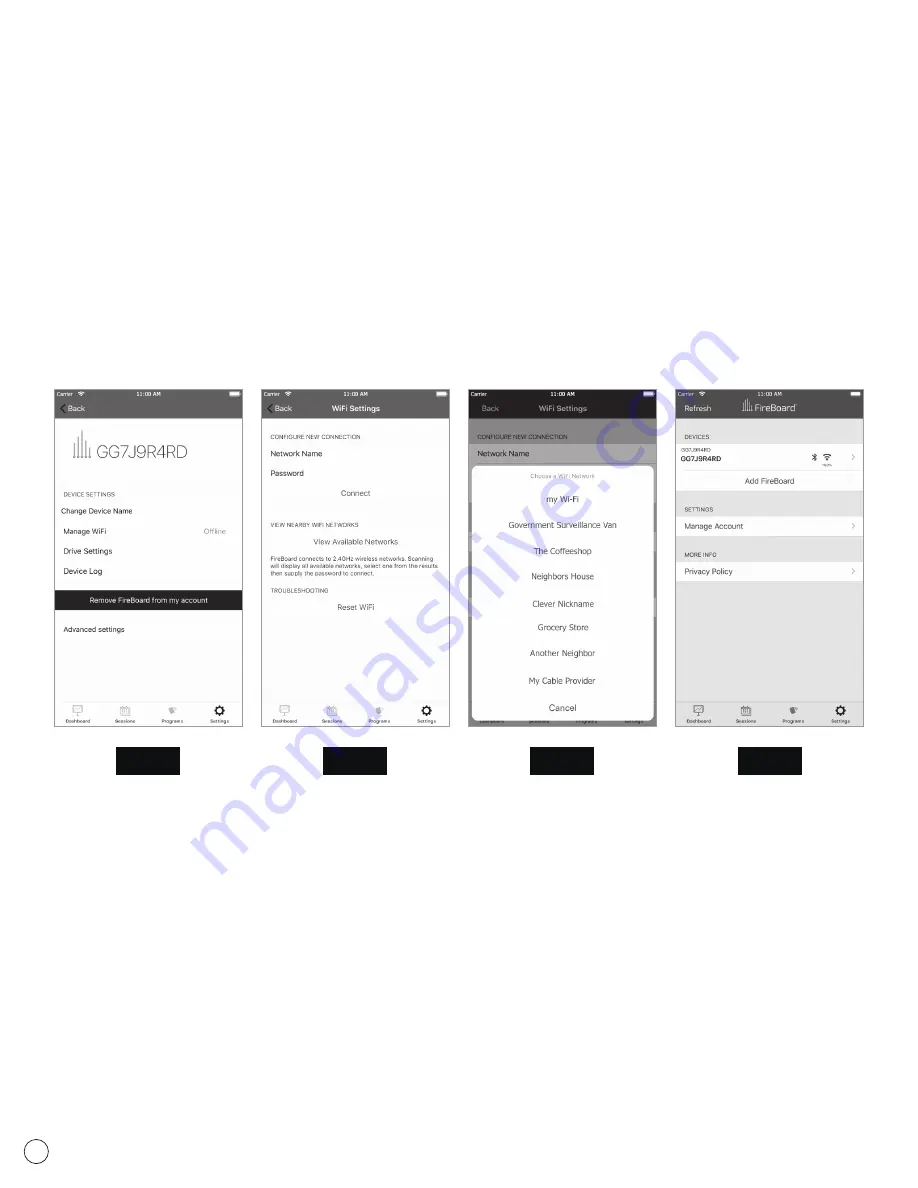
Tap your cooker’s serial number from the list, and a few tasks can be accomplished from this new screen
(FIG 7)
, but for now,
we’re interested in getting Wi-Fi connectivity configured, so tap on the “Manage Wi-Fi” option.
In this new screen
(FIG 8)
, you’ll notice a place for a network name and a password. If you already know the network name
you’ll be using, or if the network you use is not broadcasting its name (also referred to as an SSID), you can enter the name
and password of the Wi-Fi router or access point on the provided lines. Please note that network names and passwords are
case sensitive.
If you’re unsure of the exact spelling of your network name, or unsure of which networks are within the range of your cooker,
you can use the “View Available Networks” button to have your mobile device scan for nearby 2.4GHz networks
(FIG 9)
.
FIG 7
FIG 8
FIG 9
FIG 10
Tap on the Network you’d like to use, provide the appropriate password, and tap the “Connect” button. It may take up to a
minute for the connection to fully establish, but you’ll soon see that the Wi-Fi icon on your cooker’s listing will activate
(FIG 10)
.
If, after a minute or so, it does not, try re-entering your network name and password, and try connecting again.


