background image


YMGI, Engineered Comfort Products for A Sustainable  

and Efficient Green World! 

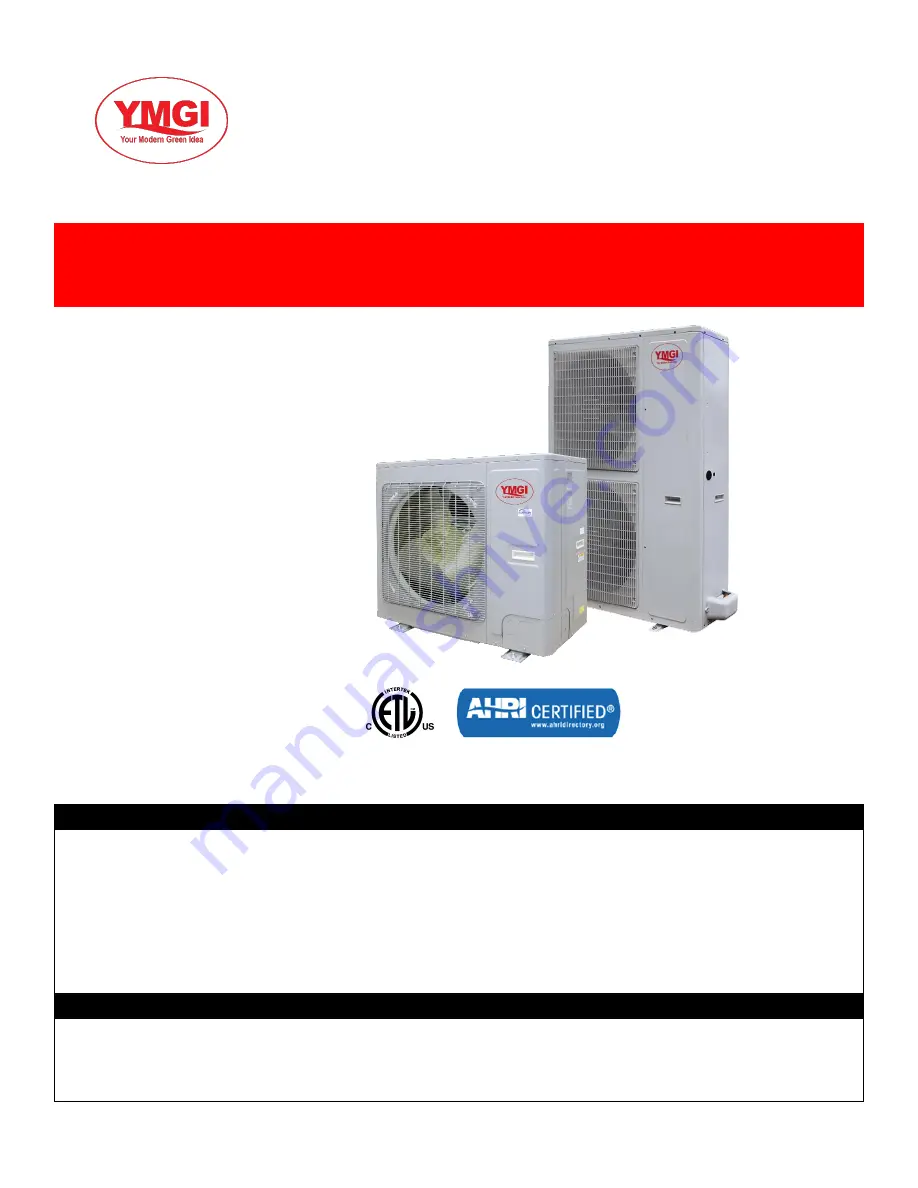
SERVICE MANUAL 

DC INVERTER SPLIT TYPE HEAT PUMP (Down to -22°F Ambient) 

OUTDOOR CONDENSING UNIT


Model Numbers: 

VRUO-2436HP-U2B(54) 
VRUO-4860HP-U2B(54) 


Thermostat-Controlled  

Universal Outdoor 
Condenser Works With:  

1.  Any Brand of American 

Style Indoor Units, and 

2.  YMGI Indoor Unit 

Universal VRUI 


Thank you for choosing this YMGI product. Please read the owner’s manual carefully before installation and operation, and retain for your 
records and future reference. If you need a replacement copy, please contact your local agent or visit www.ymgigroup.com to download 
a current electronic version. 


NOTICE


This  product  is  designed  and  manufactured  to  be  free  from  any  defects  in  material  and  workmanship  during  normal  use  and 
maintenance. Installation, operation, maintenance and repair must follow all standards and professional practices for regular cooling 
and heating equipment, such as NEC, State, or Local Codes and all related documents/manuals provided by YMGI. Failure to follow 
and adhere to all codes and documentation can cause damage to equipment, property even personal injury. 

Installer

: Currently licensed/certified HVAC technicians only. Must Read the manual and all provided documents prior to installation. 

Complete and fill out all required information on the warranty registration card. 

User

: Retain this manual and all supplied documents for your records and future reference. 

Servicer

: Use this manual for information concerning servicing and maintenance of this product.


SAFETY WARNING


Only qualified technicians should install and service this equipment. The installation, startup, operation and servicing of this equipment 
can be hazardous and requires a HVAC professional who has been trained, licensed and certified. Installations, adjustments or any 
equipment alterations done by an unqualified person could result in serious injury and even death. When working on the equipment, 
observe all precautions in the provided documents, on the tags, stickers, and labels that are attached to or placed on the equipment.


Содержание VRUO-2436HP-U2B(54)

Страница 1: ...nt such as NEC State or Local Codes and all related documents manuals provided by YMGI Failure to follow and adhere to all codes and documentation can cause damage to equipment property even personal...

Страница 2: ...AC Contractor 11 Introduction to Unitary Systems 14 System Diagram and Compatible Indoor Units 15 Product Introduction 16 Installation Preparation 17 Unit Dimensions 18 Specification Sheets 19 Diagram...

Страница 3: ...rements for handling reclaiming recovering and recycling of certain refrigerants the equipment and tools necessary to perform these service procedures In addition some states or municipalities may hav...

Страница 4: ...stem installer or HVAC professional as soon as possible and provide the following information Data on the unit model number serial number and owner s name A detailed description of the unit s problem...

Страница 5: ...etc which the manufacturer may not require certified and licensed personnel to install Reading and following YMGI Group recommendations and requirements contained in the following pages and other doc...

Страница 6: ...ling the piping through any structures at time of installation 2 Not installing an oil P trap in the copper suction line where the indoor unit is located 18 feet or more below the outdoor unit 3 Cross...

Страница 7: ...D or any other identifying marks on each pair of copper lines and wiring cable sets to keep from cross piping or cross wiring in multiple zone installations or where pipes for different single zone s...

Страница 8: ...ation or 90 days as of original shipping date from YMGI Group whichever comes first This is a standard limited liability warranty and DOES NOT cover the following Any damage or repairs to properties o...

Страница 9: ...st will be charged accordingly 3 YMGI will ground ship out the parts ASAP Expedited shipping is available at the customer s expense 4 Replacement parts that have an approved warranty registration are...

Страница 10: ...YMGI Engineered Comfort Products for A Sustainable and Efficient Green World YMGI Your Modern Green Idea 10...

Страница 11: ...ne if they are reputable 4 Use only a reputable licensed certified HVAC installation professional to prevent any unexpected charges because of unethical business practices 5 Check their references ver...

Страница 12: ...ts 17 While operating in cooling mode do not set the indoor unit s room temperature too low Keeping the temperature difference between indoor and outdoor unit within 41 18 YMGI Group recommends that o...

Страница 13: ...Make sure to disconnect the power supply and switch off all circuits prior to inspecting or servicing the unit Inspecting and servicing the unit while the power supply is connected and the circuits ar...

Страница 14: ...ance V Ph Hz VRUO 2436HP U2B 54 208 230V 1Ph 60Hz VRUO 4860HP U2B 54 208 230V 1Ph 60Hz List of Indoor Units Model Cooling Heating Capacity Btu h Power Supply Appearance V Ph Hz Airhandler VRUI 24UC M2...

Страница 15: ...uit breaker capacity V Ph Hz A VRUO 2436HP U2B 54 208 230V 1Ph 60Hz 35 VRUO 4860HP U2B 54 208 230V 1Ph 60Hz 45 Model Power Supply Fuse Capacity Circuit breaker capacity V Ph Hz A A VRUI 24UC M2B 54 20...

Страница 16: ...YMGI Engineered Comfort Products for A Sustainable and Efficient Green World YMGI Your Modern Green Idea 16 Operation Mode Cooling Mode...

Страница 17: ...YMGI Engineered Comfort Products for A Sustainable and Efficient Green World YMGI Your Modern Green Idea 17 Heating Mode...

Страница 18: ...ons the 4 way valve will continue to function temporarily and lose power after a while There must be adequate differential pressure for the 4 way valve to change directions Special Control Defrosting...

Страница 19: ...Control Under heating mode the system will enable high temperature prevention control if the temperature sensed by indoor tube temperature sensor reaches a certain value When high temperature prevent...

Страница 20: ...se set the second dip switch to Strong Defrost Under strong defrost the defrosting time will run longer and enable the condenser to be defrosted completely Defrost mode Outdoor unit dip switches Stand...

Страница 21: ...old SW1 for 5s to enter the first level menu of the debugging mode the outdoor unit mainboard LED displayer flashes Under the first level menu short press SW1 to switch various functions After switchi...

Страница 22: ...ficient Green World YMGI Your Modern Green Idea 22 TroubleShooting Wiring Diagram The following electric wiring diagram is for reference only Please refer to the version stickered inside your unit as...

Страница 23: ...YMGI Engineered Comfort Products for A Sustainable and Efficient Green World YMGI Your Modern Green Idea 23 VRUO 4860HP U2B 54...

Страница 24: ...YMGI Engineered Comfort Products for A Sustainable and Efficient Green World YMGI Your Modern Green Idea 24 Wiring Diagrams of IDUs VRUI 24UC M2B 54 VRUI 36UC M2B 54 VRUI 48UC M2B 54 VRUI 60UC M2B 54...

Страница 25: ...AC L X1 Live wire input 9 X14 OFAN H OUT AC motor high speed output 3 CN3 Wired control communication interface 10 X11 OFAN H IN AC motor high speed input 4 CN1 DC motor output 11 X8 OFAN L IN AC mot...

Страница 26: ...ed Comfort Products for A Sustainable and Efficient Green World YMGI Your Modern Green Idea 26 Pinboard No Printing Interface No Printing Interface 1 DC MOTOR1 DC motor output 2 COM2 DC motor control...

Страница 27: ...ing belt 14 T_SENSOR2 2 Outdoor tube temperature sensor interface 4 Outdoor ambient temperature sensor interface 6 Discharge temperature sensor interface 5 4WAY 4 way valve 15 T_LAC Low temperature co...

Страница 28: ...duction wire white 3 L1 1 PFC induction wire brown 12 L2 1 PFC induction wire yellow 4 N Neutral wire 13 G OUT Reserved 5 COMM1 Communication terminal same with COMM 14 U Compressor U phase terminal 6...

Страница 29: ...ire blue 8 L1 2 PFC induction wire white 2 AC L Live wire 9 U Compressor U phase terminal 3 L1 1 PFC induction wire brown 10 V Compressor V phase terminal 4 N Neutral wire 11 W Compressor W phase term...

Страница 30: ...ltering board ground wire terminal 7 L OUT Power output live wire terminal 4 E2 Filtering board grounding hole reserved VRUO 4860HP U2B 54 No Printing Interface No Printing Interface 1 AC L Power inpu...

Страница 31: ...UP VP WP NU NV NV are all among 0 3V 0 7V then it indicates the IPM module is normal If any measured valve is 0 it indicates the IPM is damaged Method of Testing PFC Module Short Circuit 1 Preparatio...

Страница 32: ...YMGI Engineered Comfort Products for A Sustainable and Efficient Green World YMGI Your Modern Green Idea 32 VRUO 2436HP U2B 54 VRUO 4860HP U2B 54...

Страница 33: ...ilure 15 P0 Driver reset protection 16 P5 Over current protection 17 P6 Master control and driver communication error 18 P7 Driver module sensor error 19 P8 Driver module high temperature protection 2...

Страница 34: ...the action of high pressure switch If the high pressure switch is cut off it is judged that high pressure is too high and the system stops operation for protection Possible reason Cut off valve of ODU...

Страница 35: ...It is judged through the action of low pressure switch If the low pressure switch is cut off it is judged that low pressure is too low and the system stops operation for protection Possible reason Cu...

Страница 36: ...through compressor discharge pipe and shell top temperature sensor If the tested temperature value is higher than 115 the unit will stop for protection Possible reason Cut off valve of ODU is not ful...

Страница 37: ...nsor through temperature sensor detecting circuit and judge the range of AD value If the sampling AD value exceeds upper limit and lower limit in 5 seconds continuously report the error Possible reaso...

Страница 38: ...through temperature sensor detecting circuit and judge the range of AD value If the sampling AD value exceeds upper limit and lower limit in 5 seconds continuously report the error Possible reason Poo...

Страница 39: ...nsor through temperature sensor detecting circuit and judge the range of AD value If the sampling AD value exceeds upper limit and lower limit in 5 seconds continuously report the error Possible reaso...

Страница 40: ...nsor through temperature sensor detecting circuit and judge the range of AD value If the sampling AD value exceeds upper limit and lower limit in 5 seconds continuously report the error Possible reaso...

Страница 41: ...DU Memory Chip Error Error display ODU mainboard LED displayer Error judgment condition and method If ODU mainboard cannot read the memory chip this error will be reported Possible reason Memory chip...

Страница 42: ...Error judgment condition and method When condensing pressure is higher than the protection value system will report overload protection Possible reason Cooling ODU heat exchanger is blocked or heat ex...

Страница 43: ...tion System will shut down for protection Possible reason Compressor 3 phase wire connection is lack of phase or phase reversed System is overloaded and compressor current is too large Drive board IPM...

Страница 44: ...nt condition and method Mainboard doesn t receive the signal of outdoor fan within 30s after the outdoor fan starts up Outdoor fan wiring terminal is not correctly connected to the mainboard Outdoor f...

Страница 45: ...ning speed differs too much from the set running speed In each case compressor runs out of step and system stops for protection Possible reason Compressor 3 phase wire connection is lack of phase or p...

Страница 46: ...ed IPM lead F0 that is of low level than it is IPM module malfunction System will shut down for protection Possible reason Power grid voltage is abnormal Drive board PFC module is damaged Drive board...

Страница 47: ...Error display ODU mainboard LED displayer Error judgment condition and method Check the error code on nixie tube of ODU main control board If PJ is displayed it indicatesinverter compressor startup fa...

Страница 48: ...oard LED displayer Error judgment condition and method Drive board chip resets and starts initialization After the drive board is energized for 5s it detects that the chip resets again In this case it...

Страница 49: ...et current protection value then it can be judged that compressor over current occurs and system will shut down for protection Possible reason System load is too much and compressor current is too lar...

Страница 50: ...between master control and driver is cut off for 30s then itcan be judged that the communication between master control and driver is faulted System will shut down for protection Possible reason Comm...

Страница 51: ...damaged or drive chip current sampling AD terminal is abnormal Troubleshooting 3 4 19 P8 Driver Module High Temperature Protection Error display ODU mainboard LED displayer Error judgment condition an...

Страница 52: ...hod If input current value exceeds the set protection value then it can be judged that AC current protection occurs and system will shut down for protection Possible reason System is heavy loaded and...

Страница 53: ...sampling circuit element is abnormal Drive chip compressor current sampling AD terminal is badly welded or short circuited Troubleshooting PL Bus Low Voltage Protection Error display ODU mainboard LED...

Страница 54: ...busbar voltage sampling circuit element is damaged or driveboard busbar voltage sampling AD terminal is abnormal Troubleshooting PU Charge Loop Error Error display ODU mainboard LED displayer Error ju...

Страница 55: ...he drive board that needs memory chip is not installed with the memory chip The lead or connector of memory chip is badly welded or short circuited Troubleshooting e1 High Pressure Sensor Error Error...

Страница 56: ...een Idea 56 C4 ODU Jumper Cap Error Error display ODU mainboard LED displayer Error judgment condition and method If jumper cap model doesn t match with mainboard report the error Possible reason Jump...

Страница 57: ...er Power failure Restart after power is resumed Power plug is loose Re insert the power plug Thermostat has low battery Replace the batteries Bad cooling or heating effect Air inlet and outlet of the...

Страница 58: ...e sound of 4 way valve switching direction The sound will disappear after the valve changes its direction There is hissing sound when the unit is started or stopped and a slight hissing sound during a...

Страница 59: ...liquid valves should be kept closed in case of refrigerant leak 3 Connect the hose used for evacuation to the vacuum pump 4 Open the switch at the lower pressure side of the manifold valve assembly an...

Страница 60: ...ng the hose Notice that the gas and liquid valve can be opened fully only after the manifold valve assembly is removed 8 Place back the caps of the liquid valve gas valve and also the service port For...

Страница 61: ...e of refrigerant tank Evacuate the middle gauge line Then tighten up the connector again and completely open the valve of refrigerant tank at the same time Step 4 Keep the refrigerant tank erect and p...

Страница 62: ...frigerant tank at the same time Step 4 Turn on the air conditioner and let it run for a while Step 5 Open the low pressure gauge valve Keep the high pressure gauge valve closed Then charge in the rema...

Страница 63: ...t up to check the current of the faulted compressor Use a pressure gauge to measure the pressure of the big and small valves Connect with a computer to monitor the data Refer to the following table ba...

Страница 64: ...Electronic expansion valve The electronic expansion valve will be reset every time when the unit is powered on or off Touch the valve and you can feel the movement of the valve spool In the last stag...

Страница 65: ...peline is under high pressure and high temperature C S pipeline is under low pressure and low temperature Because D is connected to the exhaust side it is under high pressure and high temperature rega...

Страница 66: ...wo terminals Compressor model UV Winding resistance VW Winding resistance WU Winding resistance QXFT F310zN450 0 79 7 0 79 7 0 79 7 Measure the ground resistance of each wiring terminal The resistance...

Страница 67: ...side down The angle of inclination should be within 30 Make sure the lubricant inside the compressors will not flow from the oil balance mouth The suction and exhaust openings of the compressors must...

Страница 68: ...w pressure side Do not discharge too fast It should take more than 12h to completely discharge the refrigerant otherwise large quantity of lubricant will escape from the system together with the refri...

Страница 69: ...it to the factory for inspection NOTE If the compressor is damaged and needs to be replaced the gas liquid separator should also be replaced whether or not there are impurities in the separator or ot...

Страница 70: ...neously from the high pressure side and low pressure side We recommend charging the nitrogen from the big and small valves at the same time The pressure of nitrogen should be above 20kgf Then use soap...

Страница 71: ...e between DC bus P and N on the drive board of the compressor Set the universal meter at the DC voltage and measure the voltage between P and N as shown below If the voltage is below 36V proceed with...

Страница 72: ...the flow of refrigerant in cooling heating Motor The power drive of the fan It enables the fan to run so as to provide smooth currents of air for forced convection and heat exchange of condenser and...

Страница 73: ...used to transfer partial heat of the hot flow to the cold flow so that the flow temperature can reach the specified index It is an energy exchanging device Electronic expansion valve It is used to low...

Страница 74: ...Work instruction 1 Remove the upper cover plate Unscrew the screws of the upper cover plate with a screwdriver 2 Remove the front side plate Unscrew the screws of the upper and front side plate with a...

Страница 75: ...t connect the right side plate to the electric box and the screws around the right side plate 6 Install the right side plate Screw up the screws around the right side plate Be careful to handle well t...

Страница 76: ...76 Removal of front panel NOTE Before removing the front panel make sure power is cut off Step Picture Work instruction 9 Install the front side plate Fix the clasps on both sides of the plate and ti...

Страница 77: ...r color so as to avoid misconnection 2 Break off the pipes that connecting to the compressor gas liquid separator Weld the pipes that are connected to the compressor gas liquid separator Then remove t...

Страница 78: ...or onto the chassis After replacing the compressor gas liquid separator tighten up the base screw nuts 6 Connect the welding interfaces of compressor gas liquid separator to the pipeline Weld the conn...

Страница 79: ...valve Use a soldering gun to loosen the 4 joints on the 4 way valve and then remove the connection pipes NOTE When welding the pipes the 4 way valve should be wrapped with wet cloth for cooling Do not...

Страница 80: ...e a screwdriver to unscrew the two screws on the upper left and lower right corners 2 Remove the fan Use a wrench to remove the specialized nut and gasket of the fan NOTE Please keep the nut and gaske...

Страница 81: ...lace Put on the gasket and use a wrench to secure the screw nut NOTE After installing the fan turn the fan by hand to see if it can run normally If not please check for the reason 6 Install the grill...

Страница 82: ...sen the wire clamp at the bottom of the electric box Unscrew the screws of electric box The connection wires inside and outside the electric box should be removed 3 Remove motor support When removing...

Страница 83: ...o the positions of entering and leaving pipes Weld the connection pipes Nitrogen welding the pressure of nitrogen is 0 5 0 1kgf cm relative pressure NOTE When welding the pipes do not let the flame bu...

Страница 84: ...he screws of electric box The connection wires inside and outside the electric box should be removed When removing the electric box be careful to protect the components 2 Remove the fixed block Remove...

Страница 85: ...ssure of nitrogen is 0 5 0 1kgf cm relative pressure NOTE When welding the pipes do not let the flame burn the other components Install the coil of electronic expansion valve 6 Secure the electric box...

Страница 86: ...the upper cover plate with a screwdriver 2 Remove the front plate Unscrew the screws of the front plate with a screwdriver 3 Remove the front grill Unscrew the screws of the front grill with a screwd...

Страница 87: ...ll Attach the grill back in place and tighten up the screws 7 Remove the valve cover Unscrew the screws of the valve cover with a screwdriver 8 Remove the right side plate Unscrew the screws that conn...

Страница 88: ...r A Sustainable and Efficient Green World YMGI Your Modern Green Idea 88 10 Install the grill Attach the grill back in place and tighten up the screws 11 Install the upper cover plate Tighten up the s...

Страница 89: ...uring screws of the wires with a screwdriver Remove the wires NOTE When removing the wires mark the wire terminals corresponding to their color so as to avoid misconnection 2 Loosen the securing screw...

Страница 90: ...ssis After replacing the compressor tighten up the screws at the foot of compressor 6 Connect the compressor suction port and exhaust port with the pipes Weld the compressor connection pipes and conne...

Страница 91: ...valve Use a soldering gun to loosen the 4 joints on the 4 way valve and then remove the connection pipes NOTE When welding the pipes the 4 way valve should be wrapped with wet cloth for cooling Do not...

Страница 92: ...Work instruction 1 Remove the grill Use a screwdriver to unscrew the two screws on the upper left and lower right corners 2 Remove the fan Use a wrench to remove the specialized nut and gasket of the...

Страница 93: ...ighten up the screw bolt 5 Install the fan Install the fan in place Put on the gasket and use a wrench to secure the screw nut NOTE After installing the fan turn the fan by hand to see if it can run n...

Страница 94: ...crews of electric box Remove the upper lower and front panels Loosen the wire clamp at the bottom of the electric box Unscrew the screws of electric box 2 Remove the electric box The connection wires...

Страница 95: ...itrogen is 0 5 0 1kgf cm relative pressure NOTE When welding the pipes do not let the flame burn the other components Tighten the screws of gas liquid separator 5 Secure the electric box and arrange t...

Страница 96: ...electric box Remove the upper lower and front panels Loosen the wire clamp at the bottom of the electric box Unscrew the screws of electric box 2 Remove the electric box The connection wires inside an...

Страница 97: ...with wet cloth Nitrogen welding the pressure of nitrogen is 0 5 0 1kgf cm relative pressure NOTE When welding the pipes do not let the flame burn the other components Install the coil of electronic e...

Страница 98: ...en draw them out Loosen screws around the electric box with a screwdriver Remove the electric box from the unit 3 Remove the electric element Disconnect the electric element from the wiring terminal L...

Страница 99: ...connect the wires of the fan from the wiring terminal and draw them out Loosen screws located at the front of the fan with a screwdriver Remove the fan from the unit 3 Remove the motor Loosen screws f...

Страница 100: ...with a screwdriver Remove the upper panel from unit 2 Remove the lower panel 1 and panel 2 Loosen screws round the lower panel with a screwdriver Remove the lower panel from unit 3 Remove the enhanced...

Страница 101: ...ur Modern Green Idea 101 5 Remove the primary drain pan Remove the primary drain pan from the unit 6 Remove the secondary drain pan Remove the secondary drain pan from the unit 7 Remove the evaporator...

Страница 102: ...nd Assembly of the Filter Step Picture Work instruction 1 Remove the mounting plate Loosen screws fixing the mounting plate with a screwdriver Remove the mounting plate away from the unit 2 Remove the...

Страница 103: ...d YMGI Your Modern Green Idea 103 ODU Explosive View and Lists of Parts VRUO 2436HP U2B 54 No Material name 1 Coping 2 Electric Box Assy 3 PFC Inductance 4 Filter Board 5 Reactor Sub Assy 6 Power Swit...

Страница 104: ...29 Cut Off Valve 30 Fusible Plug 31 Gas liquid Separator 32 Accumulator 33 4 Way Valve Coil 34 Drainage Hole Cap 35 Temperature Sensor 36 Temperature Sensor 37 Electrical Heater Compressor 38 Electri...

Страница 105: ...dern Green Idea 105 VRUO 4860HP U2B 54 No Description Part Number 1 Top Cover 01265356P03 2 Electric Box Assy 100002067316 3 Inductance 43120122 4 Inductance Box Sub assy 017024060021 5 Drive Board 30...

Страница 106: ...4 Compressor and Fittings 009001000266 25 Filter 07216221 26 Pressure Sensor 43004400001503 27 Electric Expand Valve Fitting 4300034501 28 Electric Expand Valve Fitting 4300034502 29 Chassis Sub assy...

Страница 107: ...cient Green World YMGI Your Modern Green Idea 107 VRUI 24HP U2B 54 VRUI 36HP U2B 54 VRUI 48HP U2B 54 VRUI 60HP U2B 54 No Material name 1 Coping 2 Left Side Plate 3 Electric Box Assy 4 Terminal Board 5...

Страница 108: ...Motor For Centrifugal Fan 13 Brushless DC Motor 14 Top Cover Board Sub Assy 15 Bottom Cover Plate Assy 16 Right Side Plate 17 Bottom Cover Plate Assy 18 Water Tray 19 Strainer 20 Cut Off Valve 3 8 N 2...

Страница 109: ...1 408 3 017 1 00 30 20 51 59 0 743 90 00 194 00 1 363 3 025 0 00 32 00 49 02 0 773 91 00 195 80 1 322 3 033 1 00 33 80 46 8 0 801 92 00 197 60 1 282 3 04 2 00 35 60 44 31 0 835 93 00 199 40 1 244 3 0...

Страница 110: ...326 137 00 278 60 0 372 3 22 47 00 116 60 6 038 2 353 138 00 280 40 0 363 3 222 48 00 118 40 5 809 2 379 139 00 282 20 0 355 3 224 49 00 120 20 5 589 2 404 140 00 284 00 0 346 3 226 50 00 122 00 5 379...

Страница 111: ...0 2 265 2 964 12 00 10 40 123 0 462 84 00 183 20 2 194 2 974 11 00 12 20 116 5 0 484 85 00 185 00 2 125 2 983 10 00 14 00 110 3 0 507 86 00 186 80 2 059 2 992 9 00 15 80 104 6 0 53 87 00 188 60 1 996...

Страница 112: ...8 00 100 40 11 52 2 094 134 00 273 20 0 5351 3 214 39 00 102 20 11 06 2 125 135 00 275 00 0 5219 3 216 40 00 104 00 10 62 2 155 136 00 276 80 0 509 3 218 41 00 105 80 10 2 2 185 137 00 278 60 0 4966 3...

Страница 113: ...0 094 77 00 170 60 6 7608 1 969 13 00 8 60 323 94 0 099 78 00 172 40 6 542 1 995 12 00 10 40 306 23 0 104 79 00 174 20 6 3315 2 021 11 00 12 20 289 61 0 11 80 00 176 00 6 1288 2 046 10 00 14 00 274 02...

Страница 114: ...814 34 00 93 20 33 453 0 759 125 00 257 00 1 6821 2 825 35 00 95 00 32 088 0 784 126 00 258 80 1 6402 2 835 36 00 96 80 30 787 0 809 127 00 260 60 1 5996 2 845 37 00 98 60 29 544 0 835 128 00 262 40...

Страница 115: ...40 453 55 40 1180 109 40 2580 3 20 468 57 20 1220 111 20 2650 5 00 483 59 00 1250 113 00 2710 6 80 504 60 80 1280 114 80 2770 8 60 520 62 60 1320 116 60 2840 10 40 538 64 40 1350 118 40 2910 12 20 55...

Страница 116: ...________________ Technician Name ____________________________________________________________ Phone _____________________________________________________________________ Email ________________________...

Страница 117: ...nt Green World YMGI Your Modern Green Idea 117 USER NOTES Please record any questions or problems you have experienced as a unit history No Date Company Name Technician Name Phone HVAC License Job Not...

Страница 118: ...neered Comfort Products for A Sustainable and Efficient Green World YMGI Your Modern Green Idea 118 SERVICE MAINTENANCE NOTES No Date Type of Service Maintenance Company Name Technician Name Phone HVA...

Страница 119: ...YMGI Engineered Comfort Products for A Sustainable and Efficient Green World YMGI Your Modern Green Idea 119...

Страница 120: ...8 16 and 24 Ton Symphony SOLO DC Inverter 57 2 3 Single Zone 16 SEER 09 36K Btu h 58 4 78 1 Single Zone 18 23 SEER 09 36K Btu h Symphony CHOIR DC Inverter 46 2 DC Inverter Multiple Zone 15 SEER 2x09K...

Отзывы: