FEATURES
1-6
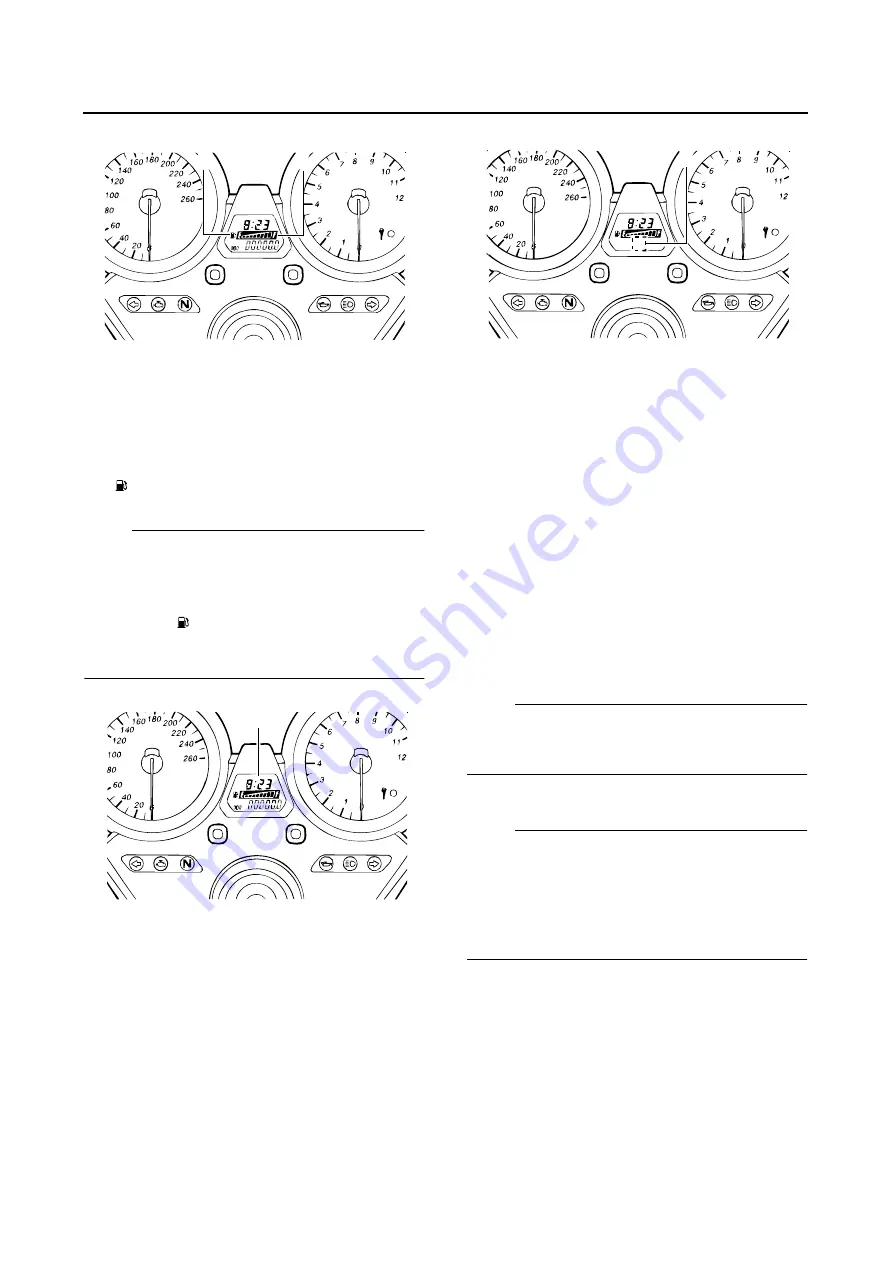
Fuel meter
The fuel meter indicates the amount of fuel in the
fuel tank. The display segments of the fuel meter
disappear towards “E” (Empty) as the fuel level
decreases. When the fuel level warning indica-
tor “ ” starts flashing, refuel as soon as possi-
ble.
NOTE:
This fuel meter is equipped with a self-diagnosis
system. If the electrical circuit is defective, the
following cycle will be repeated until the mal-
function is corrected: All the display segments
and symbol “ ” will flash eight times, then go off
for approximately 3 seconds. If this occurs, refer
to “SIGNALING SYSTEM” on page 7-19.
Clock mode
To set the clock:
1. Turn the key to “ON”.
2. Push the “SELECT” button and “RESET” but-
ton together for at least two seconds.
3. When the hour digits start flashing, push the
“RESET” button to set the hours.
4. Push the “SELECT” button, and the minute
digits will start flashing.
5. Push the “RESET” button to set the minutes.
6. Push the “SELECT” button and then release
it to start the clock.
Self-diagnosis devices
This model is equipped with a self-diagnosis de-
vice for various electrical circuits.
If any of those circuits are defective, the engine
trouble warning light will come on, and then the
odometer/tripmeter display will indicate a
two-digit error code.
If the multi-function display indicates such an
fault code, note the code number, and check the
vehicle. Refer to “FUEL INJECTION SYSTEM”
on page 7-25.
This model is also equipped with a self-diagno-
sis device for the immobilizer system.
If any of the immobilizer system circuits are de-
fective, the immobilizer system indicator light will
flash, and then the display will indicate a
two-digit error code.
NOTE:
If the display indicates error code 52, this could
be caused by transponder interference. If this
error code appears, try the following.
1. Use the code re-registering key to start the
engine.
NOTE:
Make sure there are no other immobilizer keys
close to the main switch, and do not keep more
than one immobilizer key on the same key ring!
Immobilizer system keys may cause signal inter-
ference, which may prevent the engine from
starting.
2. If the engine starts, turn it off and try starting
the engine with the standard keys.
3. If one or both of the standard keys do not
start the engine, re-register standard keys.
If the display indicates any error codes, note the
code number, and then check the vehicle. Refer
to “IMMOBILIZER SYSTEM” on page 7-69.
1. Fuel level warning indicator
2. Fuel meter
1. Clock
1
2
1
1. Error code display
1
Содержание XJR1300 2007
Страница 1: ...SERVICE MANUAL XJR1300 W 5WM 28197 E0 2007 ...
Страница 2: ......
Страница 8: ......
Страница 47: ...LUBRICATION POINTS AND LUBRICANT TYPES 2 24 ...
Страница 48: ...LUBRICATION DIAGRAMS 2 25 EAS28860 LUBRICATION DIAGRAMS ...
Страница 50: ...LUBRICATION DIAGRAMS 2 27 ...
Страница 51: ...LUBRICATION DIAGRAMS 2 28 1 Drive axle 2 Push rod 3 Main axle 4 Camshaft 5 Crankshaft ...
Страница 52: ...LUBRICATION DIAGRAMS 2 29 ...
Страница 53: ...LUBRICATION DIAGRAMS 2 30 1 Nozzle 2 Bypass valve 3 Oil filter element 4 Relief valve ...
Страница 54: ...CABLE ROUTING 2 31 EAS20430 CABLE ROUTING ...
Страница 56: ...CABLE ROUTING 2 33 ...
Страница 58: ...CABLE ROUTING 2 35 ...
Страница 60: ...CABLE ROUTING 2 37 ...
Страница 62: ...CABLE ROUTING 2 39 ...
Страница 64: ...CABLE ROUTING 2 41 ...
Страница 66: ...CABLE ROUTING 2 43 ...
Страница 68: ...CABLE ROUTING 2 45 ...
Страница 70: ...CABLE ROUTING 2 47 ...
Страница 185: ...CAMSHAFTS 5 12 Refer to ADJUSTING THE VALVE CLEAR ANCE on page 3 4 10 Install Timing plate cover ...
Страница 205: ...GENERATOR 5 32 b Measure the stator coil resistances 1 2 ...
Страница 240: ...STARTER CLUTCH 5 67 1 3 2 New ...
Страница 260: ...FUEL TANK 6 3 fuel hose end in the direction of the arrow 1 ...
Страница 269: ...THROTTLE BODIES 6 12 ...
Страница 270: ...AIR INDUCTION SYSTEM 6 13 EAS27040 AIR INDUCTION SYSTEM 1 2 3 4 4 5 4 4 3 2 1 1 2 4 3 ...
Страница 274: ...AIR INDUCTION SYSTEM 6 17 ...
Страница 277: ......
Страница 278: ...IGNITION SYSTEM 7 1 EAS27090 IGNITION SYSTEM EAS27110 CIRCUIT DIAGRAM ...
Страница 282: ...ELECTRIC STARTING SYSTEM 7 5 EAS27160 ELECTRIC STARTING SYSTEM EAS27170 CIRCUIT DIAGRAM ...
Страница 288: ...CHARGING SYSTEM 7 11 EAS27200 CHARGING SYSTEM EAS27210 CIRCUIT DIAGRAM ...
Страница 289: ...CHARGING SYSTEM 7 12 1 Generator 2 Main switch 4 Main fuse 7 Battery ...
Страница 291: ...CHARGING SYSTEM 7 14 ...
Страница 292: ...LIGHTING SYSTEM 7 15 EAS27240 LIGHTING SYSTEM EAS27250 CIRCUIT DIAGRAM ...
Страница 295: ...LIGHTING SYSTEM 7 18 ...
Страница 296: ...SIGNALING SYSTEM 7 19 EAS27270 SIGNALING SYSTEM EAS27280 CIRCUIT DIAGRAM ...
Страница 302: ...FUEL INJECTION SYSTEM 7 25 EAS27330 FUEL INJECTION SYSTEM EAS27340 CIRCUIT DIAGRAM ...
Страница 342: ...FUEL PUMP SYSTEM 7 65 EAS27580 FUEL PUMP SYSTEM EAS27590 CIRCUIT DIAGRAM ...
Страница 345: ...FUEL PUMP SYSTEM 7 68 ...
Страница 346: ...IMMOBILIZER SYSTEM 7 69 EAS27640 IMMOBILIZER SYSTEM EAS27650 CIRCUIT DIAGRAM ...
Страница 355: ...IMMOBILIZER SYSTEM 7 78 ...
Страница 356: ...ELECTRICAL COMPONENTS 7 79 EAS27970 ELECTRICAL COMPONENTS EAS5UXB011 1 3 4 5 7 8 6 10 11 12 13 14 15 15 16 17 18 2 9 ...
Страница 361: ...ELECTRICAL COMPONENTS 7 84 a b Br R Br R ...
Страница 382: ......
Страница 383: ......
Страница 384: ...YAMAHA MOTOR CO LTD 2500 SHINGAI IWATA SHIZUOKA JAPAN ...


