- 6 -
5
5
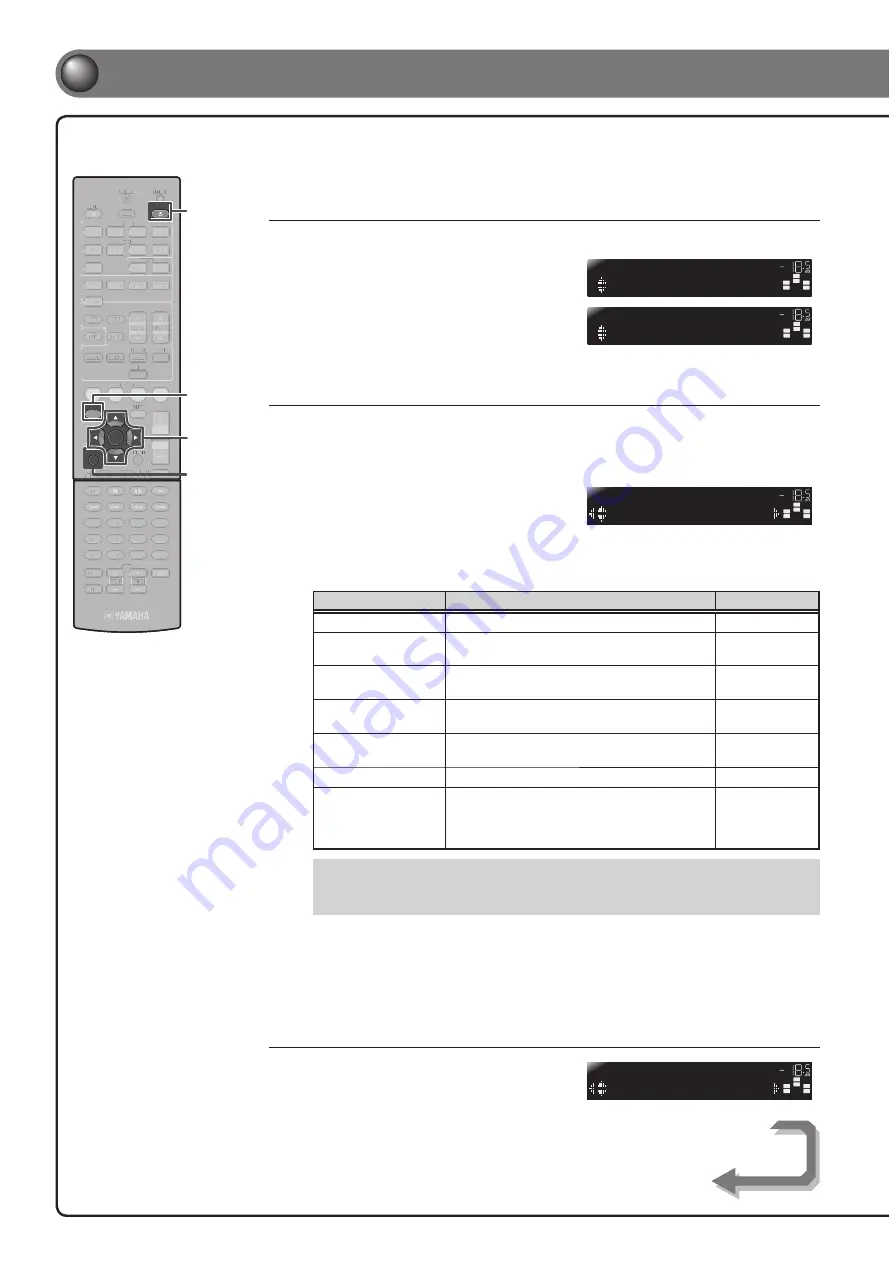
Set up speaker parameters
When you fi nish connecting, adjust the status, size, and volume
of each speaker so that the output is normal.
STEP 1: Display the setting menu
1
Press
RECEIVER
A
on the remote control to switch this unit on.
2
Press
SETUP
on the remote control.
3
Check that “Speaker Setup” appears
and press
ENTER
.
This completes step 1.
STEP 2: Set the speaker status and size
The settings in step 2 are not necessary with the following speaker confi guration:
• Front speaker: woofer diameter is 16 cm or larger
• Center/surround speakers: woofer diameter is 16 cm or smaller
• Subwoofer: connected
4
Check that “Confi g” appears and
press
ENTER
.
5
Use
Cursor
B
/
C
to select the speaker (subwoofer) you want to confi gure,
and then use
Cursor
D
/
E
to select speaker status and size.
Information
Description
Setting
Subwoofer
Sets the subwoofer status.
Yes/None
Front
Selects the size (sound reproduction capacity) of
the front speakers.
Small/Large
Center
Selects the size of the center speakers. Choose
“None” if you do not have a speaker connected.
None/Small/Large
Sur. LR
Selects the size of the surround speakers. Choose
“None” if you do not have a speaker connected.
None/Small/Large
Crossover
Audio with a frequency below this limit will be
output from the subwoofer or the front speakers.
40 Hz to 200 Hz
SWFR Phase
Switchs the phase of the subwoofer.
NRM/REV
Extra Bass
Selects whether to play front channel
low-frequency components through either the front
speakers or the subwoofer (Off), or through both
the subwoofer and front speakers (On).
On/Off
Whether or not you set “Crossover,” “SWFR Phase,” and “Extra Bass” is optional. Check
•
how the effects sound and then confi gure them to your liking.
Use the following as a guide when setting speaker sizes.
•
When you have completed the settings for one speaker, repeat the same procedure for all speakers
to complete settings.
6
Press
RETURN
when setting is complete.
This completes step 2.
STEP 3: Set the distance from the listening point
7
Press
Cursor
C
to display “Distance”
and press
ENTER
.
RECEIVER
SCENE
OPTION
SETUP
RETURN
VOLUME
ENHANCER SUR. DECODE
STRAIGHT
HDMI
AV
AUDIO
TRANSMIT
SLEEP
1
2
3
4
1
2
3
4
1
2
5
V-AUX
TUNER
FM
INFO
MEMORY
AM
PRESET
TUNING
MOVIE
MUSIC
STEREO
BD
DVD
TV
CD
RADIO
MUTE
ENTER
7
8
5
6
9
0
10
1
2
3
4
REC
ENT
TV
TV VOL
TV CH
TOP
MENU
POP-UP
MENU
DISPLAY
SOURCE
CODE SET
INPUT
MUTE
[ A ]
[ B ]
DOCK
7
8
5
6
9
0
10
1
2
3
4
REC
ENT
TV
TV VOL
TV CH
INPUT
MUTE
SCENE
OPTION
VOLUME
ENHANCER SUR. DECODE
STRAIGHT
HDMI
AV
A
A
AUDIO
TRANSMIT
SLEEP
1
2
3
4
1
2
3
4
1
2
5
V-
V
V AUX
TUNER
FM
INFO
MEMORY
AM
PRESET
TUNING
MOVIE
MUSIC
STEREO
BD
DVD
TV
CD
RADIO
MUTE
TOP
MENU
POP-UP
MENU
DISPLAY
A
A
SOURCE
CODE SET
[ A ]
[ B ]
DOCK
SETUP
RECEIVER
A
Cursor
ENTER
RETURN
SW
C
L
SL
SR
R
Config
SP SET
VOL.
SW
C
L
SL
SR
R
Speaker Setup
SETUP
VOL.
SW
C
L
SL
SR
R
Subwoofer
;;
Yes
CONFIG
VOL.
SW
C
L
SL
SR
R
Unit
;;;;;;
feet
DIST
VOL.
Continues to
the next page


