PERIODIC MAINTENANCE AND ADJUSTMENT
7-30
7
4. Remove the burnt out bulb from
the socket by pushing it in and
turning it counterclockwise.
5. Insert a new bulb into the socket,
push it in, and then turn it clock-
wise unit it stops.
6. Install the socket into its original
position, and then securely close
the seat.
Turn signal light bulb
1. Open the seat. (See page 4-7 for
seat opening and closing proce-
dures.)
2. Remove panel B. (See page 7-5.)
3. Remove the turn signal light bulb
socket by turning it counterclock-
wise.
4. Remove the burnt out bulb from
the socket by pulling it out.
5. Insert a new bulb into the socket.
6. Install the socket into its original
position, and then securely close
the seat.
EAU25851
Troubleshooting
Although Yamaha motorcycles receive
a thorough inspection before shipment
from the factory, trouble may occur dur-
ing operation. Any problem in the fuel,
compression, or ignition systems, for
example, can cause poor starting and
loss of power.
The following troubleshooting chart
represents a quick and easy procedure
for checking these vital systems your-
self. However, should your motorcycle
require any repair, take it to a Yamaha
dealer, whose skilled technicians have
the necessary tools, experience, and
know-how to service the motorcycle
properly.
Use only genuine Yamaha replace-
ment parts. Imitation parts may look
like Yamaha parts, but they are often
inferior, have a shorter service life and
can lead to expensive repair bills.
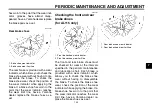
1. Tail/brake light bulb
1. Rear turn signal light bulb socket (x 2)
1. Rear turn signal light bulb (x 2)
Содержание Mio Amore AL115
Страница 1: ...5VV F8199 E3 AL115 S OWNER S MANUAL Read this manual carefully before operating this vehicle ...
Страница 74: ......
Страница 75: ......
Страница 76: ...PRINTED IN THAILAND ...


