DVD-S559
8
DVD-S559
■
REPAIR NOTES
• Repair Tips
None of the components of the following units can be supplied separately.
Each unit must be replaced as a whole in case of a failure.
• DVD Mechanism Unit
• POWER P.C.B.
• DVD P.C.B.
• OPERATION 1 P.C.B.
• OPERATION 2 P.C.B.
• When replacing DVD Mechanism Unit
1. Removing the DVD Mechanism Unit
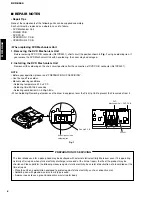
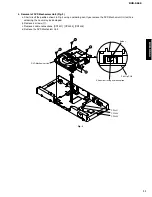
Before removing DVD P.C.B. connector (Ref CP2301), short circuit the position shown in
Fig. 1
using a soldering iron. If
you remove the DVD Mechanism Unit with no soldering, the Laser may be damaged.
2. Installing the DVD Mechanism Unit
Remove all the soldering on the short circuit position after the connection of DVD P.C.B. connector (Ref CP2301).
NOTE
• Before your operation, please read “PREPARATION OF SERVICING” .
• Use the Lead Free solder.
• Manual soldering conditions
• Soldering temperature: 320 ± 20°C
• Soldering time: Within 3 seconds
• Soldering combination: Sn-3.0Ag-0.5Cu
• When Soldering/Removing of solder, use the draw in equipment over the Pick Up Unit to prevent the Flux smoke from it.
Short circuit using a
soldering iron.
Pick Up P.C.B.
DVD
Mechanism Unit
DVD P.C.B.
CP2301
Fig. 1
The laser diode used for a pickup head may be destroyed with external static electricity. Moreover, even if it is operating
normally after repair, when static electricity discharge is received at the time of repair, the life of the product may be
shortened. Please perform the following measure against static electricity, be careful of destruction of a laser diode at the
time of repair.
• Place the unit on a workstation equipped to protect against static electricity, such as conductive mat.
• Soldering iron with ground wire or ceramic type is used.
• A worker needs to use a ground conductive wrist strap for body.
PREPARATION OF SERVICING
Содержание DVD-S559
Страница 5: ...DVD S559 5 DVD S559 FRONT PANEL REAR PANEL WG11920 DVD REMOTE CONTROL ...
Страница 34: ...DVD S559 ...

