background image

Transferring Song, Audio & Kit Data

8

    DTX502  Reference Manual

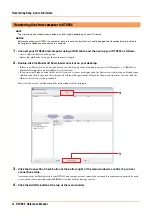
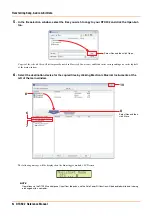
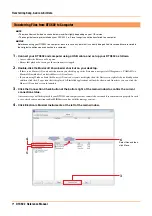
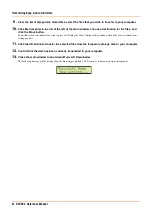
The following message will be displayed on the drum trigger module’s LCD screen.

5.

Click Flash Memory at the left of the main window.

6.

Select the files you wish to transfer and click the Move button.

You will be asked to confirm if you wish to proceed. Clicking the Cancel button in this window will end the process without trans-
ferring any files.

7.

Click the OK button to start file transfer.

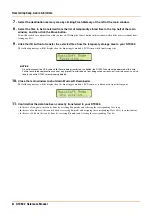
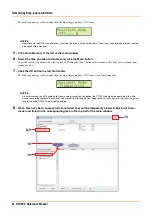
The following message will be displayed on the drum trigger module’s LCD screen while transferring files.

8.

When files have been successfully transferred, they will be temporarily stored in 

Musicsoft Down-

loader

 and listed in the corresponding area in the top half of the main window.

NOTICE

Operations via the DTX502 control panel, input from the pads, and the Auto Power-Off function will be disabled while data is being 
exchanged with a computer.

NOTICE

Do not disconnect the USB cable while files are being transferred. In addition, the DTX502 should not be operated at this time. 
Failure to avoid these precautions can not only prevent transferred data from being saved correctly, but in certain cases, can also 
lead to the entire DTX502 memory being deleted.

10

10

8,9

13

Содержание DTX Drums DTX502

Страница 1: ...nd text box in the toolbar to quickly and conve niently search for them within the text The illustrations and screens shown in this manual are for instructional purposes only and may differ somewhat f...

Страница 2: ...r DTX502 into the model name field and select Musicsoft Downloader System requirements for Musicsoft Downloader will be displayed on the download page 2 Double click the downloaded installer to launch...

Страница 3: ...assign a different number to each of them Your DTX502 only accepts song data in the form of a standard MIDI file SMF of format 0 or 1 When you transfer an SMF of format 1 it will be automatically conv...

Страница 4: ...ations will now be shown and from here you can click the Musicsoft Downloader icon to launch it Musicsoft Downloader will launch and the main window will be displayed 3 Click the Connection Check butt...

Страница 5: ...a in the top half of the main window 6 Select the destination device for the copied files by clicking Electronic Musical Instruments at the left of the main window The following message will be displa...

Страница 6: ...dow to shut down Musicsoft Downloader The following message will be displayed on the drum trigger module s LCD screen as it disconnects from the computer 11 Confirm that the data has been correctly tr...

Страница 7: ...can click the Musicsoft Downloader icon to launch it 3 Click the Connection Check button at the bottom right of the main window to confirm the current connection status An error message will be displ...

Страница 8: ...r module s LCD screen while transferring files 8 When files have been successfully transferred they will be temporarily stored in Musicsoft Down loader and listed in the corresponding area in the top...

Страница 9: ...ill be asked to confirm if you wish to proceed Clicking the Cancel button in this window will end the process without trans ferring any files 11 Click the OK button to transfer the selected files from...

Страница 10: ...rent smart device models and other system requirements vary from app to app Details are provided on the above web page and should be checked carefully before proceeding 3 Confirm the required mode of...

Страница 11: ...off OpenRim 34 A 0 34 A 0 snare off ClosedRim 27 D 0 27 D 0 Tom tom1 Head 48 C 2 48 C 2 tom2 Head 47 B 1 47 B 1 tom3 Head 43 G 1 43 G 1 Ride ride Bow 51 D 2 51 D 2 ride Edge 52 E 2 57 A 2 ride Cup 53...

Страница 12: ...eceived but not transmitted 2 2 10 Portamento Switch 65 Portamento Switch messages are received but not transmitted 2 2 11 Sostenuto 66 Sostenuto messages are received but not transmitted 2 2 12 Harmo...

Страница 13: ...ly F0 7E 7F 06 02 43 00 41 4B 06 00 00 00 7F F7 Identity Reply messages are transmitted but not received 3 2 Universal Real Time 3 2 1 MIDI Master Volume F0 7F 7F 04 01 XX mm F7 XX is ignored mm repre...

Страница 14: ...0 x After Key s o x Touch Ch s x x Pitch Bend x o 0 32 o 1 o Bank Select 4 o o 7 10 o 1 o 1 5 11 x o Control 6 38 x o Data Entry 64 66 x o Change 71 74 x o 96 97 x o RPN Inc Dec 91 x o Effect Depth 10...

Отзывы: