7
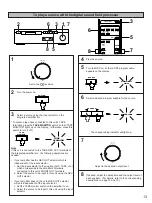
Turn up the volume.
You will hear a test tone (like pink noise) from the left front
speaker, then the center speaker, then the right front
speaker, and then the rear speakers, for about two
seconds each. The display changes as shown below.
* The test tone from the left rear speaker and the right rear
speaker will be heard at the same time.
8
Adjust the sound output level of the center speaker to be
at the same level as that of the front speakers with the
CENTER LEVEL control.
9
Adjust the sound output level of the rear speakers to be
at the same level as that of the front speakers with the
REAR LEVEL control.
10
Cancel the test tone.
Stops flashing and disappears.
Notes
●
Once you have completed these adjustments, you can
adjust whole sound level on your audio system by using
the VOLUME control (or the MASTER VOLUME keys on
the remote control transmitter).
●
If you use external power amplifiers, their volume controls
may also be adjusted to achieve proper balance.
●
In step 8, if the center channel mode is in the “PHANTOM”
position, the sound output level of the center speaker
cannot be adjusted. This is because in this mode, the
center sound is automatically output from the left and right
front speakers.
●
If there is insufficient sound output from the center and
rear speakers, you may decrease the front channel output
level by setting the FRONT LEVEL switch on the rear
panel to “–10 dB”.
11
ms
NORMAL
WIDE
PHANTOM
TEST
DELAY
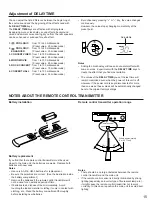
Front (L)
Center
Rear
(L and R)
Front (R)
TEST
MASTER
VOLUME
TAPE MONITOR
PRO LOGIC
ENHANCED
HALL
CNCT VIDEO
EFFECT
ON/OFF
+
–
PROGRAM
—
MONO MOVIE
CENTER MODE
+
–
DELAY
TIME
ROCK
SUR.
10
7
CENTER LEVEL
0
I 0
REAR LEVEL
0
I 0
TEST
ms
NORMAL
WIDE
PHANTOM
TEST
10
7
8 9


