background image

En

10

CINEMA DSP HD

3

 for new surround format

In 2014, the new surround audio format that employs “object-based audio” was 
announced (such as Dolby Atmos). With object-based audio, sounds can be allocated 
freely in 3D space.

The algorithm for CINEMA DSP of this model has been renovated to support those 
signals,

This can enhance the depth of 3D sound experiences and provide high-realistic 
sensation to immerse you in movies.

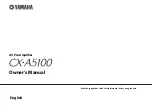
Conceptual diagram of a sound field created by the unit

YPAO is Yamaha original automatic calibration system to optimizing your sound and 
surround environment by using microphone measurement. It can be create ideal 
listening environment for maximizing high sound quality contents playback by adjusting 
various speakers setting and the sound field automatically.

YPAO-R.S.C.

In typical home, the sound has problems such as a blurred low-frequency range or a 
smearing of the acoustical sound image caused by undesirable sound reflection from 
the walls or ceiling. “YPAO-R.S.C.” is technology that reduces only the unwanted 
reflections and produces the acoustic perfection for your listening environment.
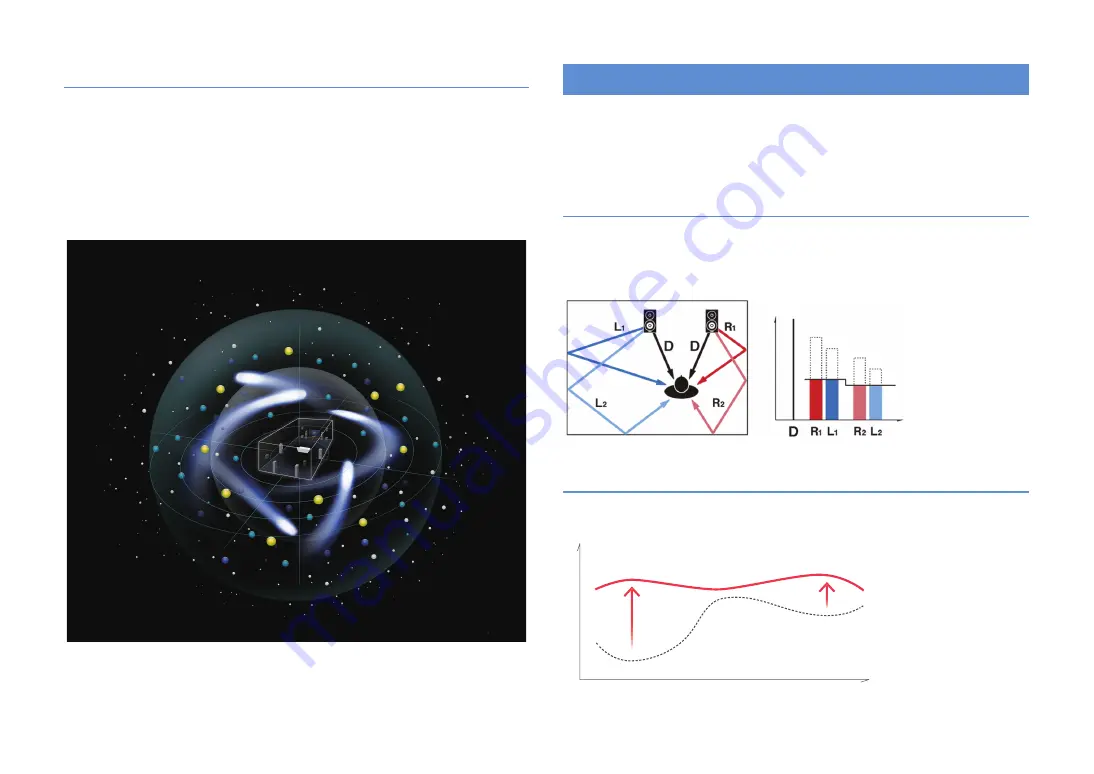
YPAO Volume

YPAO Volume automatically adjusts the high and low frequency levels at any volume 
level so that you hear natural sounds even at low volume.

YPAO

Compensation

Time

Level

YPAO Volume OFF

YPAO Volume ON

Frequency

Low

High

Level

Hig

h

Содержание CX-A5100

Страница 1: ...English AV Pre Amplifier Owner s Manual Read the supplied booklet Safety Brochure before using the unit ...

Страница 2: ...ng a device compatible with the trigger function 41 8 Connecting the power cable 42 9 Selecting an on screen menu language 43 10 Configuring the necessary speaker settings 44 11 Optimizing the speaker settings automatically YPAO 45 Measuring at one listening position single measure 48 Measuring at multiple listening positions multi measure 51 Checking the measurement results 53 Reloading the previ...

Страница 3: ...rent status 106 Switching information on the front display 106 Viewing the status information on the TV 106 Configuring playback settings for different playback sources Option menu 107 Option menu items 107 CONFIGURATIONS 112 Configuring input sources Input menu 112 Input menu items 112 Configuring the SCENE function Scene menu 114 Scene menu items 115 Configuring sound programs surround decoders ...

Страница 4: ...estions 160 Troubleshooting 161 Power system and remote control 161 Audio 163 Video 165 FM AM radio 166 Bluetooth 166 USB and network 167 Error indications on the front display 169 Glossary 170 Audio information 170 HDMI and video information 172 Network information 172 Yamaha technologies 173 Supported devices and file formats 174 Video signal flow 175 Multi zone output 176 Information on HDMI 17...

Страница 5: ...remote control sensor on the unit and remain within the operating range shown below The illustrations of the main unit used in this manual are of the U S A model unless otherwise specified In this manual illustrations of English menu screens are used as examples Some features are not available in certain regions Due to product improvements specifications and appearance are subject to change withou...

Страница 6: ... suit your room YPAO p 45 Reproducing stereo or latest multichannel sounds such as Dolby Atmos with the sound fields like actual movie theaters and concert halls CINEMA DSP HD3 p 70 Enjoying compressed music with enhanced sound Compressed Music Enhancer p 74 USB device Network contents Wide variety of supported content Bluetooth p 79 iPod iPhone p 80 USB p 84 Media server PC NAS p 87 Internet radi...

Страница 7: ... is no space to place them in the rear of your room you can place them in the front and enjoy multichannel surround sound with the 5 speakers placed in the front Virtual CINEMA FRONT DAC Digital Filter p 130 You can select the digital filter type of the audio DAC digital to analog converter to have favorite sounds Ultra Low Jitter PLL Mode p 114 By adjusting the elimination level of jitter in digi...

Страница 8: ...et Extra Bass in the Option menu to On to enjoy enhanced bass sounds p 109 I want to change the on screen menu language Use Language in the Setup menu to select a language from English Japanese French German Spanish Russian Italian and Chinese p 43 I want to update the firmware Use FIRM UPDATE in the ADVANCED SETUP menu to update the unit s firmware p 148 If the unit is connected to the Internet a...

Страница 9: ...e spaces around the world CINEMA DSP allows this data to be applied to create sound fields This unit contains a wide variety of sound programs using CINEMA DSP By selecting a sound program that is appropriate to the content of the playback source such as movies music or games you can maximize the acoustical effectiveness of that specific content For example a sound program designed for movies can ...

Страница 10: ... by using microphone measurement It can be create ideal listening environment for maximizing high sound quality contents playback by adjusting various speakers setting and the sound field automatically YPAO R S C In typical home the sound has problems such as a blurred low frequency range or a smearing of the acoustical sound image caused by undesirable sound reflection from the walls or ceiling Y...

Страница 11: ... can be applied to lossless 44 1 48 kHz content such as from a CD 2 channel PCM or a FLAC file for further heightening of the musicality in the original content p 110 Before processing After processing High quality video processing From low quality digital video to BD Blu ray disc images any content can be played back as a high quality image p 131 Motion adaptive and edge adaptive deinterlacing Mu...

Страница 12: ...hrough the speakers of a different room Enjoying videos using a TV in another room HDMI connection While enjoying multichannel playback in your living room you can enjoy videos and music being input via HDMI on a TV in a different room Useful applications AV CONTROLLER AV CONTROLLER will turn your smartphone tablet into a Wi Fi enabled remote control for your Yamaha network products This applicati...

Страница 13: ...6 INPUT knob Selects an input source 7 Front panel door For protecting controls and jacks p 14 8 VOLUME knob Adjusts the volume Part names and functions INPUT MAIN ZONE VOLUME PURE DIRECT ENTER OPTION ON SCREEN DISPLAY RETURN YPAO MIC PHONES TONE BALANCE STRAIGHT PROGRAM MULTI ZONE VIDEO AUX ZONE 2 ZONE 3 ZONE 4 ZONE CONTROL SILENT CINEMA VIDEO 5V 1A SCENE 1 2 3 4 R L AUDIO HDMI IN INFO WPS MEMORY...

Страница 14: ...controlled by the keys and knobs on the front panel p 100 H INFO WPS key Selects the information displayed on the front display p 106 Enters the wireless network connection setup WPS push button configuration by holding down for 3 seconds p 60 I MEMORY key Registers FM AM radio stations as preset stations p 76 Registers USB network contents as shortcuts p 102 J FM and AM keys Switch between FM and...

Страница 15: ...ng to a Bluetooth device p 79 0 ENHANCER Lights up when Compressed Music Enhancer p 74 is working A CINEMA DSP indicator CINEMA DSP HD lights up when CINEMA DSP p 70 is working CINEMA DSP lights up when CINEMA DSP HD3 is activated B STEREO Lights up when the unit is receiving a stereo FM radio signal TUNED Lights up when the unit is receiving an FM AM radio station signal C PARTY Lights up when th...

Страница 16: ...nstallation Consult your dealer for details D AC IN jack For connecting the supplied power cable p 42 NETWORK DC OUT 5V 0 5A 3 NET MONITOR OUT ZONE OUT HDMI OUT ARC ZONE OUT 1 2 HDMI 1 BD DVD AV 1 AV 2 AV 3 AV 4 AV 5 AV 6 AV 7 TRIGGER OUT 1 2 RS 232C Y PB PR Y PB PR Y PB PR MONITOR OUT ZONE OUT IN OUT IN OUT AV 1 AV 3 REMOTE 1 2 COMPONENT VIDEO A AV 2 B C AV 4 D AV OUT R L AV 3 AV 4 AV 2 AV 1 1 BD...

Страница 17: ... FRONT PRESENCE SURROUND BACK SURROUND SURROUND FRONT FRONT CENTER PRE OUT SURROUND SUR BACK 5 COAXIAL 6 PRE OUT SUBWOOFER CENTER FRONT SURROUND SURROUND BACK FRONT PRESENCE REAR PRESENCE SINGLE FRONT REAR 12V 0 1A FM AM 75Ω ANTENNA HD Radio 4 RADIO R L R L R R R R R L L L L L NETWORK HDMI OUT ARC ZONE OUT 1 2 HDMI 1 BD DVD AV 1 AV 2 AV 3 AV 4 HDCP2 2 AV 5 AV 6 AV 7 IN OUT REMOTE R R L AV 1 AV 2 A...

Страница 18: ...rious settings with one touch Also turns on the unit when it is in standby mode p 67 6 PROGRAM keys Select a sound program p 69 7 External device operation keys Select menus for external devices p 152 8 ON SCREEN key Displays the on screen menu on the TV 9 Menu operation keys Cursor keys Select a menu or a parameter ENTER Confirms a selected item RETURN Returns to the previous screen 0 MODE key Sw...

Страница 19: ...hes the unit to standby mode automatically after a specified period of time has elapsed sleep timer Press repeatedly to set the time 120 min 90 min 60 min 30 min off Q LEVEL key Adjusts the volume of each speaker p 127 R SETUP key Switches the remote control to the setup mode p 149 To operate external devices with the remote control register a remote control code for each device before using p 149...

Страница 20: ...ess antenna p 40 Connect the unit to a router access point with a network cable or prepare the wireless antenna for establishing a wireless network connection 7 Connecting other devices p 41 Connect external devices such as a device with analog multichannel output and a device compatible with the trigger function 8 Connecting the power cable p 42 After all the connections are complete plug in the ...

Страница 21: ...front center and surround speakers to produce natural 3 dimensional sound fields when front presence speakers are connected but no rear presence speakers Ideal speaker layout 1 Placing speakers Speaker type Abbr Function Front L 1 Produce front left right channel sounds stereo sounds Front R 2 Center 3 Produces center channel sounds such as movie dialogues and vocals Surround L 4 Produce surround ...

Страница 22: ...peakers installed to the ceiling or when using the Dolby Enabled speakers as the presence speakers configure the Layout Front Presence Rear Presence setting in the Setup menu before performing YPAO p 44 9 2 channel system 5 1 4 using rear presence speakers This speaker system uses the front and rear presence speakers to produce a highly natural 3 dimensional sound field and also creates Virtual Su...

Страница 23: ...l sound field 7 1 channel system 5 1 2 using front presence speakers This speaker system uses the front presence speakers to produce a natural 3 dimensional sound field and also creates Virtual Surround Back Speaker VSBS using the surround speakers to add a sense of depth to the rear sound field This system is suited for enjoying not only 5 1 channel but also for 7 1 channel contents When using fr...

Страница 24: ...round sounds using the surround back speakers 5 1 channel system This speaker system creates Virtual Presence Speaker VPS using the front center and surround speakers to produce a 3 dimensional sound field and also creates Virtual Surround Back Speaker VSBS using the surround speakers to add a sense of depth to the rear sound field This system is suited for enjoying not only 5 1 channel but also f...

Страница 25: ...er front 4 1 channel system Front 5 1 channel system using front presence speakers This speaker system uses the front presence speakers to produce a natural 3 dimensional sound field and creates the virtual surround speakers using the front speakers to allow you to enjoy multichannel surround sound Virtual CINEMA DSP When using front presence speakers installed to the ceiling or when using the Dol...

Страница 26: ... Cinema DSP HD3 with any layout pattern You can configure the placement patterns for front presence and rear presence speakers separately Front Height Rear Height Install the presence speakers on the front rear side wall It delivers a natural sound field with excellent linkage of left right top and bottom sound spaces and sound extensity effectively Overhead Install the presence speakers to the ce...

Страница 27: ...ng use the following illustration as a reference When using two presence speakers When using four presence speakers Installation position Just above the listening position or the ceiling between extensions of front speakers and listening position Installation position Front presence speakers the ceiling between the extensions of the front speakers and listening position Rear presence speakers the ...

Страница 28: ...rol Audio Return Channel ARC and 3D and Ultra HD 4K video transmission features Use high speed HDMI cables to enjoy 3D or Ultra HD 4K videos Video jacks COMPONENT VIDEO jacks Transmit video signals separated into three components luminance Y chrominance blue PB and chrominance red PR Use a component video cable with three plugs VIDEO jacks Transmit analog video signals Use a video pin cable Input ...

Страница 29: ...from the unit hold down the PUSH button on the unit and then pull the connector out XLR output jacks Match the pins and insert the female connector of the XLR balanced cable until you hear a click When disconnecting the cable from the unit hold down the lever of the connector and then pull it out Digital optical cable Digital coaxial cable Stereo pin cable AUDIO 4 R XLR balanced cable male CENTER ...

Страница 30: ...that its XLR jacks are compatible with the pin assignments of the unit p 29 We recommend using a power amplifier with volume control bypass or without volume control circuit 2 Connecting the power amplifier and subwoofers Caution To prevent the generation of loud noises or abnormal sounds make sure you remove the power cable of the unit and turn off the power amplifier before making connections RE...

Страница 31: ...to the instruction manual of your subwoofer and verify that its XLR jacks are compatible with the pin assignments of the unit p 29 NETWORK HDMI D AV 2 AV 3 AV 4 HDCP2 2 AV 5 AV 6 AV 7 IN OUT REMOTE FRONT PRESE CK RROUND BACK SURROUND SUBWOOFER 2 REAR 1 FRONT SURROUND SURROUND FRONT FRONT CENTER PRE OUT FM Ω ANTENNA 4 RADIO 1 2 E OUT ZONE 3 AM PRE OUT SUBWOOFER CENTER FRONT PRESENCE REAR PRESENCE F...

Страница 32: ...I 1 BD DVD AV 1 AV 2 AV 3 AV 4 HDCP2 2 AV 5 A 3 AV 4 FRONT PRESENCE BACK SURROUND SURROUND FRONT CENTER PRE OUT FM 75Ω ANTENNA 4 RADIO CAL 1 2 ZONE OUT ZONE 2 ZONE 3 AM PRE OUT SUBWOOFER CENTER FRONT SURROUND SURROUND BACK SINGLE FRONT REAR Y PB PR PR PB Y PR PB Y PR PB AV 1 COMPONENT VIDEO A AV 3 C AV 2 B MONITOR OUT ZONE OUT Y R R R 9 9 The unit rear 1 2 3 4 5 6 7 8 9 10 11 12 ...

Страница 33: ...onnect the TV to the MONITOR OUT VIDEO jack If you connect your TV to the unit with a cable other than HDMI video input to the unit via HDMI cannot be output to the TV Operations with TV screen are available only when your TV is connected to the unit via HDMI If you will receive TV broadcasts only from the set top box you do not need to make an audio cable connection between the TV and the unit 3 ...

Страница 34: ... MONITOR OUT ZONE OUT R L R L O O Y PB PR COMPONENT VIDEO P R P B Y PR PB Y The unit rear MONITOR OUT COMPONENT VIDEO jacks Video input component video AUDIO 1 OPTICAL or AUDIO jacks Audio output digital optical or analog stereo TV HDMI OUT ARC ZONE OUT 1 2 1 BD DVD AV 1 AV 2 R R L AV 1 AV 2 AV 3 AV 4 AUDIO 1 AUDIO 2 AUDIO 3 AUDIO 4 REAR PRESENCE FRONT PRESENCE BACK SURROUND SUR 2 TV 1 BD DVD OPTI...

Страница 35: ...the COMPONENT VIDEO A B C COAXIAL c d e and OPTICAL a b f jacks to another input source If you make more than one audio connection for one input source an audio signal played back on the unit will be determined according to the Audio Select setting p 111 in the Option menu HDMI connection Connect a video device to the unit with an HDMI cable If you select the input source by pressing AV 1 7 on the...

Страница 36: ... SURROUND FRONT FR CENTER PRE OUT 1 BD DVD 4 3 COAXIAL COAXIAL COAXIAL FM 75Ω ANTENNA 4 RADIO OPTICAL 1 2 ZONE OUT ZONE 2 ZONE 3 5 6 AM PRE OUT SUBWOOFER CENTER FRONT PRESENCE FRONT SURROUND SURROUND BACK SINGLE FRONT REAR TRIGG OU 1 2 12V Y PB PR PR PB Y PR PB Y PR PB AV 1 COMPONENT VIDEO A AV 3 C AV 2 B MONITOR OUT ZONE OUT Y HDCP2 2 SUBWOOFER CENTER L R R R R R L Y PB PR Y PB PR R L COAXIAL OPT...

Страница 37: ... Audio input jacks on the unit Digital coaxial AV 1 2 COAXIAL AUDIO 3 COAXIAL Digital optical AV 3 OPTICAL AUDIO 1 2 OPTICAL Analog stereo RCA AV 1 4 AUDIO RCA AUDIO 1 3 AUDIO RCA Analog stereo XLR AUDIO 4 AUDIO XLR Turntable PHONO PHONO When connecting a turntable The PHONO jack of the unit is compatible with an MM cartridge To connect a turntable with a low output MC cartridge use a boosting tra...

Страница 38: ...I OUT jack of the unit p 33 You need to prepare an HDMI cable that matches the output jacks on your device The VIDEO AUX HDMI IN jack does not support HDCP 2 2 Composite video analog stereo connection Connect a playback device such as game consoles and camcorders to the unit with a video pin cable and a stereo pin cable If you select V AUX as the input source by pressing V AUX the video audio play...

Страница 39: ...AV 3 AV 4 AUDIO 1 AUDIO 2 AUDIO 3 AUDIO 4 REAR PRESENCE FRONT PRESENCE BACK SURROUND SURROUND FRONT FRONT CENTER PRE OUT 2 TV 1 BD DVD OPTICAL 4 OPTICAL 3 COAXIAL COAXIAL 2 COAXIAL 1 PHONO MULTI CH INPUT GND FM 75Ω ANTENNA 4 RADIO OPTICAL 1 2 ZONE OUT ZONE 2 ZONE 3 5 6 AM PRE OUT SUBWOOFER CENTER FRONT PRESENCE REAR PRESENCE FRONT SURROUND SURROUND BACK SINGLE FRONT REAR TRIGGER OUT 1 2 12V 0 1A Y...

Страница 40: ...arameters such as IP address are properly assigned to the unit in Network p 144 in the Information menu Some security software installed on your PC or the firewall settings of network devices such as a router may block the access of the unit to the network devices or the Internet In these cases configure the security software or firewall settings appropriately Each server must be connected to the ...

Страница 41: ...d input selection If you have a power amplifier or a Yamaha subwoofer that supports a system connection or a device with a trigger input jack you can use the trigger function by connecting the external device to one of the TRIGGER OUT jacks with a monaural mini plug cable You can configure the trigger function settings in Trigger Output1 and Trigger Output2 p 141 in the Setup menu 7 Connecting oth...

Страница 42: ...er cable to the unit and then to an AC wall outlet 8 Connecting the power cable NETWORK OUT OTE REAR PRESENCE FRONT PRESENCE BACK SURROUND SUBWOOFER 2 REAR 1 FRONT SURROUND AC IN RS 232C 3 NET WIRELESS L L L L To an AC wall outlet The unit rear 1 2 3 4 5 6 7 8 9 10 11 12 ...

Страница 43: ... exit from the menu press ON SCREEN The information on the front display is provided in English only 9 Selecting an on screen menu language 1 2 3 4 5 6 7 8 9 10 11 12 CLASSICAL LIVE CLUB ENTERTAIN MOVIE STEREO STRAIGHT INPUT PURE DIRECT MUTE TV TVVOL MODE TV CH PRESET SOURCE RECEIVER AV AUDIO 1 2 3 4 5 6 7 V AUX 1 2 3 4 BLUETOOTH TUNER USB NET PHONO MULTI B A SCENE 1 2 3 4 PROGRAM VOLUME MUTE TOP ...

Страница 44: ...ound p 126 b Use the cursor keys q w to select Front and press ENTER When using the presence speakers for Dolby Atmos playback a Use the cursor keys and ENTER to select Configuration Layout Front Presence p 126 b Use the cursor keys q w to select your front presence speaker layout and press ENTER c If you are using the rear presence speakers also select its layout in Rear Presence 7 To exit from t...

Страница 45: ... RETURN to select CANCEL and proceed to Step 4 4 Turn on the subwoofer and set the volume to half If the crossover frequency is adjustable set it to maximum 5 Place the YPAO microphone at your listening position and connect it to the YPAO MIC jack on the front panel Place the YPAO microphone at your listening position same height as your ears We recommend the use of a tripod as a microphone stand ...

Страница 46: ...st place the YPAO microphone at the listening position you will be seated most frequently Yes Select this option if you will have several listening positions or if you want others to enjoy surround sound You can take measurements at up to 8 different positions in the room The speaker settings will be optimized to suit the area defined by those positions multi measure No default Select this option ...

Страница 47: ...Multi measure 1 listening position front back left right Single measure Yes Enables the angle height measurement The unit will measure angle of each speaker and height of the presence speakers at the listening position and correct the speaker parameters so that CINEMA DSP can create more effective sound fields No default Disables the angle height measurement 1 2 3 4 5 6 7 8 9 10 11 12 ...

Страница 48: ...oceed to Step 3 When angle height measurement is enabled Proceed to Step 2 2 Perform the angle height measurement a Use the cursor keys to select YES and press ENTER Select NO to cancel the angle height measurement b Attach the supplied pole to the center of the microphone base Microphone base Pole CLASSICAL LIVE CLUB ENTERTAIN MOVIE STEREO STRAIGHT INPUT PURE DIRECT MUTE TV TVVOL MODE TV CH PRESE...

Страница 49: ...hen the fourth angle measurement finishes 3 Use the cursor keys to select Save Cancel and press ENTER To check the measurement results select Result For details see Checking the measurement results p 53 Microphone base CLASSICAL LIVE CLUB ENTERTAIN MOVIE STEREO STRAIGHT INPUT PURE DIRECT MUTE TV TVVOL MODE TV CH PRESET SOURCE RECEIVER AV AUDIO 1 2 3 4 5 6 7 V AUX 1 2 3 4 BLUETOOTH TUNER USB NET PH...

Страница 50: ...speaker settings Caution The YPAO microphone is sensitive to heat so should not be placed anywhere where it could be exposed to direct sunlight or high temperatures such as on top of AV equipment 1 2 3 4 5 6 7 8 9 10 11 12 CLASSICAL LIVE CLUB ENTERTAIN MOVIE STEREO STRAIGHT INPUT PURE DIRECT MUTE TV TVVOL MODE TV CH PRESET SOURCE RECEIVER AV AUDIO 1 2 3 4 5 6 7 V AUX 1 2 3 4 BLUETOOTH TUNER USB NE...

Страница 51: ...t all listening positions up to 8 have been taken 3 When the measurements at the positions you want to measure are completed use the cursor keys to select CANCEL and press ENTER When you have taken measurements at 8 listening positions the following screen appears automatically When angle height measurement is disabled Proceed to Step 5 When angle height measurement is enabled Proceed to Step 4 CL...

Страница 52: ... the same way perform the angle measurement for the positions 2 and 3 f Set the YPAO microphone at the top of the pole and perform the fourth angle measurement The following screen appears on the TV when the fourth angle measurement finishes Microphone base 1 2 3 4 5 6 7 8 9 10 11 12 CLASSICAL LIVE CLUB ENTERTAIN MOVIE STEREO STRAIGHT INPUT PURE DIRECT MUTE TV TVVOL MODE TV CH PRESET SOURCE RECEIV...

Страница 53: ...s to select Result and press ENTER You can also select Result from Auto Setup p 121 in the Setup menu which displays the previous measurement results The following screen appears 1 Measurement result items 2 Measurement result details 3 The number of measured positions when multi measure is performed Caution The YPAO microphone is sensitive to heat so should not be placed anywhere where it could b...

Страница 54: ...e low frequency signals effectively Small The speaker cannot reproduce low frequency signals effectively Distance Distance from the listening position to each speaker Level Output level adjustment for each speaker Angle Horizontal Horizontal angle of each speaker at the listening position Height Height of the presence speakers above the level of the listening position 1 2 3 4 5 6 7 8 9 10 11 12 CL...

Страница 55: ...cted but no surround speakers are connected Surround speakers need to be connected in order to use surround back speakers Follow the on screen instructions to exit YPAO turn off the unit and power amplifier and then reconnect the speakers E 7 No MIC The YPAO microphone has been removed Connect the YPAO microphone to the YPAO MIC jack firmly and follow the on screen instructions to start the measur...

Страница 56: ...e you can ignore the message The pin assignments of the XLR jacks of the unit and power amplifier are not same Check the pin assignments of the XLR jacks of the power amplifier If they are not compatible with the pin assignments of the unit p 29 change the pin assignment setting of the power amplifier or use unbalanced RCA connections W 2 Over Distance A speaker is placed more than 24 m 80 ft from...

Страница 57: ...to a wireless router access point In such case place them close to each other Connecting without a wireless router access point Connect a mobile device to the unit directly You can use the application for smartphone tablet AV CONTROLLER p 12 to control the unit from mobiles devices or enjoy music files stored on mobiles devices on the unit For details on connection see Connecting a mobile device t...

Страница 58: ...d press ENTER 7 Use the cursor keys q w and ENTER to check Wireless Wi Fi and select OK The checkmark indicates the current setting 8 Use the cursor keys q w and ENTER to check Share Wi Fi Settings iOS and select NEXT Yes Do you own iOS devices iPhone iPod touch Yes A p 58 B p 60 Does your wireless router access point have a WPS button C p 61 No No 1 2 3 4 5 6 7 8 9 10 11 12 CLASSICAL LIVE CLUB EN...

Страница 59: ...relessly You need iOS device with iOS 7 or later USB Cable You can apply the connection settings on the iOS device to the unit using a USB cable For details see Sharing the iOS device setting using a USB cable You need iOS device with iOS 5 or later The name of the unit Tap here to start setup The network currently selected 1 2 3 4 5 6 7 8 9 10 11 12 CLASSICAL LIVE CLUB ENTERTAIN MOVIE STEREO STRA...

Страница 60: ...e WPS button on the wireless router access point When the connection process finishes Completed appears on the front display If Not connected appears repeat from Step 1 or try another connection method DISPLAY RETURN YPAO MIC PHONES VIDEO AUX ZONE 2 ZONE 3 ZONE 4 ZONE CONTROL SILENT CINEMA VIDEO 5V 1A R L AUDIO The unit front About WPS WPS Wi Fi Protected Setup is a standard established by the Wi ...

Страница 61: ...ice setting p 58 Access Point Scan You can set up a wireless connection by searching for an access point For details on settings see Searching for an access point p 62 Manual Setting You can set up a wireless connection by entering the required information such as SSID manually For details on settings see Setting up the wireless connection manually p 62 PIN Code You can set up a wireless connectio...

Страница 62: ...he wireless connection setting screen appears on the TV You need to setup the SSID network name encryption method and security key for your network 1 Use the cursor keys and ENTER to enter the SSID of the access point and select NEXT 2 Use the cursor keys q w and ENTER to check the security method of the access point and select NEXT Settings None WEP WPA2 PSK AES Mixed Mode 1 2 3 4 5 6 7 8 9 10 11...

Страница 63: ...n the TV screen 2 Enter the unit s PIN code into the wireless router access point For details on settings refer to the instruction manual of the wireless router access point 3 Use the cursor keys e r to select CONNECT and press ENTER to start the connection process When the connection process finishes Completed appears on the TV screen If Not connected appears repeat from Step 1 or try another con...

Страница 64: ... cursor keys q w and ENTER to check Wireless Direct and select OK The checkmark indicates the current setting 8 Use the cursor keys q w and ENTER to check the desired security method and select NEXT Settings None WPA2 PSK AES If you select None the connection may be insecure since the communication is not encrypted 1 2 3 4 5 6 7 8 9 10 11 12 CLASSICAL LIVE CLUB ENTERTAIN MOVIE STEREO STRAIGHT INPU...

Страница 65: ...ct the SSID displayed in Step 10 from the list of available access points c When you are prompted for a password enter the security key displayed in Step 10 12To exit from the menu press ON SCREEN 1 2 3 4 5 6 7 8 9 10 11 12 CLASSICAL LIVE CLUB ENTERTAIN MOVIE STEREO STRAIGHT INPUT PURE DIRECT MUTE TV TVVOL MODE TV CH PRESET SOURCE RECEIVER AV AUDIO 1 2 3 4 5 6 7 V AUX 1 2 3 4 BLUETOOTH TUNER USB N...

Страница 66: ... an HDMI output jack by selecting a scene p 67 When OUT 1 2 is selected the unit outputs video signals at the highest resolution supported by both TVs or projectors connected to the unit For example if you have connected a 1080p TV to the HDMI OUT 1 jack and a 720p TV to the HDMI OUT 2 jack the unit outputs 720p video signals If the HDMI OUT 2 jack is assigned to Zone2 or Zone4 p 139 you can turn ...

Страница 67: ...Selecting the input source and favorite settings with one touch SCENE SCENE SCENE key Input Input p 66 AV 1 AUDIO 1 NET RADIO TUNER Audio Select p 111 Auto Auto HDMI Output HDMI Output p 66 OUT 1 2 OUT 1 2 OUT 1 2 OUT 1 2 Mode Sound Program p 69 Sci Fi STRAIGHT 11ch Stereo 11ch Stereo Pure Direct Mode p 129 Auto Auto Auto Auto Enhancer p 74 Off On On On Enhancer Hi Res Mode p 110 On On On 1 2 3 4 ...

Страница 68: ...e menu Selecting setting items to be included as scene assignments In addition to the default scene assignments Input HDMI Output and Mode you can also include the following setting items as the scene assignments in Detail p 116 in the Scene menu VOLUME SBL SBR SW1 SL SR C L R SET Complete SCENE1 Sound Tone Control YPAO Volume Adaptive DRC Extra Bass Surround CINEMA DSP 3D Mode Dialogue Lift Dialo...

Страница 69: ...ys to select a sound program surround decoder and press ENTER You can also switch the sound programs and surround decoder by pressing PROGRAM You can change the settings of the surround programs and surround decoders in the DSP Program menu p 117 The sound mode can be applied separately to each input source You can check which speakers are currently outputting sound by looking at the channel indic...

Страница 70: ...feeling without disturbing the original acoustic positioning of multichannel audio such as Dolby Digital and DTS Its design is based on the concept of the ideal movie theater in which the audience is surrounded by beautiful reverberations from the left right and rear Spectacle This program delivers the scale and grandeur of spectacular movie productions It delivers an expansive sound space to matc...

Страница 71: ... highly concentrated It is also characterized by high energy immediate sound Hall in Munich A This sound field simulates a concert hall with approximately 2 500 seats in Munich using stylish wood for the interior finishing as normal standards for European concert halls Fine beautiful reverberations spread richly creating a calming atmosphere The listener s virtual seat is at the center left of the...

Страница 72: ...vely wide space with a high ceiling like an audience hall in a palace It offers pleasant reverberations that are suitable for courtly music and chamber music Village Gate This is the sound field at a jazz club that was in New York It is in a basement and has a relatively spacious floor area The listener s virtual seat is at the center left of the hall Village Vanguard The Jazz club is on 7th Avenu...

Страница 73: ...ng overhead will be created especially when object based audio such as Dolby Atmos content is played bPLIIx Movie Use the Dolby Pro Logic IIx decoder or Dolby Pro Logic II decoder suitable for movies Sounds will be output from the surround surround back speakers even when 2 channel source is input bPLII Movie bPLIIx Music Use the Dolby Pro Logic IIx decoder or Dolby Pro Logic II decoder suitable f...

Страница 74: ...nnel PCM and FLAC when Hi Res Mode p 110 in the Option menu is set to On default 1 Press ENHANCER Each time you press the key Compressed Music Enhancer is enabled or disabled Compressed Music Enhancer does not work on signals whose sampling rate is over 48 kHz You can also use Enhancer p 110 in the Option menu to enable disable Compressed Music Enhancer VOLUME L R PURE DIRECT VOLUME SBL SBR SW1 SL...

Страница 75: ...lly Numeric keys Enter a frequency directly For example to select 98 50 MHz press 9 8 5 and 0 or ENT TUNED lights up when a signal is received from a radio station STEREO also lights up when a stereo signal is received Wrong Station appears when you enter a frequency that is out of reception range You can switch between Stereo stereo and Mono monaural for FM radio reception in FM Mode p 111 in the...

Страница 76: ... preset number 01 to 40 directly by using the numeric keys after pressing PRESET once No Presets appears when no radio stations are registered Wrong Num appears when an invalid number is entered Empty appears when a preset number not in use is entered To clear preset stations use Clear Preset or Clear All Preset p 78 VOLUME SBL SBR SW1 SL SR C L R STEREO TUNED Preset OK 01 FM 98 50MHz Preset Prese...

Страница 77: ... the current frequency press the cursor keys q w while READY is displayed To cancel the search press RETURN Texts in parentheses denote indicators on the front display The following screen appears for about 3 seconds when the search finishes TP Not Found appears for about 3 seconds when no traffic information stations are found Program Service Program service name Program Type Current program type...

Страница 78: ...sting stations are stored automatically by Auto Preset Menu Function Browse Moves to the browse screen preset station list Screen Off Closes the screen display and shows the background Press one of the menu operation keys to redisplay it 1 2 3 Menu Submenu Function Utility Memory Registers the current station to the preset number selected in the list Auto Preset Automatically registers FM radio st...

Страница 79: ...s to the Bluetooth device after Step 1 To establish another Bluetooth connection first terminate the current Bluetooth connection To terminate the Bluetooth connection perform one of the following operations Perform the disconnect operation on the Bluetooth device Select an input source other than Bluetooth on the unit In the Setup menu select Bluetooth Audio Receive Disconnect You can use the ext...

Страница 80: ... supplied with the iPod 1 Connect the USB cable to the iPod 2 Connect the USB cable to the USB jack The iPod charges while it is connected to the unit If you set the unit to standby mode while the iPod is charging the iPod continues to charge up to 4 hours If Network Standby p 135 in the Setup menu is set to On it continues to charge without limit Disconnect the iPod from the USB jack when it is n...

Страница 81: ... 5 Operation menu Press the cursor key r and then use the cursor keys q w to select an item Press ENTER to confirm the selection Menu Function 1 Page Up Moves to the previous next page of the list 1 Page Down 10 Pages Up Moves 10 pages forward backward 10 Pages Down Return Returns to the higher level list Now Playing Moves to the playback screen Screen Off Closes the screen display and shows the b...

Страница 82: ... press MODE again 2 Operate your iPod itself to start playback Menu Function Browse Moves to the browse screen Screen Off Closes the screen display and shows the background Press one of the menu operation keys to redisplay it 1 3 2 CLASSICAL LIVE CLUB ENTERTAIN MOVIE STEREO STRAIGHT INPUT PURE DIRECT MUTE TV TVVOL MODE TV CH PRESET SOURCE RECEIVER AV AUDIO 1 2 3 4 5 6 7 V AUX 1 2 3 4 BLUETOOTH TUN...

Страница 83: ...andom order x appears in the TV screen Albums Albums Plays back albums in random order x appears in the TV screen Repeat Repeat Off Off Turns off the repeat function One One Plays back the current song repeatedly c appears in the TV screen All All Plays back all songs repeatedly v appears in the TV screen CLASSICAL LIVE CLUB ENTERTAIN MOVIE STEREO STRAIGHT INPUT PURE DIRECT MUTE TV TVVOL MODE TV C...

Страница 84: ...nts and start playback You can control the USB memory device with the menu displayed on the TV screen 1 Press USB to select USB as the input source The browse screen is displayed on the TV If playback is ongoing on your USB storage device the playback screen is displayed Playing back music stored on a USB storage device DISPLAY RETURN YPAO MIC PHONES SILENT CINEMA 5V 1A The unit front USB storage ...

Страница 85: ...cursor keys q w to select an item Press ENTER to confirm the selection Menu Function 1 Page Up Moves to the previous next page of the list 1 Page Down 10 Pages Up Moves 10 pages forward backward 10 Pages Down Return Returns to the higher level list Now Playing Moves to the playback screen Screen Off Closes the screen display and shows the background Press one of the menu operation keys to redispla...

Страница 86: ...es to the browse screen Screen Off Closes the screen display and shows the background Press one of the menu operation keys to redisplay it 1 3 2 Item Setting Function Shuffle Shuffle Off Off Turns off the shuffle function On On Plays back songs in the current album folder in random order x appears on the TV screen Repeat Repeat Off Off Turns off the repeat function One One Plays back the current s...

Страница 87: ...configure the media sharing setting on each music server For a PC with Windows Media Player installed For Windows Media Player 12 1 Start Windows Media Player 12 on your PC 2 Select Stream then Turn on media streaming 3 Click Turn on media streaming 4 Select Allowed from the drop down list next to the unit s model name 5 Click OK to exit For Windows Media Player 11 1 Start Windows Media Player 11 ...

Страница 88: ...not be selected If the unit detects a series of unsupported files such as images and hidden files during playback playback stops automatically You can register your favorite items as shortcuts and access them directly by selecting the shortcut numbers p 102 CLASSICAL LIVE CLUB ENTERTAIN MOVIE STEREO STRAIGHT INPUT PURE DIRECT MUTE TV TVVOL MODE TV CH PRESET SOURCE RECEIVER AV AUDIO 1 2 3 4 5 6 7 V...

Страница 89: ... to control playback For details see DMC Control p 113 Menu Function 1 Page Up Moves to the previous next page of the list 1 Page Down 10 Pages Up Moves 10 pages forward backward 10 Pages Down Return Returns to the higher level list Now Playing Moves to the playback screen Screen Off Closes the screen display and shows the background Press one of the menu operation keys to redisplay it 1 5 3 2 4 M...

Страница 90: ...screen Repeat Repeat Off Off Turns off the repeat function One One Plays back the current song repeatedly c appears on the TV screen All All Plays back all songs in the current album folder repeatedly v appears on the TV screen CLASSICAL LIVE CLUB ENTERTAIN MOVIE STEREO STRAIGHT INPUT PURE DIRECT MUTE TV TVVOL MODE TV CH PRESET SOURCE RECEIVER AV AUDIO 1 2 3 4 5 6 7 V AUX 1 2 3 4 BLUETOOTH TUNER U...

Страница 91: ...elected playback starts and the playback screen is displayed To return to the previous screen press RETURN You can register your favorite items as shortcuts and access them directly by selecting the shortcut numbers p 102 Listening to Internet radio CLASSICAL LIVE CLUB ENTERTAIN MOVIE STEREO STRAIGHT INPUT PURE DIRECT MUTE TV TVVOL MODE TV CH PRESET SOURCE RECEIVER AV AUDIO 1 2 3 4 5 6 7 V AUX 1 2...

Страница 92: ... 1 Page Down 10 Pages Up Moves 10 pages forward backward 10 Pages Down Return Returns to the higher level list Now Playing Moves to the playback screen Screen Off Closes the screen display and shows the background Press one of the menu operation keys to redisplay it 1 5 3 2 4 Menu Function Bookmark On Adds the station selected in the list to the Bookmarks folder p 93 Browse Moves to the browse scr...

Страница 93: ...u 3 Access the vTuner website http yradio vtuner com with the web browser on your PC and enter the vTuner ID To use this feature you need to create your personal account Create your account using your e mail address 4 Register your favorite radio stations Click the Add icon next to the station name To unregister a station select My Favorites in the Home screen and then click the Remove icon next t...

Страница 94: ...s iPod music contents Follow the procedure below to play back iTunes iPod music contents on the unit 1 Turn on the unit and start iTunes on the PC or display the playback screen on the iPod If the iTunes iPod recognizes the unit the AirPlay icon appears If the icon does not appear check whether the unit and PC iPod are connected to the router properly 2 On the iTunes iPod click tap the AirPlay ico...

Страница 95: ... a s d f g on the remote control to control playback Caution When you use iTunes iPod controls to adjust volume the volume may be unexpectedly loud This could result in damage to the unit or speakers If the volume suddenly increases during playback stop playback on the iTunes iPod immediately Menu Function Screen Off Closes the screen display and shows the background Press one of the menu operatio...

Страница 96: ...ng a TV and speakers Connections TV for analog video playback p 97 TV for digital video playback p 98 Speakers using an external amplifier p 97 Enjoying videos music using only a TV Connection TV p 98 Playing back videos audio in multiple rooms multi zone Video audio signals that can be output to each zone vary depending on how you connect the device in each zone to the unit s output jacks For det...

Страница 97: ...t Monitor Out Assign p 139 in the Setup menu to Zone2 or Zone3 Caution Remove the unit s power cable from the AC wall outlet before connecting an external amplifier HDMI OUT ARC ZONE OUT 1 2 HDMI 1 BD DVD AV 1 AV 2 AV 3 AV 4 HDCP2 2 AV 1 AV 2 AV 3 AV 4 AUDIO 2 AUDIO 3 O 4 REAR PRESENCE FRONT PRESENCE BACK SURROUND SURROUND FRON 1 BD DVD OPTICAL 4 3 COAXIAL COAXIAL 2 COAXIAL H INPUT FM 75Ω ANTENNA ...

Страница 98: ...ack is assigned to Zone2 you can enable disable the audio output from the HDMI OUT 2 jack by setting Audio Output p 139 in the Setup menu to On or Off default HDMI OUT ARC ZONE OUT 1 2 R R L AV 1 AV 2 AV 3 AV 4 AUDIO 1 AUDIO 2 AUDIO 3 AUDIO 4 REAR PRESENCE FRONT PRESENCE 2 TV 1 BD DVD OPTICAL 4 OPTICAL 3 COAXIAL COAXIAL 2 COAXIAL 1 PHONO MULTI CH INPUT GND OPTICAL 5 6 HDCP2 2 SUBWOOFER CENTER SURR...

Страница 99: ...cks with monaural mini jack cables and an infrared signal receiver NETWORK HDMI AV 2 AV 3 AV 4 HDCP2 2 AV 5 AV 6 AV 7 IN OUT REMOTE K ROUND BA SU SUBWOOFER 2 REAR F SURROUND SURROUND FRONT FRONT CENTER PRE OUT FM ANTENNA 4 RADIO 1 2 OUT ZONE 3 AM PRE OUT SUBWOOFER CENTER FRONT PRESENCE REAR PRESENCE FRONT SURROUND SURROUND BACK SINGLE FRONT REAR RS TRIGGER OUT 1 2 12V 0 1A Y PB PR PR PB Y PR PB Y ...

Страница 100: ... p 84 Playing back music stored on media servers PCs NAS p 87 Listening to Internet radio p 91 Playing back music via AirPlay p 94 You can also use the web control p 103 to control Zone2 Zone3 or Zone4 AirPlay is available in Zone2 and Zone3 only when AirPlay playback is ongoing in the main zone The Zone2 Zone3 input automatically switches in conjunction with the input source selected in the main ...

Страница 101: ...rce in multiple rooms party mode The party mode allows you to play back in all zones the same music that is being played back in the main zone During the party mode stereo playback is automatically selected for all zones Utilize this function when you want to use main zone music as background music for a house party 1 Press PARTY Each time you press the key the party mode is turned on or off When ...

Страница 102: ...o another location A Bluetooth connection cannot be established When you register music files stored on a USB storage device or a PC NAS the unit memorizes the relative position of the music files in the folder If you have added or deleted any music files to or from the folder the unit may not recall the music file correctly In such cases register the items again Registering favorite items shortcu...

Страница 103: ... can bookmark the unit s IP address in the browser or create a shortcut link p 105 to access the web control screen quickly in the future However if you are using a DHCP server the IP address of the unit may change each time the unit is turned on If you have enabled the MAC address filter p 136 you need to specify the MAC address of your PC to allow the PC to access the unit For information on how...

Страница 104: ...AD Reloads the current status of the unit Control screen 1 PLAY INFO Selects an input source or controls playback for the selected zone 2 TOP MENU Moves to the top menu screen 3 SCENE Selects a scene for the selected zone 4 POWER Turns on off the power for the selected zone 5 VOLUME Adjusts the volume or mutes the audio output for the selected zone You can also select the increments used for volum...

Страница 105: ...Update Updates the firmware of the unit by using the firmware you have downloaded on the PC Follow the on screen instructions to start the firmware update Create Link Creates a shortcut link to the desired control screen Tips Displays tips for use of the web control Licenses Displays the licenses of the software used in the unit 2 BACK Moves to the top menu screen 3 RELOAD Reloads the current stat...

Страница 106: ... PLƒx MOVIE AV1 Information Bluetooth USB SERVER AirPlay Song song title Artist artist name Album album name DSP Program sound mode name Audio Decoder decoder name During simple playback of iPod DSP Program sound mode name Audio Decoder decoder name NET RADIO Song song title Album album name Station station name DSP Program sound mode name Audio Decoder decoder name Input source group Item Input s...

Страница 107: ... A DRC Sets whether the dynamic range from maximum to minimum is automatically adjusted when the volume is adjusted 108 Dialogue Dialog Dialogue Level Dialog Lvl Adjusts the volume of dialogue sounds 109 Dialogue Lift Dialog Lift Adjusts the perceived height of dialogue sounds 109 Subwoofer Bass Subwoofer Bass SubwooferTrim SW Trim Fine adjusts the subwoofer volume 109 Extra Bass Extra Bass Enable...

Страница 108: ... you are listening at lower volumes or at night Sets whether the dynamic range from maximum to minimum is automatically adjusted when the volume level is adjusted When it is set to On it is useful for listening to playback at a low volume at night Settings If On is selected the dynamic range becomes narrow at a low volume and wide at a high volume FM Mode FM Mode Switches between stereo and monaur...

Страница 109: ...ed when front presence speakers are used Virtual Presence Speaker VPS p 70 is working You may hear dialogue sounds from the surround speakers depending on the listening position Setting range 0 to 5 The bigger the value the higher the position Subwoofer Bass Subwoofer Bass Adjust the subwoofer volume or bass sound Fine adjusts the subwoofer volume Setting range 6 0 dB to 0 0 dB to 6 0 dB 0 5 dB in...

Страница 110: ...FLAC using Compressed Music Enhancer Settings Video Processing Video Process Configures the video signal processing settings Enables disables the video signal processing resolution aspect ratio and video adjustments settings configured in Processing p 131 in the Setup menu Settings Selects a video adjustment setting from presets you have configured in Adjustment p 132 in the Setup menu This settin...

Страница 111: ...ception Settings Input Trim In Trim Audio Select A Sel Auto Auto Automatically selects the audio input jack in the following priority order 1 HDMI input 2 Digital input COAXIAL or OPTICAL 3 Analog input AUDIO RCA or XLR HDMI HDMI Always selects HDMI input No sounds are produced when no signals are input through the HDMI jack Coax Opt Coax Opt Always selects digital input COAXIAL or OPTICAL No soun...

Страница 112: ...g and press ENTER 6 To exit from the menu press ON SCREEN Input menu items Available items vary depending on the selected input source Default settings are underlined Configuring input sources Input menu Item Function Page Rename Icon Select Changes the input source name and icon 113 Decoder Mode Sets the format of digital audio playback to DTS 113 Volume Interlock Enables disables volume controls...

Страница 113: ...o DTS Input sources AV 1 7 V AUX AUDIO 1 4 available only when any audio digital input jack is assigned Settings Volume Interlock Enables disables volume controls from iTunes iPod via AirPlay Input sources AirPlay Settings DMC Control Selects whether to allow DLNA compatible Digital Media Controller DMC to control playback Input source SERVER Settings A Digital Media Controller DMC is a device tha...

Страница 114: ...SB Settings You can change the settings of the SCENE function p 67 using the TV screen 1 Press ON SCREEN 2 Use the cursor keys to select Scene and press ENTER 3 Use the cursor keys e r to select a scene to be configured and press the cursor key q 4 Use the cursor keys q w to select an item and press ENTER Bypass Does not activate the attenuator for the balance input ATT 6dB Activates the attenuato...

Страница 115: ... SCENE5 12 Off To control playback of an HDMI Control compatible device by SCENE link playback you need to set HDMI Control in the Setup menu to On and perform the HDMI Control link setup p 177 Item Function Page Save Registers the current settings in the selected scene 115 Load Loads the settings registered for the selected scene You can also configure the SCENE link playback setting select items...

Страница 116: ...rsor keys e r to select an icon and press the cursor key w 2 Press ENTER to enter the name edit screen 3 Use the cursor keys and ENTER to rename and select ENTER to confirm the entry To clear the entry select CLEAR 4 Use the cursor keys to select OK and press ENTER To restore the default setting select RESET 5 To exit from the menu press ON SCREEN Reset Restores the default settings p 67 for the s...

Страница 117: ...the cursor key q You can still switch the sound program by using cursor keys e r after Step 3 4 Use the cursor keys q w to select an item and press ENTER To return to the previous screen during menu operations press RETURN To restore the default settings for the selected sound program select Reset 5 Use the cursor keys to select a setting and press ENTER 6 To exit from the menu press ON SCREEN Con...

Страница 118: ... it Surround Back Initial Delay Adjusts the delay between the direct sound and surround back sound field generation Room Size Adjusts the broadening effect of the presence sound field 0 1 to 2 0 Higher to enhance the broadening effect and lower to reduce it Surround Room Size Adjusts the broadening effect of the surround sound field Surround Back Room Size Adjusts the broadening effect of the surr...

Страница 119: ...ight Balance is set to 0 Monaural Mix Enables disables monaural sound output Off On Decode Type Item Function Settings bSurround Center Spread Selects whether to spread the center channel signals to left and right when 2 channel source is played Off On Select On to spread center channel signals to left and right if you feel the center sound is too strong when 2 channel source is played bPLIIx Musi...

Страница 120: ...select Setup and press ENTER 3 Use the cursor keys e r to select a menu 4 Use the cursor keys q w to select an item and press ENTER To return to the previous screen during menu operations press RETURN 5 Use the cursor keys to select a setting and press ENTER 6 To exit from the menu press ON SCREEN Configuring various functions Setup menu ...

Страница 121: ...rround Back Selects whether or not surround back speakers are connected and their size 125 Front Presence Selects whether or not front presence speakers are connected and their size 125 Rear Presence Selects whether or not rear presence speakers are connected and their size 125 Subwoofer 1 Subwoofer 2 Selects whether or not a subwoofer is connected to the SUBWOOFER 1 or SUBWOOFER 2 jack and its ph...

Страница 122: ...Decode Mode Enables disables playback of object based audio signals such as Dolby Atmos contents 130 Video Video Mode Enables disables the video signal processing resolution aspect ratio and video adjustments 131 HDMI HDMI Control Enables disables HDMI Control You can also configure the relevant settings such as ARC and TV audio input 133 Audio Output Selects a device to output audio 133 Standby T...

Страница 123: ... for which the MONITOR OUT ZONE OUT jacks are used 139 HDMI OUT2 Assign Select the zone for which the HDMI OUT 2 ZONE OUT jack is used 139 Party Mode Set Enables disables switching to the party mode for each zone 139 Function Input Assignment Assigns the COMPONENT VIDEO COAXIAL and OPTICAL jacks to another input source 140 Display Set Dimmer Front Display Adjusts the brightness of the front displa...

Страница 124: ... Large if the woofer diameter of your speaker is 16 cm 6 1 4 or larger or Small if it is smaller than 16 cm 6 1 4 Selects the size of the front speakers Settings Front is automatically set to Large when both Subwoofer 1 and Subwoofer 2 are set to None Selects whether or not a center speaker is connected and its size Settings Pattern1 2 Copies the Pattern1 parameters to Pattern2 Pattern2 1 Copies t...

Страница 125: ...nd back channel frequency components Small x1 Select this option when one small speaker is connected The subwoofer or front speakers will produce surround back channel low frequency components lower than the specified crossover frequency default 80 Hz Small x2 Select this option when two small speakers are connected The subwoofer or front speakers will produce surround back channel low frequency c...

Страница 126: ...en 2 subwoofers are used Settings This setting is not available when Subwoofer 1 or Subwoofer 2 is set to None Layout Rear Select this option when surround speakers are placed on the rear side of the room Front Select this option when surround speakers are placed on the front side of the room Virtual CINEMA FRONT p 72 works in this case Front Height Select this option when front presence speakers ...

Страница 127: ...ualizer Settings YPAO Flat YPAO Front and YPAO Natural are available only when the measurement results of Auto Setup have already been saved p 45 Press ENTER again to view the measurement results Manual equalizer adjustment 1 Set Parametric EQ to Manual and press ENTER 2 Press ENTER again to enter the edit screen 3 Use the cursor keys to select a speaker and press ENTER To restore the default sett...

Страница 128: ...es the Lipsync adjustment for each input source Choices AV 1 7 V AUX AUDIO 1 4 Settings Selects the method to adjust the delay between video and audio output Setting range Even if Auto Manual Select is set to Auto the automatic adjustment does not work depending on the TV connected to the unit In this case adjust the delay manually in Adjustment Off Does not output test tones On Outputs test tones...

Страница 129: ...DSP effect level Settings Adjustment Maximum Produces audio without adjusting the dynamic range Standard Optimizes the dynamic range for regular home use Minimum Auto Sets the dynamic range for clear sound even at night or at low volumes When playing back Dolby TrueHD signals the dynamic range is automatically adjusted based on the input signal information Off Sets the level to the volume level of...

Страница 130: ... 7 1 channel content is played back DAC Digital Filter Selects the digital filter type of the audio DAC digital to analog converter to have favorite sounds Settings Object Decode Mode Enables disables playback of object based audio signals such as Dolby Atmos contents Settings Off Disables CINEMA DSP HD3 On Enables CINEMA DSP HD3 Off Disables Virtual Presence Speaker VPS On Enables Virtual Presenc...

Страница 131: ...TV normally Selects an aspect ratio to output HDMI video signals when Video Mode is set to Processing Settings This setting functions only when 480i 576i or 480p 576p signals are converted into 720p 1080i 1080p or 2160p 4K signals Direct Disables the video signal processing Processing Enables the video signal processing Configure the settings in Resolution Aspect and Adjustment Resolution Through ...

Страница 132: ...or keys e r to select a setting and press ENTER 4 To exit from the menu press ON SCREEN Detail Enhancement Adjusts the enhancement effect of video details Setting range 0 to 50 Edge Enhancement Adjusts the enhancement effect of video edges Setting range 0 to 50 Brightness Adjusts the video brightness Setting range 100 to 0 to 100 Contrast Adjusts the video contrast Setting range 100 to 0 to 100 Sa...

Страница 133: ...nit via ARC are not supported by the unit set ARC to Off and use the TV s speakers Select whether to use HDMI control to link the standby behavior of the TV and the unit when HDMI Control is set to On Settings Audio Output Selects a device to output audio The Amp and HDMI OUT1 settings are available only when HDMI Control is set to Off The HDMI OUT2 setting is available only when HDMI OUT2 Assign ...

Страница 134: ...o output from the TV On Enables the audio output from the TV Off This setting is available only when HDMI Control is set to Off Does not output videos audio to the TV On Outputs videos audio to the TV The unit consumes more power than when Off is selected Auto Outputs videos audio to the TV If no signals are detected the unit is set to the power saving mode Wired Select this option when you want t...

Страница 135: ... devices network standby Settings DHCP Off Does not use a DHCP server Configure the network parameters manually For details see Manual network settings On Uses a DHCP server to automatically obtain the unit s network parameters such as IP address IP Address Specifies an IP address Subnet Mask Specifies a subnet mask Default Gateway Specifies the IP address of the default gateway DNS Server P Speci...

Страница 136: ... the cursor keys q w to select a value 4 To confirm the setting press ENTER 5 To save the changes use the cursor keys to select OK and press ENTER 6 To exit from the menu press ON SCREEN Network Name Edits the network name the unit s name on the network displayed on other network devices Procedure 1 Press ENTER to enter the name edit screen 2 Use the cursor keys and ENTER to rename and select ENTE...

Страница 137: ...le when Network Standby p 135 is set to Off Multi Zone Configures the multi zone settings Main Zone Set Configures the main zone setting Changes the zone name for main zone displayed on the front display or TV screen Procedure 1 Press ENTER to enter the name edit screen 2 Use the cursor keys and ENTER to rename and select ENTER to confirm the entry To clear the entry select CLEAR Off Disables the ...

Страница 138: ...e is set to Variable Adjusts the audio output timing for Zone2 or Zone3 so that the audio is synchronized with the video Setting range 0 ms to 100 ms 1 ms increments Switches between stereo and monaural for Zone2 or Zone3 output Settings Changes the zone name for Zone2 or Zone3 displayed on the front display or TV screen You can change the zone name in the same manner as Zone Rename in Main Zone S...

Страница 139: ...deo cable connect the video monitor to the COMPONENT VIDEO jacks with a component video cable HDMI OUT2 Assign Select the zone for which the HDMI OUT 2 ZONE OUT jack is used Settings Main Zone2 Zone4 For details on video audio signals that can be output to each zone see Multi zone output p 176 Enables disables the audio output from the HDMI OUT 2 jack when HDMI OUT2 Assign is set to Zone2 Party Mo...

Страница 140: ... and press ENTER 3 To exit from the menu press ON SCREEN You cannot assign both COAXIAL and OPTICAL jacks to the same input source Display Set Configures the settings related to the front display and TV screen display Adjusts the brightness of the front display Setting range 4 to 0 higher to brighten Selects whether to display short messages on the TV screen when the unit is operated such as input...

Страница 141: ...he output level for electronic signal transmission with Manual Low Stops the electronic signal transmission when you switch to the input source specified in this option High Transmits the electronic signal when you switch to the input source specified in this option Low Stops the electronic signal transmission High Transmits the electronic signal Target Zone Main When Trigger Mode is set to Power ...

Страница 142: ...ls 20 Minutes Other models Off Just before the unit enters standby mode AutoPowerStdby appears and then countdown starts in the front display Off Does not protect the settings On Protects the settings until Off is selected Icon Off Does not set the unit to standby mode automatically 20 Minutes Sets the unit to standby mode when you have not operated the unit and no input signals are detected for 2...

Страница 143: ... unit using the TV screen 1 Press ON SCREEN 2 Use the cursor keys to select Information and press ENTER 3 Use the cursor keys e r to select an information type 4 To exit from the menu press ON SCREEN English English 日本語 Japanese French German Spanish Russian Italian Chinese Français Deutsch Español Italiano Viewing information about the unit Information menu ...

Страница 144: ...the input bitstream signal Dialogue The dialogue normalization level of the input bitstream signal Output The channels PRE OUT jacks from which signals are output HDMI Signal Presence or absence of HDMI signal input output HDMI Resolution Resolutions of input signal analog or HDMI and output signal HDMI Analog Resolution Resolutions of input signal analog and signal output at the MONITOR OUT jacks...

Страница 145: ...nt display 1 Set the unit to standby mode 2 While holding down STRAIGHT on the front panel press MAIN ZONE z 3 Press PROGRAM to select an item 4 Press STRAIGHT to select a setting 5 Press MAIN ZONE z to set the unit to standby mode and turn it on again The new settings take effect Remote ID The unit s remote control ID setting p 146 TV Format The unit s video signal type p 147 Tuner Freq Step Asia...

Страница 146: ... ID2 5 Press ENTER to confirm the setting Once the remote control ID is registered successfully OK appears in the display window If ERROR appears registration failed Repeat from Step 3 6 To exit from the setup menu press SETUP The registered remote control codes p 149 are not cleared even if you change the remote control ID Item Function Page REMOTE SENSOR Turns on off of the remote control sensor...

Страница 147: ... has been set to SKIP Selecting the HDMI 4K signal format 4K MODE Select the format of signals input output at the unit when HDMI 4K 60 Hz 50Hz compatible TV and playback device are connected to the unit Settings When MODE 1 is selected use a high speed HDMI cable that supports 18 Gbps FM100 AM10 Select this when you want to adjust the FM frequency by 100 kHz steps and AM by 10 kHz steps FM50 AM9 ...

Страница 148: ...f the unit detects newer firmware over the network the corresponding message will be displayed after ON SCREEN is pressed In this case you can also update the unit s firmware by following the procedure in Updating the unit s firmware via the network p 159 Checking the firmware version VERSION Check the version of firmware currently installed on the unit You can also check the firmware version in S...

Страница 149: ...ayed on the remote control s display window 154 MACRO Programs macro operations sequence of control commands 155 CLEAR Clears the remote control configurations 157 ERASE Erases a function assigned to each key by learning 158 EX IR Extended IR code mode This feature is for the authorized custom installers only CLASSICAL LIVE CLUB ENTERTAIN MOVIE STEREO STRAIGHT INPUT PURE DIRECT MUTE TV TVVOL MODE ...

Страница 150: ...d Repeat from Step 3 6 To exit from the setup menu press SETUP TV operations Once you have registered the remote control code for your TV you can control it using the TV operation keys regardless of the input source selected on the unit PRESET empty or code currently registered TV operation keys INPUT Switches the video inputs of the TV MUTE Mutes the audio output of the TV TV VOL Adjust the volum...

Страница 151: ... be canceled If this happens repeat from Step 2 3 Use the cursor keys q w to select PRESET and press ENTER 4 Press a corresponding input selection key and press ENTER For example press AV1 to set the remote control code for the playback device connected to the AV1 jack 5 Use the numeric keys or cursor keys to enter the 4 digit remote control and press ENTER Once the remote control code is successf...

Страница 152: ...EARN and press ENTER 3 Press one of the following keys depending on the type of your device For playback device press the input selection key corresponding to the input jacks where the device is connected For TV press TV z SOURCE z Turns on off the playback device Menu operation keys Cursor keys Select an item ENTER Confirms a selected item RETURN Returns to the previous screen DISPLAY Switches in...

Страница 153: ... to the menu operation keys external device operation keys or numeric keys However it makes these keys to control the unit impossible If you need to restore the remote control code for the unit perform the following steps a Press SETUP b Use the cursor keys q w to select CLEAR and press ENTER c Use the cursor keys q w to select LEARN and press ENTER d Press RECEIVER z e Hold down ENTER until OK ap...

Страница 154: ...e the cursor keys q w 6 Press ENTER to register the new name Once the new name is successfully registered OK appears in the display window 7 To edit another device name or scene name repeat Steps 3 to 6 8 To exit from the setup menu press SETUP RENAME BD DVD 2 3 5 1 4 6 TUN CH ENHANCER SUR DECODE HDMI OUT MEMORY INFO AM PARTY FM 0 10 LEVEL ENT SETUP ZONE 8 7 SLEEP 9 CLASSICAL LIVE CLUB ENTERTAIN M...

Страница 155: ...ey when the macro operations are enabled MACRO ON Macro operation key Macro operations 1st command 2nd commend RECEIVER z Turns on the unit unregistered Input selection keys Turns on the unit Selects the corresponding input source unregistered for the A and B keys RECEIVER MACRO lights up when macro operations are enabled RECEIVER CLASSICAL LIVE CLUB ENTERTAIN MOVIE STEREO STRAIGHT INPUT PURE DIRE...

Страница 156: ...ing for aturning on the unit bselecting AV1 as the input source cturning on the DVD player assigned to AV1 and dturning on the TV a MACRO 1 Press RECEIVER z b MACRO 2 Press AV1 c MACRO 3 Press SOURCE RECEIVER repeatedly to select AV1 and press SOURCE z d MACRO 4 Press SOURCE RECEIVER repeatedly to select TV and press TV z 6 To confirm the setting hold down ENTER until OK appears on the window disp...

Страница 157: ... key or RECEIVER z 5 Hold down ENTER until OK appears on the window display If NG or ERROR appears clearing has failed Repeat from Step 2 6 To exit from the setup menu press SETUP LEARN Clears the functions learned from other remote controls PRESET Restores the default remote control code settings RENAME Restores the default device name settings MACRO Clears the macro operation settings RESET Clea...

Страница 158: ... Steps 3 to 5 until all desired key assignments are erased 7 To exit from the setup menu press SETUP ERASE 2 3 5 1 4 6 TUN CH ENHANCER SUR DECODE HDMI OUT MEMORY INFO AM PARTY FM 0 10 LEVEL ENT SETUP ZONE 8 7 SLEEP 9 CLASSICAL LIVE CLUB ENTERTAIN MOVIE STEREO STRAIGHT INPUT PURE DIRECT MUTE TV TVVOL MODE TV CH PRESET SOURCE RECEIVER AV AUDIO 1 2 3 4 5 6 7 V AUX 1 2 3 4 BLUETOOTH TUNER USB NET PHON...

Страница 159: ...he System screen Updating the unit s firmware via the network Note Do not operate the unit or disconnect the power cable or network cable during firmware update Firmware update takes about 20 minutes or more depending on your Internet connection speed If the unit is connected to the wireless network network update may not be possible depending on the condition of the wireless connection In this ca...

Страница 160: ... the unit enable HDMI Control on each device and perform the HDMI Control link setup This setup is required every time you add a new HDMI Control compatible device to your system For information on how HDMI Control works between your TV and playback devices refer to the instruction manuals for each device I want to turn off the on screen messages displayed during operations By default short messag...

Страница 161: ... turn on the power is disabled Contact your nearest Yamaha dealer or service center to request repair The power does not turn off The internal microcomputer has frozen due to an external electric shock such as lightning or excessive static electricity or to a drop in the power supply voltage Hold down MAIN ZONE z on the front panel for more than 10 seconds to initialize and reboot the unit If the ...

Страница 162: ...l The remote control is set to control the unit Press SOURCE RECEIVER to set the remote control to control external devices the key lights up in green The corresponding remote control code is not set properly Set the remote control code again p 149 Even if the remote control code is registered properly some products may not respond to the remote control The remote control does not learn new functi...

Страница 163: ... is set too low Perform Auto Setup p 45 or use Level in the Setup menu to adjust the speaker volume p 127 The speaker cable connecting the power amplifier and the speaker is defective If there is no problem with the connection replace with another speaker cable The speaker is malfunctioning To check it replace with another speaker If the problem persists the power amplifier may be malfunctioning N...

Страница 164: ...s set to output 2 channel audio such as PCM only To check it use Audio Signal in the Information menu p 144 If necessary change the digital audio output setting on the playback device Noise hum is heard The unit is too close to another digital or radio frequency device Move the unit further away from the device The cable connecting the unit and playback device is defective If there is no problem w...

Страница 165: ... back contents that require HDCP 2 2 compatible devices both the TV and playback device must support HDCP 2 2 The playback device that supports HDCP 2 2 is connected to the VIDEO AUX HDMI IN jack To play back contents that require HDCP 2 2 compatible devices connect the playback device to the HDMI AV 1 7 jack p 35 The number of devices connected to the HDMI OUT jack is over the limit Disconnect so...

Страница 166: ...ly p 75 Use an outdoor AM antenna Connect it to the ANTENNA AM jack together with the supplied AM antenna AM radio stations cannot be registered as presets Auto Preset has been used Auto Preset is for registering FM radio stations only Register AM radio stations manually p 76 Problem Cause Remedy A Bluetooth connection cannot be established The Bluetooth function of the unit is disabled Enable the...

Страница 167: ...ed back continuously Files not supported by the unit exist in the selected folder If the unit detects a series of unsupported files such as images and hidden files during playback playback stops automatically Do not store the unsupported files in the playback folder The network feature does not function The network parameters IP address have not been obtained properly Enable the DHCP server functi...

Страница 168: ... available There may be a network problem at the radio station or the service may have been stopped Try the station later or select another station The selected Internet radio station is currently broadcasting silence Some Internet radio stations broadcast silence at certain of times of the day Try the station later or select another station Access to the network is restricted by the firewall sett...

Страница 169: ...message stays more than 3 minutes turn off the unit and turn it on again RemID Mismatch The remote control IDs of the unit and the remote control are not identical Change the remote control ID of the unit or the remote control p 146 Remote Off The unit cannot be operated from remote control because the remote control sensor on the main unit is turned off Use the controls on the front panel To use ...

Страница 170: ...mos and Dolby surround playback Dolby Pro Logic II Dolby Pro Logic II enables 5 channel playback from 2 channel sources There are three modes available Music mode for music sources Movie mode for movie sources and Game mode for game sources Dolby Pro Logic IIx Dolby Pro Logic IIx enables 7 channel playback from 2 channel or multichannel sources There are three modes available Music mode for music ...

Страница 171: ...r mobile telephones portable audio players and audio streaming services on Internet because it allows a high compression rate of data while maintaining better audio quality than MP3 Neural X Neural X is the latest downmixing upmixing and spatial remapping technology from DTS It is built in to DTS X to provide upmix of Neural X encoded and non encoded PCM data In DTS X for AVRs and Sound Bars Neura...

Страница 172: ... Multimedia Interface is the world wide standard interface for digital audio video signal transmission This interface transmits both digital audio and digital video signals using a single cable without any loss HDMI complies with HDCP High bandwidth Digital Content Protection and provides a secure audio video interface For further information on HDMI visit the HDMI website at http www hdmi org x v...

Страница 173: ...ssing harmonics in compression music formats such as MP3 As a result this technology provides improved performance for the overall sound system SILENT CINEMA Yamaha has developed a natural realistic sound effect DSP algorithm for headphones Parameters for headphones have been set for each sound program so that accurate representations of all the sound programs can be enjoyed on headphones Virtual ...

Страница 174: ...touch with iOS 4 3 3 or later Mac with OS X Mountain Lion or later and Mac and PC with iTunes 10 2 2 or later as of July 2015 File formats USB PC NAS Linear PCM format only To play back FLAC files stored on a PC or NAS you need to install server software that supports sharing of FLAC files via DLNA on your PC or use a NAS that supports FLAC files Digital Rights Management DRM contents cannot be pl...

Страница 175: ...NENT VIDEO HDMI VIDEO VIDEO VIDEO VIDEO PR PB Y COMPONENT VIDEO PR PB Y COMPONENT VIDEO m Available HDMI out COMPONENT VIDEO out VIDEO out Resolution 480i 576i 480p 576p 720p 1080i 1080p 4K 480i 576i 480p 576p 720p 1080i 1080p 480i 576i HDMI in 480i 576i m m m m m m 480p 576p m m m m m 720p m m m m 1080i m m m m 1080p 50 60 Hz m m m m 1080p 24 Hz m m 4K m COMPONENT VIDEO in 480i 576i m m m m m m m...

Страница 176: ...source selected in the main zone is selected 6 Available when 2 channel PCM signals are input 7 To play back DSD audio in Zone2 Zone3 select Main Zone Sync as the Zone2 Zone3 input with the web control p 103 or use the party mode p 101 Video output m Available 8 Available when Monitor Out Assign p 139 in the Setup menu is set to Zone2 or Zone3 9 Available when HDMI OUT2 Assign p 139 in the Setup m...

Страница 177: ...back device and turning on the TV with a scene selection p 67 Switching the TV input to display the on screen menu when ON SCREEN is pressed Controlling the playback device playback and menu operations without registering remote control codes p 151 Example To use HDMI Control you need to perform the following HDMI Control link setup after connecting the TV and playback devices For details on setti...

Страница 178: ...t setting on the TV We recommend using TV and playback devices from the same manufacturer so that HDMI Control works more effectively We do not assure the operation of all HDMI Control compatible devices Audio Return Channel ARC ARC allows you to input TV audio to the unit with the HDMI cable which transmits video signal to the TV Check the following after the HDMI Control settings 1 Select a TV p...

Страница 179: ...als directly does not decode the bitstream signals on the playback device For details refer to the instruction manual for the playback device Audio signal type Audio signal format Compatible media example 2ch Linear PCM 2ch 32 to 192 kHz 16 20 24 bit CD DVD Video DVD Audio Multichannel Linear PCM 8ch 32 to 192 kHz 16 20 24 bit DVD Audio BD Blu ray disc HD DVD DSD 2 to 5 1ch 2 8224 MHz 1 bit SACD B...

Страница 180: ...ACK SURROUND BACK SURROUND SUBWOOFER 2 REAR 1 FRONT SURROUND SURROUND FRONT FRONT CENTER PRE OUT 2 TV 1 BD DVD OPTICAL 4 OPTICAL 3 COAXIAL COAXIAL 2 COAXIAL 1 PHONO MULTI CH INPUT GND AC IN FM 75Ω ANTENNA 4 RADIO OPTICAL 1 2 ZONE OUT ZONE 2 ZONE 3 5 6 AM PRE OUT SUBWOOFER CENTER FRONT PRESENCE REAR PRESENCE FRONT SURROUND SURROUND BACK SINGLE FRONT REAR RS 232C TRIGGER OUT 1 2 12V 0 1A 3 NET Y PB ...

Страница 181: ...is a trademark of Sony Corporation DLNA and DLNA CERTIFIED are trademarks or registered trademarks of Digital Living Network Alliance All rights reserved Unauthorized use is strictly prohibited Windows Windows is a registered trademark of Microsoft Corporation in the United States and other countries Internet Explorer Windows Media Audio and Windows Media Player are either registered trademarks or...

Страница 182: ...Stereo Front Rear Monox2 ZONE OUT x 2 ZONE2 ZONE3 Headphone x 1 Video MONITOR OUT ZONE OUT Composite x 1 Component x 1 HDMI Output HDMI OUT x 2 HDMI OUT 1 2 barter to ZONE OUT ZONE2 ZONE4 Other jacks YPAO MIC x 1 REMOTE IN x 1 REMOTE OUT x 1 TRIGGER OUT x 2 RS 232C x 1 HDMI HDMI features Deep Color x v Color Auto Lip Sync ARC Audio Return Channel 3D 4K Ultra HD Video Format Repeater Mode VGA 480i ...

Страница 183: ... Output Level Impedance RCA Unbalance Preout Front L R 1 0 V 470 Center 1 0 V 470 Surround L R 1 0 V 470 Surround Back L R 1 0 V 470 Front Presence L R 1 0 V 470 Rear Presence L R 1 0 V 470 Subwoofer 1 2 1 0 V 470 Zone2 Zone3 1 0 V 470 XLR Balance Preout Front L R 2 0 V 470 Center 2 0 V 470 Surround L R 2 0 V 470 Surround Back L R 2 0 V 470 Front Presence L R 2 0 V 470 Rear Presence L R 2 0 V 470 ...

Страница 184: ...se Ratio Video Conversion Off 60 dB or more Monitor Out Frequency Response Video Conversion Off Component MONITOR OUT ZONE OUT 5 Hz to 100 MHz 3 dB FM Section Tuning Range U S A and Canada models 87 5 MHz to 107 9 MHz Asia model 87 5 87 50 MHz to 108 0 108 00 MHz Other models 87 50 MHz to 108 00 MHz 50 dB Quiet Sensitivity IHF 1 kHz 100 MOD Mono 3 µV 20 8 dBf Signal to Noise Ratio IHF 65 dB 64 dB ...

Страница 185: ...ol 149 Extra Bass 109 F Firmware update 148 159 FM radio 75 Frequency step setting 75 147 Front display information 106 H HDCP 38 163 165 HDMI OUT2 Assign 139 HDMI output selection 66 HDMI signal compatibility 179 Headphone 72 Hi Res Mode 110 I Initial Volume 129 138 Input jack assignment 140 Input Trim In Trim 111 Internet radio 91 iPod content playback 80 iPod content playback AirPlay 94 L Lipsy...

Страница 186: ...ion 41 141 Turntable 37 U Unbalanced connection 31 32 USB storage device content playback 84 V Virtual CINEMA FRONT 25 72 Virtual Presence Speaker VPS 23 130 Virtual Surround Back Speaker VSBS 22 130 W Wallpaper 141 Web control 103 Wireless Wi Fi 58 134 Wireless Direct 64 134 WPS 60 172 X XLR jacks 29 Y YPAO Yamaha Parametric room Acoustic Optimizer 45 YPAO Volume 108 Z Zone 96 137 ...

Страница 187: ... 2015 Yamaha Corporation YH133A0 EN ...

Отзывы: