CVP-809/CVP-805 Owner’s Manual
82
8
Record your performance to another Channel by repeating steps 1 – 7.
In step 2, confirm that [Overwrite MIDI] is selected. In step 4, select a Channel which has no
recorded data. In step 5, play the keyboard while listening to the already recorded data.
NOTE
When recording another channel, you can turn already recorded channels on or off in the Mixer display (page 97).
9
Save the recorded performance (step 8 on page 77).
You can convert a recorded MIDI Song in the User memory or USB flash drive to an Audio Song.
Conversion is executed by playing back the MIDI Song and re-recording it as an Audio Song. By default,
the converted data is saved in WAV format, in the same way as Audio recording (page 75).
NOTE
Before using a USB flash drive, be sure to read “Connecting USB Devices” on page 100.
1
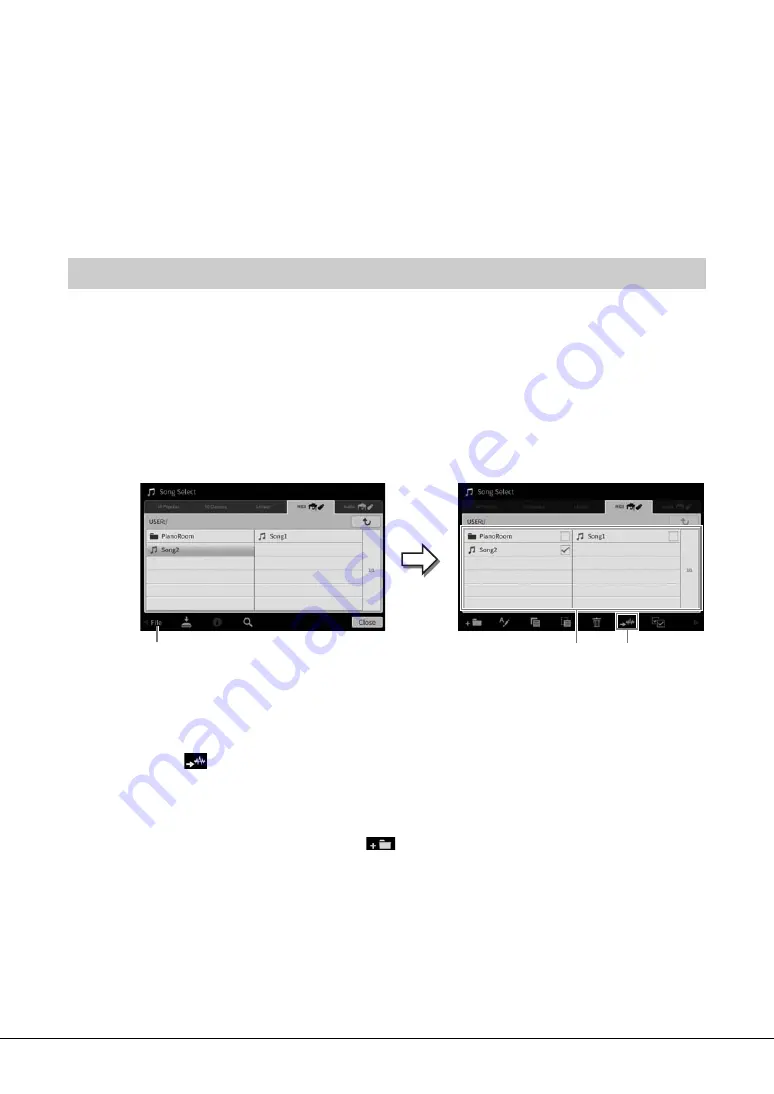
Call up the Song Selection display which contains the MIDI Song to be converted.
2
Touch [File] to call up the File Management icons.
3
Enter a checkmark to the MIDI Song to be converted.
NOTE
Audio Conversion can only be done one file at a time.
4
Touch
(Audio Convert) to call up the Song Selection display for selecting the
Save destination.
5
Specify the Save destination location.
You can add a new folder by touching
(New Folder).
6
Touch [Convert] to start conversion.
This operation starts playback and conversion from MIDI to audio. If you play the keyboard or
input audio signals via a microphone, the [AUX IN] jack, etc. during conversion, these sounds
will also be recorded.
When conversion is completed, the message indicating that the conversion is being executed
will no longer be shown in the display, and the newly created new Audio Song is shown in the
Song Selection display.
Converting a MIDI Song to an Audio Song
2
4
3


