Settings
31
En
SETTINGS
4
Eng
lish
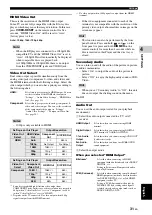
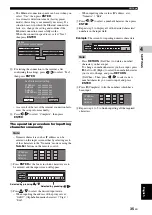
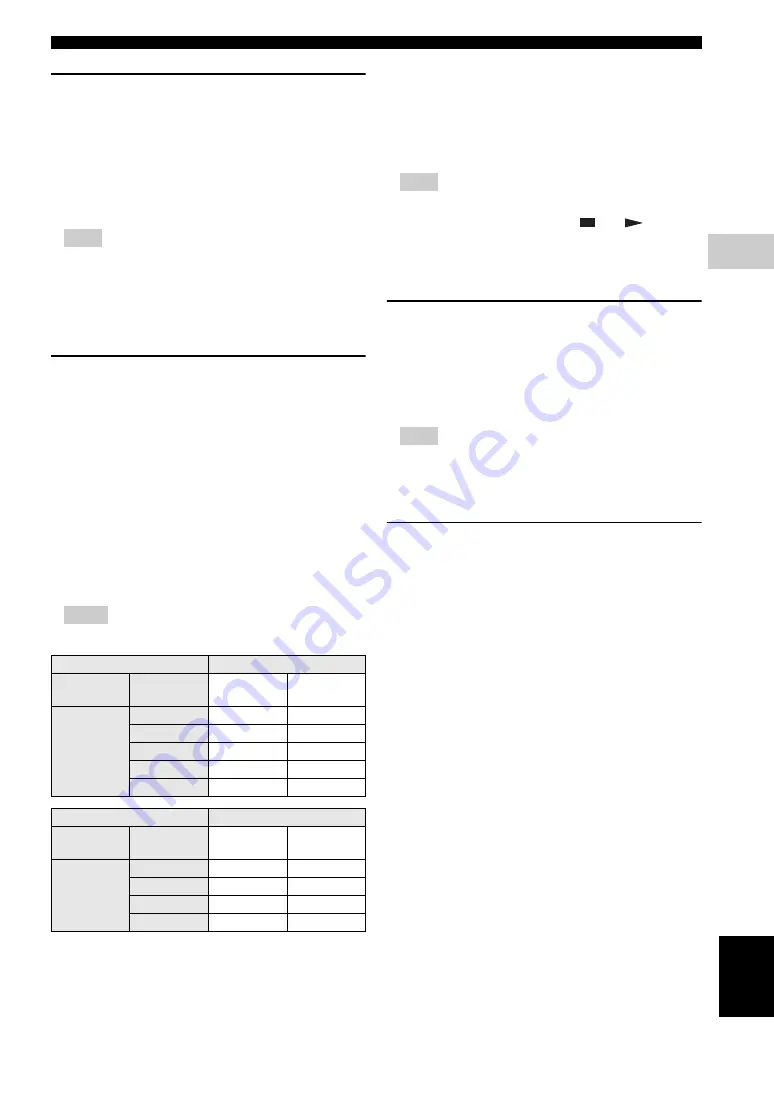
HDMI Video Out
This sets the resolution of the HDMI video output.
Some TV are not fully compatible with the Blu-ray disc
player, which may cause the image distortion. In this case,
press
VIDEO-RESET
on the remote control for five
seconds. “HDMI Video Out” will be reset to “Auto”
(factory preset value).
Auto
*,
1080p
,
1080i
,
720p
,
480p
Note
– When the BD player is connected to a 1080p/24Hz
compatible TV and the “HDMI Video Out” is set to
“Auto”, 1080p/24Hz will automatically be displayed
when compatible discs are played back.
At 1080p/24Hz or 1080p/60Hz, there is no output
from the COMPONENT jacks and VIDEO jack.
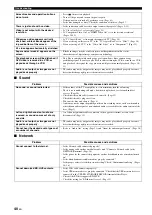
Video Out Select
Dual video output is possible simultaneously from the
analog video jacks (component, S-video, and video) and
the HDMI terminal with the following settings. Select the
video output which you want to have priority according to
the following chart.
Notes
– 1080p is only available in HDMI.
*1
Some discs prohibit high definition video output from
COMPONENT jacks. In this case, video resolution is converted to
480p (when “Video Out Select” is set to “Component”) or 480i
(when “Video Out Select” is set to “HDMI”).
*2
Depends on the TV connected. No video output when 1080p
signal is output from the HDMI terminal.
*3
No video output when 1080p signal is output from the HDMI
terminal.
– If the video equipment connected to each of the
terminals is not compatible with the resolution of the
priority video output, abnormalities in images on the
screen may appear.
Hint
– This function can also be performed by the front
panel buttons. Press and hold
and
on the
front panel (or press and hold
DIMMER
on the
remote control) for more than 4 seconds while no
disc is inserted in this Player and the disc tray is
closed.
Secondary Audio
You can turn on and off the audio of the picture in picture
or audio commentaries.
– Select “On” to output the audio of the picture in
picture.
– Select “Off” to enjoy the high-quality sounds of BD-
Video.
Hint
– When you set “Secondary Audio” to “Off”, this unit
does not output the clicking sound on the menu.
On
,
Off
*
Audio Out
You can set the audio output suited for your playback
environment.
1
Select the audio output connected to a TV or AV
receiver.
2
Select the output mode.
When you selected “HDMI Output”
HDMI
*
:
Select this to give priority to HDMI output. You can
set the resolution of the HDMI video output in
“Settings” - “Audio Video Settings” - “HDMI Video
Out”. (See page 31.)
Component
: Select this to give priority to analog (component, S-
video, and video) output. You can set the resolution
of the component video output in “Settings” -
“Audio Video Settings” - “Component Video Out”.
(See page 30.)
Settings on this Player
Output Resolution
Video Out
Select
HDMI Video
Out
Component
Out
S/CVBS Out
HDMI
Auto
*1 *2
480i
*3
1080p
No Output
No Output
1080i
1080i
*1
480i
720p
720p
*1
480i
480p
480p
*1
480i
Settings on this Player
Output Resolution
Video Out
Select
Component
Video Out
HDMI Out
S/CVBS Out
Component
1080i
*1
1080i
*1
480i
720p
*1
720p
*1
480i
480p
480p
480i
480i
480i
480i
HDMI Output
*:
Select this when you connect using HDMI
terminal.
Digital Output
:
Select this when you connect using DIGITAL
OUT terminal (COAXIAL/OPTICAL).
7.1ch Audio
Output
:
Select this when you connect using AUDIO OUT
(8ch discrete) jacks.
2ch Audio
Output
:
Select this when you do not use SURROUND
sound equipment.
Bitstream*
:
– Select this when connecting to HDMI
equipment with a built-in decoder for DOLBY
DIGITAL, etc.
– Setting to Bitstream will output each audio
signal by Bitstream.
PCM (Surround)
: – Select this when connecting to multi-channel
HDMI equipment (without a built-in decoder
for DOLBY DIGITAL, etc.) or 2ch HDMI
equipment such as TV.
– Setting to PCM (Surround) will output by
LINEAR PCM by decoding audio signals
recorded in each audio output mode such as
DOLBY DIGITAL, DTS.


