background image

20

TOOLS for 01X/Plug-in Effect  Manuel d’installation

Configuration de mLAN AUTO W.CLK (01X)

19

Lorsque le logiciel mLAN Driver est installé, le mLAN Auto Connector 

démarre. Pour être certain que les paramètres du mLAN Auto 

Connector sont correctement reçus, réglez le paramètre mLAN AUTO 

W.CLK (wordclock) (Horloge automatique) sur ENABLE (Activé), 

comme décrit dans les instructions suivantes. Vous pouvez également 

effectuer ces réglages après avoir lancé le mLAN Auto Connector.

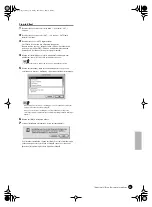
Configuration sur le 01X

19-1

Ouvrez le mode UTILITY (Utilitaire) en appuyant sur la 

touche [UTILITY] du 01X.

19-2

Appelez l'écran mLAN AUTO W.CLK en appuyant sur 

W.CLK (bouton de canal 3).

19-3

Appuyez sur ENABLE (bouton de canal 1).

19-4

Le message « ENABLE SURE? » (Etes-vous sûr de vouloir 

activer ?) apparaît. Modifiez le réglage en appuyant sur le 

bouton de canal 8.

• Si le paramètre est déjà réglé sur ENABLE, le message n'apparaît pas. 

Vous pouvez donc passer à l'étape suivante.

• A moins d'effectuer une sauvegarde système, les réglages Utility du 01X sont 

perdus lors de la mise hors tension de l'appareil. (Reportez-vous au mode 

d'emploi du 01X.) Pour être certain que les réglages effectués ici seront effectifs 

lors de la prochaine mise sous tension du 01X, effectuez une sauvegarde 

système en appuyant sur la touche [UTILITY] tout en maintenant la touche 

[SHIFT] enfoncée.

Passez à l’étape suivante.

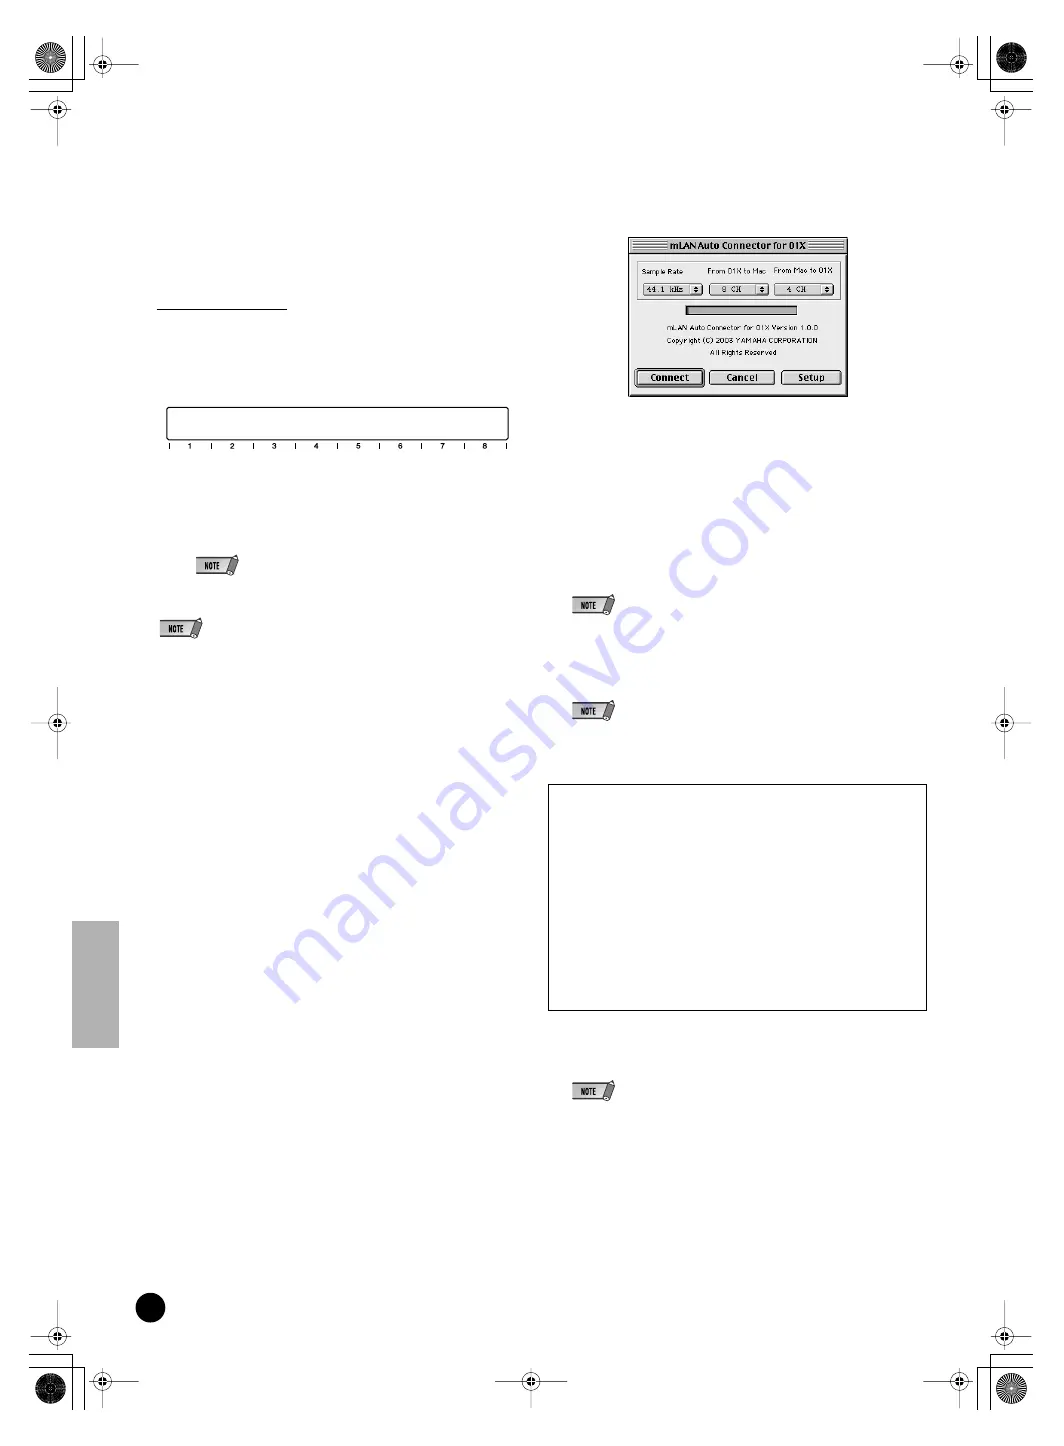
Paramètres de mLAN Auto Connector

20

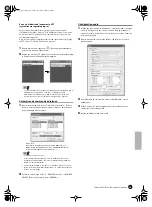
Modifiez les paramètres du mLAN Auto Connector en fonction de 

l'usage que vous comptez faire du mLAN.

Sample Rate (Vitesse d'échantillonnage)

Détermine la fréquence d'échantillonnage 

(fréquence de l'horloge)

From 01X to Mac (Du 01X vers le Mac)

Détermine le nombre de canaux de transmission 

audio du mLAN depuis le 01X vers l'ordinateur.

From Mac to 01X (Du Mac vers le 01X)

Détermine le nombre de canaux de transmission 

audio du mLAN depuis l'ordinateur vers le 01X. 

Les deux derniers canaux sont connectés à 

l'entrée du contrôleur.

• Le fait de connecter le 01X à l'aide du mLAN Auto Connector peut provoquer 

des bruits parasites au niveau de certains périphériques. Prenez dès lors soin de 

baisser le volume de votre système amplificateur/haut-parleur ou du bouton 

MONITOR/PHONES (Contrôleur/Casque) ou du curseur Stereo lors de 

l'opération « Connect ».

• Si vous paramétrez la vitesse d'échantillonnage sur 96 kHz/88,2 kHz lorsque le 

paramètre LAYER (Couche) du 01X est réglé sur 17 – 24 (mLAN), le paramètre 

LAYER 1 – 8 est appelé et le canal 1 est automatiquement sélectionné.

21

Cliquez sur [Connect] (Connecter). Si les connexions sont correctes, 

le mLAN Auto Connector termine l'opération et la communication de 

données du mLAN démarre, le 01X jouant le rôle d'esclave.

• En cas d'échec de la connexion, redémarrez le mLAN Auto Connector (situé 

dans le dossier « mLANTools » du dossier de destination de l'installation), puis 

cliquez à nouveau sur [Connect].

• Lorsque vous démarrez le mLAN Auto Connector pour la première fois, les 

fichiers suivants apparaissent dans le dossier Trash (Poubelle). Vous pouvez 

supprimer ces fichiers.

• AutoConnector01X alias

• AutoConnector01X launcher

Passez à l’étape suivante.

UTILITY

mLAN AUTO W.CLK

[INT : 48 kHz] 1/2

ENABLE/DISABLE

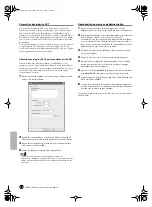
Paramétrage de la vitesse de transition de l'horloge

Cliquez sur [Setup] (Configurer) dans l'écran mLAN Auto Connector 

pour ouvrir la fenêtre de configuration.

Lorsque l'horloge du 01X est paramétrée en tant qu'esclave d'un 

périphérique mLAN externe et que le signal d'horloge entrant 

change, ce panneau de commande détermine si l'ajustement de 

l'horloge en fonction de l'horloge maître doit se faire rapidement ou 

lentement.

Slow (Lent)

.......L'horloge change lentement. (C'est le réglage par 

défaut de la plupart des applications.)

Fast (Rapide)

....L'horloge change rapidement. (Ce réglage risque 

d'augmenter les bruits de gigue.)

01x_inst_f.fm  Page 20  Friday, December 5, 2003  4:39 PM

Содержание 01x

Страница 1: ...ubt und sonst ausdrücklich verboten Yamaha leistet keinerlei Garantie hinsichtlich der Benutzung des Programms und der zugehörigen Dokumentation und übernimmt keine Verantwortung für die Ergebnisse der Benutzung dieser Anleitung oder des Programms Das Kopieren im Handel erhältlicher Musikdaten ist nur für Ihren Privatgebrauch zulässig und sonst streng untersagt Die in dieser Installationsanleitung...

Страница 2: ...ge 3 For Macintosh see page 17 CD ROM Installation Procedure Before breaking the seal of the software packaging please read carefully the Software Licensing Agreement at the end of this guide q Verify that your system meets the operating requirements of the software Studio Manager mLAN Tools driver etc Windows page 5 Macintosh page 18 w Install the appropriate driver to your computer and make the ...

Страница 3: ... Mode in the mLAN Driver Setup to WDM 2CH ASIO page 10 To call up the online manual select Start All programs YAMAHA TWE Wave Editor TWE Manual If you want to install only TWE double click Setup exe in the TWE folder then follow the onscreen instructions MltPartEditor_ Multi Part Editor for MOTIF RACK 1 Enables you to edit the Mixing parameters such as effect of the MOTIF RACK on your computer whe...

Страница 4: ...sic hardware editor control panels to operate properly Level 2 OPT Processors provides support for real time MIDI processors and panel automation Typically this allows both real time and offline MIDI effects e g Arpeggiators transposers etc to operate properly and supply automation to OPT panels Level 3 OPT Views provides support for edit views and MIDI processors panels that require direct access...

Страница 5: ...ess 3 The system requirements listed here apply when using the included soft ware and when playing audio MIDI data detailed below on standard sequencer software This may differ depending the particular sequencer software you are using Frequency resolution 44 1 kHz 16 bit Audio Driver 8 in 2 out active MIDI Driver 1 in 1 out MIDI Remote Control Automation Audio playback tracks 12 MIDI Remote Contro...

Страница 6: ...y to the computer without use of a hub and disconnect all other IEEE 1394 connected devices from the computer 3 Make sure that the 01X is turned off 4 Start the computer and log in to the Administrator account When using the mLAN connection make sure to disable any energy saving features on the computer such as Suspend Sleep Standby or Pause If you are using the S200 data transfer rate standard ch...

Страница 7: ...o quit the installation Quitting by using the CTR ALT DEL buttons or by turning off the power while installation is in process is can result in problems since the installation is terminated without performing a proper uninstall 11 Double click on the mLAN_ folder Various files are shown including Setup exe 12 Double click on Setup exe 13 A series of confirmation messages appear If there are no pro...

Страница 8: ...on is finished a Complete message appears Click Finish For information on the Waiting display see below Registering the ports for the mLAN Driver 24 The New Hardware Wizard automatically appears Check the radio button next to Install the software automatically Rec ommended and click Next to start installation It may take some time for the initial New Hardware Wizard window to appear Proceed to the...

Страница 9: ...PC to 01X Determines the number of mLAN audio transmis sion channels from the computer to the 01X Connecting the 01X by using the mLAN Auto Connector may produce noise in some of the devices For this reason make sure to turn down the level of your amp speaker system or the MONITOR PHONES knob Stereo fader during the Connect operation When selecting ASIO WDM see the Mode of mLAN Driver setup on pag...

Страница 10: ...o cancel mLAN startup click Cancel in the mLAN Start window To use mLAN right click on the mLAN icon mLAN Manager in the task bar and select ON Device Manager Operating System 1 Select Control Panel from the Start menu 2 Double click on the System icon to call up the System Properties win dow 3 Select the Hardware tab and click Device Manager 4 Click on the mark next to Sound video and game contro...

Страница 11: ...ithin the DAW software For example twice the value of the Preferred Buffer Size set in the ASIO mLAN Control panel becomes the actual latency value ASIO mLAN Control Panel When you start the ASIO mLAN Control Panel the system displays the following dialog box q Preferred Buffer Size This parameter enables you to specify the size of the buffer inside the mLAN ASIO driver w Sample Size This paramete...

Страница 12: ...es that data in the corresponding format is being received The symbol indicates that data in a different format is being received For example the symbol oooooooo in the Audio field indicates that nine sequences have been received and the first eight sequences are in the audio data format The Unknown field displays symbols if sequences in unknown formats are received These fields are blank if no mL...

Страница 13: ...tX After installing the program restart the computer and resume installation of SQ01 from step 1 above 4 When the pre install routine is finished a Welcome display appears Click Next 5 The Choose Destination Location window appears letting you deter mine the desired drive and folder name for installation The destination directory is automatically set however if you wish to change it click the Brow...

Страница 14: ...window will be displayed Make sure the registration information you entered is correct then click Yes If the information is incorrect click No and return to step 3 above 5 A window for selecting plug in effects will be displayed Select check the software you want to install and click Next 6 A window appears prompting you for confirmation of the plug in effects to be installed Make sure the informa...

Страница 15: ...A VST Plugins Plug in Effect name Setup A Welcome window appears 2 Select Remove then click Next A window appears prompting you for confirmation of the file deletion 3 Click OK to remove the files To cancel the operation click Cancel MIDI port setting when starting the software as a stand alone application Before setting the MIDI port on the Studio Manager or Multi Part Editor you should set the M...

Страница 16: ...page In the Contents page you can search for desired information by selecting a general topic and exploring the related items in increas ing detail 1 Double click on Contents to call up the Contents page 2 Double click on the book icon corresponding to the desired topic or function Items related to the topic are listed in the window 3 Click on an item name to call up the explanation for the item 4...

Страница 17: ...using 01X and computer with the mLAN connection For instructions on installing see page 18 OMS_ Open Music System OMS 2 3 8 2 This software is necessary for using the 01X and computer with the mLAN connection to transfer MIDI data Remote Control and Studio Manager data For instructions on installing see page 18 OMS Setup for YAMAHA folder Contains the OMS Setup files for the 01X page 21 NIdemo_ B4...

Страница 18: ...n 2 Insert effects plug in 10 Plug in synthesizer 3 Latency 5 msec or less 3 The system requirements listed here apply when using the included soft ware and when playing audio MIDI data detailed below on standard sequencer software This may differ depending the particular sequencer software you are using Frequency resolution 44 1 kHz 16 bit Audio Driver 8 in 2 out active MIDI Driver 1 in 1 out MID...

Страница 19: ...elect Quit to close the installer Then reboot the computer 9 After restarting the Macintosh you will find the Opcode OMS Applica tions folder on your computer Hard Disk as the default 10 Copy the OMS_2 3_Mac pdf in the CD ROM to the OMS Applica tions folder drag and drop it to the folder Refer to the OMS_2 3_Mac pdf English version only for information on how to use the application 11 Copy the OMS...

Страница 20: ...o 01X Determines the number of mLAN audio transmis sion channels from the computer to the 01X The latter two channels are connected to the monitor input Connecting the 01X by using the mLAN Auto Connector may produce noise in some of the devices For this reason make sure to turn down the level of your amp speaker system or the MONITOR PHONES knob Stereo fader during the Connect operation If you ch...

Страница 21: ...In this situation connect your Macintosh to the 01X and follow the procedure below to re create the setup file 1 Start OMS Setup and select New Setup from the File menu 2 The OMS Driver Search dialog appears Remove the check from the Modem and Printer check boxes and click Search to execute the device search If the Search operation has been completed successfully the mLAN 01 device is dis played i...

Страница 22: ...r_ folder to display the following installation screen The Install Location box displays the destination of the installation If you wish to change the destination disk or folder use the Switch Disk button and the pop up menu to specify the desired destination In general there is no need to change the destination directory 2 In order to install the Studio Manager owner s manual PDF select Custom In...

Страница 23: ... enter the User Name Com pany Name and Serial Number Serial number is provided in the included Users Card 5 Click Continue In the window that appears you can select the Vst Plugins folder to which the plug in effect will be installed If there is only one VstPlugins folder in your computer this step is unneces sary Go on to step 7 If there is no VstPlugins folder in your computer you can select the...

Страница 24: ... Logic 5 series ver 5 1 or later Logic 6 series ver 6 0 or later Logic Plutinum Gold Audio Cubase SX ver 1 0 3 or later Cubase SL ver 1 0 3 or later Nuendo 2 0 ver 2 0 or later SONAR XL ver 2 1 or later Digital Performer ver 3 1 or later Multi Part Editor for MOTIF RACK MOTIF ES Check also the system requirements of the 01X when using mLAN See pages 5 18 Hints when using audio data Windows For opt...

Страница 25: ...ack View window select Remote Control to call up the dialog boxes below then make the settings as shown Mode 01X Input device mLAN MIDI In Port 1 Output device mLAN MIDI Out Port 1 01X port number 1 The port not indicated with a number is Port 1 When using the Multi Part Editor for remote control as the plug in of SQ01 select Multi Part Editor for MOTIF RACK as the MIDI Editor The MIDI Mixer in th...

Страница 26: ...er 3 Select the VST plug in folder which has the VST plug in you want to use from the list and click OK 4 Click OK to close the Audio dialog Alternately you can copy the VST plug in module you want to use to the Program Files YAMAHA Vst plugins folder so that it can also be used on the SQ01 For details refer to the owner s manual of the particular VST plug in you are using Playing the demo song 1 ...

Страница 27: ...s are the same as those following step 3 of playing the demo song on the SQ01 page 26 When playing back song data for the first time after starting Cubase the automa tion data and audio data may not be synchronized Stop playback once and try playing back again Logic Remote Control setup When turning on the power of the 01X before starting Logic 1 On the 01X select UTILITY REMOTE knob 1 REMOTE SELE...

Страница 28: ...e menu 3 Select ASIO mLAN for the ASIO Driver To call up the ASIO mLAN Control Panel click Configure Driver SONAR Remote Control setup 1 Pull down the Options menu and select MIDI Devices to call up the MIDI Devices window 2 Add mLAN MIDI In Port 1 to the Inputs and add mLAN MIDI Out Port 1 to the Outputs 3 Pull down the Options menu and select Control Surfaces to call up the Control Surface windo...

Страница 29: ...n t connect the 01X s mLAN MIDI output plug to the computer s mLAN MIDI input plug 9 10 Can t connect the computer s mLAN MIDI output plug to the 01X s mLAN MIDI input plug 9 10 Can t connect the computer s mLAN wordclock output plug to the 01X s mLAN wordclock input plug 9 10 Can t connect the 01X s mLAN wordclock output plug to the computer s mLAN wordclock input plug 9 10 A new 1394 adaptor car...

Страница 30: ...usly Check how many ports can be used simultaneously Turn off all devices on the mLAN network except the computer and re connect each device one by one until the device caus ing the problem is found For Windows When removing the mLAN bus from the Safely Remove Hardware setting of the task bar Restart the com puter when using mLAN again With Macintosh notebook computers such as the iBook and PowerB...

Страница 31: ...ayback and Voice recording settings Select Start Control Panel Sounds and Audio Devices Audio Make sure that something other than mLAN Audio Out In 01 is selected for the Sound playback and Sound recording settings For Windows Select Start Control Panel Sounds and Audio Devices Sounds tab and select No sounds in the Sound scheme box then execute again If you cannot close mLAN by selecting OFF afte...

Страница 32: ...h bevor Sie das Siegel der Softwareverpackung öffnen die Software Lizenzvereinbarung am Ende dieser Anleitung sorgfältig durch q Stellen Sie sicher dass das System die Betriebsanforderungen der Software Studio Manager mLAN Tools Treiber usw erfüllt Windows Seite 5 Macintosh Seite 18 w Installieren Sie den für Ihren Computer geeigneten Treiber und nehmen Sie die notwendigen Einstellungen vor Window...

Страница 33: ...mLAN Driver Setup Setup des mLAN Treibers auf WDM 2CH ASIO Seite 10 Um die Online Hilfe aufzurufen klicken Sie auf Start Programme YAMAHA TWE Wave Editor TWE Manual Wenn Sie lediglich TWE installieren möchten doppelklicken Sie auf die Datei Setup exe im Ordner TWE und folgen Sie den Bildschirmanweisungen MltPartEditor_ Multi Part Editor for MOTIF RACK 1 Ermöglicht die Bearbeitung der Mixing Parame...

Страница 34: ...re Editoren Level 2 OPT Processors bietet Unterstützung für Echtzeit MIDI Prozessoren und die Automatisierung von Bedienelementen Diese Ebene ermöglicht in der Regel ein ordnungsgemäßes Funktionieren von MIDI Effekten z B Arpeggiatoren Transposern usw in Echtzeit oder offline sowie die Automatisierung von OPT Bedienelementen Level 3 OPT Views bietet Unterstützung zur Bearbeitung von Ansichten und ...

Страница 35: ...end genannten Audio MIDI Daten mit einer standardmäßigen Sequenzeranwendung abgespielt werden Je nach verwendeter Sequenzersoftware kann es Abweichungen geben Frequenz Auflösung 44 1 kHz 16 Bit Audio Treiber 8 Ein 2 Ausgänge aktiv MIDI Treiber 1 Ein 1 Ausgang MIDI Remote Control Automation Audio Wiedergabespuren 12 MIDI Fernsteuerung Automation Send Effekte Plug in 2 Insert Effekte Plug in 6 Plug ...

Страница 36: ...er ab 3 Achten Sie darauf dass das 01X ausgeschaltet ist 4 Starten Sie den Computer und melden Sie sich unter dem Administratorenkonto an Stellen Sie bei Verwendung der mLAN Verbindung sicher dass alle Energiesparfunktionen auf dem Computer wie Ruhezustand Anhalten Standby oder Pause deaktiviert sind Wenn Sie die Standard Datenübertragungsrate S200 verwenden überprüfen Sie dies an der Rückseite de...

Страница 37: ... ALT ENTF oder durch Ausschalten des Computers kann zu Problemen führen da die Installation ohne ordnungsgemäße Deinstallation beendet wird 11 Doppelklicken Sie auf den Ordner mLAN Daraufhin werden mehrere Dateien angezeigt unter anderem Setup exe 12 Doppelklicken Sie auf Setup exe 13 Es erscheint eine Reihe von Bestätigungsmeldungen Wenn keine Probleme auftreten klicken Sie in jeder Meldung auf O...

Страница 38: ...licken Sie auf Fertig stellen Informationen zum Fenster Im Wartezustand finden Sie nachfolgend Registrieren der Ports für den mLAN Treiber 24 Der Assistent für das Suchen neuer Hardware wird automatisch angezeigt Wählen Sie die Option Software automatisch installieren empfohlen aus und klicken Sie auf Weiter Unter Umständen nimmt es ein wenig Zeit in Anspruch bis das erste Fenster des Hardwareassi...

Страница 39: ...Audioübertragungskanäle vom 01X zum Computer fest From PC to 01X Vom PC zum 01X Legt die Anzahl der mLAN Audioübertragungskanäle vom Computer zum 01X fest Wenn die 01X Verbindungen unter Verwendung von mLAN Auto Connector hergestellt werden kann dies in einigen Geräten Rauschen erzeugen Achten Sie daher darauf dass während des Verbindungsvorgangs an Ihrer Stereoanlage oder am MONITOR PHONES Regler...

Страница 40: ...enster mLAN Start auf Cancel Abbrechen Klicken Sie zur Verwendung von mLAN mit der rechten Maustaste auf das mLAN Symbol mLAN Manager in der Taskleiste und wählen Sie ON Ein aus Geräte Manager Betriebssystem 1 Klicken Sie im Menü Start auf Systemsteuerung 2 Doppelklicken Sie auf das Symbol System um das Fenster Eigenschaften von System bzw Systemeigenschaften zu öffnen 3 Wechseln Sie zur Registerk...

Страница 41: ...ASIO mLAN Control Panel ASIO mLAN Kontrollfeld Wenn Sie das ASIO mLAN Kontrollfeld starten wird das folgende Dialogfeld angezeigt q Preferred Buffer Size Bevorzugte Puffergröße Mit diesem Parameter können Sie die Größe des Puffers innerhalb des mLAN ASIO Treibers festlegen w Sample Size Sample Größe Mit diesem Parameter können Sie die Bit Auflösung für das Senden und Empfangen von Audiodaten festl...

Страница 42: ...n werden Das Symbol o zeigt an dass Daten im entsprechenden Format empfangen werden Das Symbol zeigt an dass Daten in einem anderen Format empfangen werden Beispielsweise bedeutet die Anzeige oooooooo im Feld Audio dass neun Sequenzen empfangen wurden die ersten acht davon im Audiodatenformat Im Feld Unknown Unbekannt werden Symbole angezeigt wenn Sequenzen unbekannten Formats empfangen werden Die...

Страница 43: ...rd ein Begrüßungsbildschirm angezeigt Klicken Sie auf Next Weiter 5 Das Fenster Choose Destination Directory Zielverzeichnis auswählen wird angezeigt in dem Sie das gewünschte Laufwerk und Verzeichnis zur Installation festlegen können Das Zielverzeichnis wird automatisch vorgegeben wenn Sie es ändern möchten klicken Sie auf die Schaltfläche Browse Durchsuchen und wählen Sie den gewünschten Ordner ...

Страница 44: ...ierungsbestätigung wird angezeigt Vergewissern Sie sich dass die eingegebenen Registrierungsangaben richtig sind und klicken Sie auf Yes Ja Falls die Angaben falsch sind klicken Sie auf No Nein und gehen Sie zu Schritt 3 s o zurück 5 Ein Fenster zur Auswahl von Plug in Effekten wird angezeigt Wählen Sie die zu installierende Software aus und klicken Sie auf Next Weiter 6 Ein Fenster wird angezeigt...

Страница 45: ... Begrüßungsfenster wird angezeigt 2 Klicken Sie auf Remove Entfernen und dann auf Next Weiter Daraufhin wird ein Fenster angezeigt in dem Sie zur Bestätigung der Löschung der Dateien aufgefordert werden 3 Klicken Sie auf OK um die Dateien zu entfernen Um den Vorgang abzubrechen klicken Sie auf Cancel Abbrechen MIDI Port Einstellung bei Ausführung der Software als eigenständige Anwendung Bevor Sie ...

Страница 46: ... untergeordneten immer mehr ins Detail gehenden Themen durchsuchen 1 Doppelklicken Sie auf Inhalt um die Seite Inhalt zu öffnen 2 Doppelklicken Sie auf das dem gewünschten Thema oder der gewünschten Funktion entsprechende Buchsymbol Die mit dem Thema verknüpften Elemente werden im Fenster aufgelistet 3 Klicken Sie auf die Bezeichnung eines Elements um die entsprechende Erklärung aufzurufen 4 Indem...

Страница 47: ...Sie auf Seite 18 OMS_ Open Music System OMS 2 3 8 2 Diese Software ist notwendig um das 01X und den Computer über die mLAN Verbindung für die MIDI Datenübertragung zu nutzen Fernsteuerung und Studio Manager Daten Anweisungen zur Installation finden Sie auf Seite 18 OMS Setup for YAMAHA Ordner Enthält die OMS Setup Dateien für den 01X Seite 21 NIdemo_ B4 Demo 2 Pro 53 Demo 2 Demo für den VST Plug i...

Страница 48: ...oder weniger 3 Die hier aufgeführten Systemanforderungen gelten wenn die im Lieferumfang enthaltene Software verwendet wird und die nachfolgend genannten Audio MIDI Daten mit einer standardmäßigen Sequenzeranwendung abgespielt werden Je nach verwendeter Sequenzersoftware kann es Abweichungen geben Frequenz Auflösung 44 1 kHz 16 Bit Audio Treiber 8 Ein 2 Ausgänge aktiv MIDI Treiber 1 Ein 1 Ausgang ...

Страница 49: ...9 Nach dem Neustart des Macintosh befindet sich auf dem Computer ein Ordner namens Opcode OMS Applications standardmäßig auf dem Startvolume 10 Kopieren Sie die Datei OMS_2 3_Mac pdf von der CD ROM in das Verzeichnis OMS Applications zum Beispiel durch Ziehen und Ablegen In der Datei OMS_2 3_Mac pdf nur auf Englisch verfügbar finden Sie Informationen zur Verwendung des Programms 11 Kopieren Sie OM...

Страница 50: ...01X zum Computer fest From Mac to 01X Vom Mac zum 01X Legt die Anzahl der mLAN Audioübertragungskanäle vom Computer zum 01X fest Die beiden letzten Kanäle werden mit dem Monitoreingang verbunden Wenn die 01X Verbindungen unter Verwendung von mLAN Auto Connector hergestellt werden kann dies in einigen Geräten Rauschen erzeugen Achten Sie daher darauf dass während des Verbindungsvorgangs an Ihrer St...

Страница 51: ...ird Verbinden Sie in dieser Situation Ihren Mac mit dem 01X und befolgen Sie die nächsten Schritte um die Setup Datei neu zu erzeugen 1 Starten Sie das OMS Setup und wählen Sie im Menü File Datei die Menüoption New Setup Neues Setup aus 2 Der Dialog OMS Driver Search Suche nach OMS Treiber erscheint Deaktivieren Sie die Kontrollkästchen Modem und Printer Drucker und klicken Sie auf Search Suchen u...

Страница 52: ...rdner ändern möchten klicken Sie auf die Schaltfläche Switch Disk Laufwerk wechseln und geben Sie im Pop Up Menü das gewünschte Ziel an Normalerweise muss das Zielverzeichnis nicht geändert werden 2 Um die Bedienungsanleitung des Studio Managers PDF zu installieren wählen Sie Custom Install achten Sie darauf dass Studio Manager for 01X und PDFManual markiert sind steht für die ausgewählte Sprache ...

Страница 53: ...eriennummer finden Sie auf der mitgelieferten Benutzerkarte 5 Klicken Sie auf Continue Weiter In dem erscheinenden Fenster können Sie den Ordner VstPlugins auswählen in dem der Plug in Effekt installiert werden soll Falls sich auf Ihrem Computer nur ein Ordner VstPlugins befindet ist dieser Schritt nicht nötig Fahren Sie mit Schritt 7 fort Falls sich auf Ihrem Computer kein Ordner VstPlugins befin...

Страница 54: ...6 V 6 0 oder neuer Logic Platinum Gold Audio Cubase SX V 1 0 3 oder neuer Cubase SL V 1 0 3 oder neuer Nuendo 2 0 V 2 0 oder neuer SONAR XL V 2 1 oder neuer Digital Performer V 3 1 oder neuer Multi Part Editor for MOTIF RACK MOTIF ES Prüfen Sie auch die Systemanforderungen für den 01X bei Verwendung von mLAN Siehe Seiten 5 18 Tipps für den Einsatz von Audiodaten Windows Für den optimalen Einsatz d...

Страница 55: ...ontrol Fernsteuerung um die folgend abgebildeten Dialoge zu öffnen und nehmen Sie die Einstellungen vor wie gezeigt Mode Modus 01X Input Device Eingabegerät mLAN MIDI In Port 1 Output Device Ausgabegerät mLAN MIDI Out Port 1 01X Port Number Port Nummer des 01X 1 Der Port ohne Nummer ist Port 1 Wenn Sie den Multi Part Editor als Plug in des SQ01 zur Fernsteuerung verwenden wählen Sie Multi Part Edi...

Страница 56: ...f OK 4 Klicken Sie auf OK um den Audio Dialog zu schließen Sie können auch das VST Plug in Modul in den Ordner Program files YAMAHA Vst plugins kopieren um es mit dem SQ01 zu verwenden Ausführliche Informationen finden Sie im Benutzerhandbuch des verwendeten VST Plug ins Demo Song abspielen 1 Kopieren Sie die Demo Song Datei All for You for SQ01 yws aus dem Ordner DemoSong auf der CD ROM auf Ihre ...

Страница 57: ... die nach Schritt 3 der Demo Song Wiedergabe mit dem SQ01 Seite 26 Wenn Sie die Songdaten nach dem Start von Cubase zum ersten Mal wiedergeben kann es sein dass die Automationsdaten und die Audiodaten nicht synchron sind Stoppen Sie die Wiedergabe und starten Sie sie nochmals Logic Einrichtung der Fernsteuerung Wenn Sie vor dem Starten von Logic den 01X einschalten möchten 1 Wählen Sie am 01X den ...

Страница 58: ...reiber aus Zum Aufrufen des ASIO mLAN Kontrollfelds klicken Sie auf Configure Driver Treiber konfigurieren SONAR Einrichtung der Fernsteuerung 1 Klappen Sie das Menü Options herunter und wählen Sie die Option MIDI Devices MIDI Geräte um das Fenster MIDI Devices aufzurufen 2 Fügen Sie mLAN MIDI In Port 1 den Inputs hinzu und mLAN MIDI Out Port 1 den Outputs 3 Klappen Sie das Menü Options herunter u...

Страница 59: ...o the 01X s mLAN MIDI input plug Der mLAN MIDI Ausgangsstecker des Computers kann nicht mit dem mLAN MIDI Eingangsstecker des 01X verbunden werden 9 10 Can t connect the computer s mLAN wordclock output plug to the 01X s mLAN wordclock input plug Der mLAN Wordclock Ausgangsstecker des Computers kann nicht mit dem mLAN Wordclock Eingangsstecker des 01X verbunden werden 9 10 Can t connect the 01X s ...

Страница 60: ...zeitig benutzt werden können Schalten Sie alle Geräte auf dem mLAN Netzwerk mit Ausnahme des Computers aus und schließen Sie nacheinander die Geräte wieder an bis dasjenige Gerät gefunden ist welches das Problem verursacht Für Windows Wenn Sie den mLAN Bus aus der Einstellung Hardware sicher entfernen der Taskleiste entfernen Starten Sie den Computer neu wenn Sie mLAN wieder benutzen möchten Bei d...

Страница 61: ...st Wählen Sie Start Systemsteuerung Sounds und Audiogeräte Audio Vergewissern Sie sich dass unter Soundwiedergabe und Soundaufnahme nicht mLAN Audio Out In 01 ausgewählt ist Für Windows Wählen Sie Start Systemsteuerung Sounds und Audiogeräte und dort den Reiter Sounds und wählen Sie Keine Sounds im Feld Audioschema und führen Sie die Funktion erneut aus Wenn Sie mLAN nicht schließen können durch A...

Страница 62: ...us à la page 3 Pour Macintosh reportez vous à la page 17 Procédure d installation du CD ROM Avant d ouvrir l emballage scellé du logiciel lisez attentivement l accord de licence du logiciel disponible à la fin de ce guide q Vérifiez que votre système est conforme à la configuration minimale requise pour les logiciels Studio Manager mLAN Tools pilote etc Windows page 5 Macintosh page 18 w Installez...

Страница 63: ...r Setup Configuration du pilote mLAN sur WDM 2CH ASIO page 10 Pour appeler le manuel en ligne sélectionnez Démarrer Tous les programmes YAMAHA TWE Wave Editor TWE Manual Si vous voulez uniquement installer le TWE double cliquez sur le fichier Setup exe dans le dossier TWE puis suivez les instructions à l écran MltPartEditor_ Multi Part Editor for MOTIF RACK 1 Vous permet d éditer les paramètres de...

Страница 64: ...e fonctionner correctement Niveau 2 L OPT Processors prend en charge les processeurs MIDI et l automatisation du panneau en temps réel En général ce niveau permet aux effets MIDI en temps réel et hors ligne fonction d arpèges de transposition etc de fonctionner correctement et d automatiser le fonctionnement d OPT Panels Niveau 3 L OPT Views offre un support qui vous permet d éditer les vues et le...

Страница 65: ...ication lorsque vous utilisez le logiciel fourni et lorsque vous reproduisez les données audio MIDI détaillées ci dessous sur un logiciel de séquençage standard Elle peut néanmoins varier en fonction du logiciel de séquençage que vous utilisez Fréquence résolution 44 1 kHz 16 bits Pilote audio 8 entrées 2 sorties actives Pilote MIDI 1 entrée 1 sortie commande à distance automation MIDI Pistes de r...

Страница 66: ...a borne IEEE 1394 de l ordinateur 3 Vérifiez que le 01X est hors tension 4 Démarrez l ordinateur et ouvrez la session Administrateur Lorsque vous utilisez la connexion mLAN prenez soin de désactiver toutes les fonctions d économie d énergie de l ordinateur telles que Suspension Veille Attente ou Pause Si vous utilisez le taux de transfert de données du S200 vérifiez le panneau arrière de votre pér...

Страница 67: ... hors tension pendant la procédure d installation risque d engendrer des problèmes dans la mesure où l installation est interrompue sans que la désinstallation ait été effectuée de manière correcte 11 Double cliquez sur le dossier mLAN Différents fichiers s affichent dont Setup exe 12 Double cliquez sur Setup exe 13 Une série de messages de confirmation apparaissent S il n y a pas de problèmes cli...

Страница 68: ... Terminer Pour obtenir des informations sur l écran En attente reportez vous ci dessous Enregistrement des ports du pilote mLAN 24 La fenêtre Assistant Matériel détecté apparaît automatiquement Cochez la case en regard de Installer le logiciel automatiquement recommandé et cliquez sur Suivant pour démarrer l installation L affichage de la fenêtre Assistant Matériel détecté peut prendre un certain ...

Страница 69: ...X Détermine le nombre de canaux de transmission audio du mLAN depuis l ordinateur vers le 01X Le fait de connecter le 01X à l aide du mLAN Auto Connector peut provoquer des bruits parasites au niveau de certains périphériques Prenez dès lors soin de baisser le volume de votre système amplificateur haut parleur ou du bouton MONITOR PHONES Contrôleur Casque ou du curseur Stereo lors de l opération C...

Страница 70: ...N Start Pour utiliser le mLAN cliquez avec le bouton droit sur l icône mLAN mLAN Manager dans la barre de tâches et sélectionnez ON Gestionnaire de périphériques Système d exploitation 1 Sélectionnez Panneau de configuration dans le menu Démarrer 2 Double cliquez sur l icône Système pour ouvrir la fenêtre Propriétés système 3 Sélectionnez l onglet Matériel et cliquez sur Gestionnaire de périphériq...

Страница 71: ...vient la valeur de latence réelle Panneau de configuration ASIO mLAN Lorsque vous lancez le panneau de configuration ASIO mLAN le système affiche la boîte de dialogue suivante q Preferred Buffer Size Taille préférée du tampon Ce paramètre vous permet de spécifier la taille du tampon à l intérieur du pilote ASIO mLAN w Sample Size Taille de l échantillon Ce paramètre vous permet de spécifier la rés...

Страница 72: ...ue que des données dans le format correspondant sont reçues Le symbole indique que des données d un format différent sont reçues Par exemple le symbole oooooooo dans la zone Audio indique que neuf séquences ont été reçues et que les huit premières sont au format audio La zone Unknown Inconnu contient des symboles lorsque des séquences de format inconnu sont reçues Ces zones sont vides si aucune do...

Страница 73: ...e de la procédure de pré installation un écran Bienvenue apparaît Cliquez sur Suivant 5 La fenêtre Sélectionner le répertoire de destination dans laquelle vous pouvez spécifier le lecteur et le nom du dossier dans lesquels installer le logiciel apparaît Le répertoire de destination est automatiquement défini Cependant si vous souhaitez le modifier cliquez sur le bouton Parcourir et sélectionnez le...

Страница 74: ...a fenêtre de confirmation de l enregistrement apparaît Vérifiez que les informations relatives à l enregistrement sont correctes puis cliquez sur Oui Si les informations sont incorrectes cliquez sur Non et revenez à l étape 3 ci dessus 5 Une fenêtre de sélection des effets plug in apparaît Sélectionnez cochez le logiciel à installer puis cliquez sur Suivant 6 Une fenêtre vous invitant à confirmer ...

Страница 75: ...r puis cliquez sur Suivant Une fenêtre vous invitant à confirmer la suppression du fichier apparaît 3 Cliquez sur OK pour supprimer les fichiers Pour annuler l opération cliquez sur Annuler Configuration du port MIDI lors du démarrage du logiciel en tant qu application autonome Avant de configurer le port MIDI dans le Studio Manager ou le Multi Part Editor vous devez configurer le port MIDI depuis...

Страница 76: ... rechercher les informations souhaitées en sélectionnant une rubrique générale et en parcouant les entrées associées plus en détails 1 Double cliquez sur Contents pour appeler la page Contents 2 Double cliquez sur l icône en forme de livre correspondant à la rubrique ou à la fonction de votre choix Les entrées associées à la rubrique s affichent dans la fenêtre 3 Cliquez sur une entrée pour obteni...

Страница 77: ...ec la connexion mLAN Pour obtenir des instructions sur l installation reportez vous à la page 18 OMS_ Open Music System OMS 2 3 8 2 Ce logiciel est nécessaire pour pouvoir utiliser le 01X et l ordinateur avec la connexion mLAN afin de transférer des données MIDI données Remote Control et Studio Manager Pour obtenir des instructions sur l installation reportez vous à la page 18 OMS Setup for YAMAHA...

Страница 78: ...ion plug in 10 Synthétiseur plug in 3 Latence 5 msec maximum 3 La configuration système décrite ici est d application lorsque vous utilisez le logiciel fourni et lorsque vous reproduisez les données audio MIDI détaillées ci dessous sur un logiciel de séquençage standard Elle peut néanmoins varier en fonction du logiciel de séquençage utilisé Fréquence résolution 44 1 kHz 16 bits Pilote audio 8 ent...

Страница 79: ...ation Redémarrez ensuite l ordinateur 9 Après avoir redémarré votre Macintosh vous trouverez les dossiers Opcode et OMS Applications sur votre ordinateur par défaut sur le disque dur 10 Copiez le fichier OMS_2 3_Mac pdf du CD ROM vers le dossier OMS Applications opération de glisser déposer Reportez vous au fichier OMS_2 3_Mac pdf version anglaise uniquement pour plus d informations sur l utilisat...

Страница 80: ...ux de transmission audio du mLAN depuis l ordinateur vers le 01X Les deux derniers canaux sont connectés à l entrée du contrôleur Le fait de connecter le 01X à l aide du mLAN Auto Connector peut provoquer des bruits parasites au niveau de certains périphériques Prenez dès lors soin de baisser le volume de votre système amplificateur haut parleur ou du bouton MONITOR PHONES Contrôleur Casque ou du ...

Страница 81: ...e Dans ce cas connectez votre Macintosh au 01X et suivez la procédure ci dessous pour recréer le fichier de configuration 1 Lancez OMS Setup et sélectionnez New Setup Nouvelle configuration dans le menu File 2 La boîte de dialogue OMS Driver Search Recherche du pilote OMS apparaît Décochez les cases Modem et Printer Imprimante puis cliquez sur Search Rechercher pour lancer la recherche de périphér...

Страница 82: ... dossier de destination utilisez le bouton Switch Disk et le menu déroulant pour spécifier la destination de votre choix En général il n est pas nécessaire de modifier le répertoire de destination 2 Pour installer le mode d emploi du Studio Manager PDF sélectionnez Custom Install Installation personnalisée vérifiez que les options Studio Manager for 01X et PDFManual sont cochées indique la langue ...

Страница 83: ...z trouver le numéro de série sur la carte utilisateur fournie 5 Cliquez sur Continue Dans la fenêtre qui apparaît vous pouvez sélectionner le dossier VstPlugins dans lequel installer l effet plug in S il n existe qu un seul dossier VstPlugins sur votre ordinateur cette étape n est pas nécessaire Passez à l étape 7 S il n y a pas de dossier VstPlugins sur votre ordinateur vous pouvez sélectionner l...

Страница 84: ...ion 1 0 3 ou ultérieure Cubase SL version 1 0 3 ou ultérieure Nuendo 2 0 version 2 0 ou ultérieure SONAR XL version 2 1 ou ultérieure Digital Performer version 3 1 ou ultérieure Multi Part Editor for MOTIF RACK MOTIF ES Vérifiez également la configuration système du 01X en cas d utilisation de mLAN Reportez vous aux pages 5 18 Astuces en cas d utilisation de données audio Windows Pour une utilisat...

Страница 85: ...s de dialogue ci dessous puis effectuez les paramétrages comme indiqué Mode 01X Input device Périphérique d entrée mLAN MIDI In Port 1 Output device Périphérique de sortie mLAN MIDI Out Port 1 01X port number Numéro de port du 01X 1 Le port sans numéro est le port 1 Si vous utilisez le Multi Part Editor pour la commande à distance en tant qu application plug in du SQ01 sélectionnez Multi Part Edit...

Страница 86: ...rmer la boîte de dialogue Audio Vous pouvez également copier le module plug in VST à utiliser sous Programmes YAMAHA Vst plugins de manière à pouvoir l utiliser aussi sur le SQ01 Pour plus de détails reportez vous au mode d emploi du plug in VST que vous utilisez Reproduction du morceau de démonstration 1 Copiez le fichier du morceau de démonstration All for You for SQ01 yws du dossier DemoSong du...

Страница 87: ... celles qui suivent l étape 3 de la reproduction du morceau de démonstration sur le SQ01 page 26 Lorsque vous reproduisez des données de morceau pour la première fois après avoir démarré Cubase il est possible que les données d automation et les données audio ne soient pas synchronisées Interrompez la reproduction et essayez de les lire à nouveau Logic Configuration de la commande à distance Lorsq...

Страница 88: ...n arrière plan SONAR Configuration de la commande à distance 1 Allez sur le menu déroulant Options et sélectionnez MIDI Devices Périphériques MIDI pour appeler la fenêtre MIDI Devices 2 Ajoutez mLAN MIDI In Port 1 dans Inputs Entrées et mLAN MIDI Out Port 1 dans Outputs Sorties 3 Ouvrez le menu déroulant Options et sélectionnez Control Surfaces pour appeler la fenêtre Control Surface 4 Cliquez sur...

Страница 89: ...computer s mLAN MIDI output plug to the 01X s mLAN MIDI input plug Impossible de connecter la prise de sortie MIDI mLAN de l ordinateur à la prise d entrée MIDI mLAN du 01X 9 10 Can t connect the computer s mLAN wordclock output plug to the 01X s mLAN wordclock input plug Impossible de connecter la prise de sortie du signal d horloge mLAN de l ordinateur à la prise d entrée du signal d horloge mLA...

Страница 90: ... périphériques du réseau mLAN hors tension à l exception de l ordinateur et rebranchez les périphériques un par un jusqu à ce que vous ayez identifié le périphérique à l origine du problème Pour Windows En cas de retrait du bus mLAN à l aide du paramètre Safely Remove Hardware Retrait du matériel en toute sécurité de la barre de tâches Redémarrez l ordinateur lorsque vous décidez d utiliser à nouv...

Страница 91: ...ation Sons et périphériques audio Audio Assurez vous qu une option autre que mLAN Audio Out In 01 est sélectionnée pour les paramètres Lecture des sons et Enregistrement des sons Pour Windows Sélectionnez Démarrer Panneau de configuration Sons et périphériques audio onglet Sons et sélectionnez Aucun son dans le champ Modèle puis exécutez à nouveau l opération Si vous ne parvenez pas à fermer le mL...

Страница 92: ...rmanent basis provided that you retain no copies and the recipient agrees to the terms of the licen sing agreement 3 TERMINATION The licensing condition of the software program becomes effective on the day that you receive the SOFTWARE If any one of the copyright laws or clauses of the licensing conditions is violated the licensing agreement shall be terminated automatically without notice from Ya...

Страница 93: ...alien auf unbefristeter Basis unter den Voraussetzungen übertragen daß Sie keine Kopien zurückbehalten und sich der Empfänger mit den Bedingungen der Lizenzvereinba rung einverstanden erklärt 3 BEENDIGUNG Die Lizenzbedingung des Softwareprogramms wird am Tag an dem Sie die SOFTWARE erhalten wirksam Falls ein Copyrightgesetz oder eine Bestimmung der Lizenzbedingungen verletzt wird wird automatisch ...

Страница 94: ... qui l accompagne sous réserve que vous n en conserviez aucun exemplaire et que le bénéficiaire accepte les termes du présent contrat 3 RESILIATION Les conditions énoncées dans le présent contrat de licence prennent effet à compter du jour où le LOGICIEL vous est remis Si l une quelconque des dispositions relatives au droit d auteur ou des clauses du contrat ne sont pas respectées le contrat de li...

Страница 95: ...jatinte gedruckt Ce document a été imprimé sur du papier non blanchi au chlore avec de l encre d huile de soja U R G Pro Audio Digital Musical Instrument Division Yamaha Corporation 2003 Yamaha Corporation 312POCP2 3 02B0 Printed in Japan WB29370 01x inst e fm 36 ページ 2003年12月8日 月曜日 午後1時54分 ...

Отзывы: