6
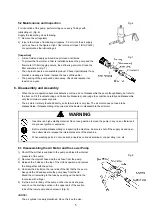
6) Pull out the suction tube, and the intake valve Assy becomes visible. At this time, take care not to cause the oil
remaining in the tube to flow on the floor. (Fig. 8)
6.2 Disassembling and Inspecting the Lower Pump
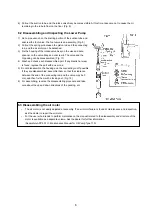
1) Set a pipe wrench on the knurling portion of the suction tube and
unscrew the foot valve. The foot valve is an assembly. (Fig. 9)
2) Pull out the spring pin between the piston rod and the connecting
rod, and the air motor can be detached.
3) Fix the housing of the intake valve Assy on the vise and set a
spanner on the valve body and unscrew it. The valve and the
U-packing can be disassembled. (Fig. 11)
4) Wash and check each disassembled part. If any blemish or wear
is found, replace the part with a new one.
5) Do not disassemble the housing and the connecting rod if possible.
If they are disassembled, assemble them so that the clearance
between the end of the connecting rod and the valve may be 3
mm, and then fix them with a locking nut. (Fig. 10)
6) For assembling, reverse the disassembling procedure and take
care about the up and down directions of the packing, etc.
6.3 Disassembling the air motor
-
The air motor is not easily adjusted at assembly. If an air motor failure is found at maintenance and inspection,
ask the dealer to repair the air motor.
-
For the user who intends to perform maintenance, the manual related to the disassembly and structure of the
motor is available as a separate volume. Ask the dealer for further information.
(Separately APP 001 U : Maintenance Manual for Oil Pump Type 110)
Содержание 880635
Страница 2: ......

