10
due to the tip, solder collector, tube or in-line filter.
CAUTION
: THE DESOLDER SWITCH MUST BE “OFF” AND ALLOW THE IRON TO
COLL BEFORE ATTEMPTING THE FOLLOWING PROCEDURES:
1.
Disconnect vacuum tube form the fitting on the front panel, place finger over the hole
of the fitting, depress vacuum switch and you should have a strong vacuum. If not, send
back to your nearest service center for pump repair.
2.
Disconnect the inline filter from the iron assembly, depress vacuum switch, replace
filling of the in-line filter if there is little vacuum pressure or the filters are discolored.
3.
Remove solder collector from desolder iron assembly, place finger over the hole of the
collector, depress vacuum switch. There is little suction clean or replace the collector
tube.
4.
Depress vacuum witch, clean the tip tube with spring wire provided if there is no
suction per the “Procedure for Cleaning Clogged Tip” section below.
MAINTENANCE
DESOLDER TIP REPLACEMENT AND DRESSING
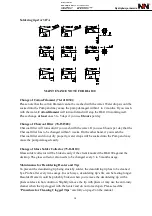
Desolder tips can be changed or replaced simply unscrewing the barrel nut assembly.
The station must be turned off and allowed to cool before this operation. If the system
is left on without a tip in place, damage to the iron assembly may occur!
After removing the tip, blow out any oxide dust that may have formed in the tip
receptacle. Be careful not to get dust in your eyes. Replace the tip according to
Figures 3-9 and hand tighten the securing screw for the barrel nut assembly. Pliers can
be used to avoid contact with hot surfaces BUT SHOULD BE USED WITH
CAUTION because over tightening may cause damage to the element or fuse the tip
to the element.
PROCEDURE FOR CLEANING CLOGGED TIPS
CAUTION: This procedure is to be working in high temperature. Be careful to avoid
burning your fingers during this operation.
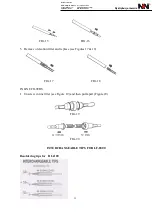
1. Be sure that the spring wire (included) will not go through the nozzle of the
desolder tip.
8.
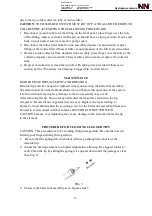
Adjust the heating element to a higher temperature allowing the clogged solder to
melt. Clean the tip by sliding the spring wire up and down until the passage is clear.
(See Fig. 3)
FIG-3
9.
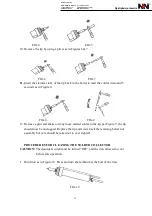
Unscrew the barrel nut assembly as in Figures 4 & 5.
Dystrybucja i serwis
Dane kontaktowe:
NDN - Zbigniew Daniluk
ul. Janowskiego 15
02-784 Warszawa
tel.: (22) 641-15-47
e-mail: [email protected]
NIP: 521-044-00-73

