Conductivity Calibration
The Pro1030 can be calibrated in conductivity, specific conductance or salinity.
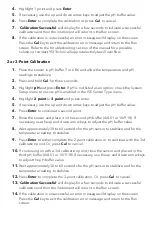
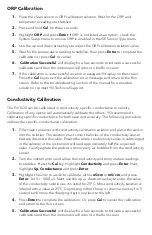
Calibration of any option will automatically calibrate the others. YSI recommends
calibrating specific conductance for both ease and accuracy. The following procedure
outlines the specific conductance calibration.
1.
Fill a clean container with conductivity calibration solution and place the sensor
into the solution. The solution must cover the holes of the conductivity sensor
that are closest to the cable. Ensure the entire conductivity sensor is submerged
in the solution or the instrument will read approximately half the expected
value. Gently agitate the probe to remove any air bubbles from the conductivity
sensor.
2.
Turn the instrument on and allow the conductivity and temperature readings
to stabilize. Press the
Cal
key. Highlight
Conductivity
and press
Enter
. Next,
highlight
Sp. Conductance
and press
Enter
.
3.
Highlight the units you wish to calibrate, either
uS/cm
or
mS/cm
, and press
Enter
. 1 mS = 1,000 uS. Next, use the up or down arrow key to enter the value
of the conductivity solution as it is listed for 25°C. Most conductivity solution is
labeled with a value at 25°C. Depressing either the up or down arrow key for 5
seconds will move the changing digit one place to the left.
4.
Press
Enter
to complete the calibration. Or, press
Cal
to cancel the calibration
and return to the Run screen.
5.
‘
Calibration Successful
’ will display for a few seconds to indicate a successful
calibration and then the instrument will return to the Run screen.
ORP Calibration
1.
Place the clean sensor in ORP calibration solution. Wait for the ORP and
temperature readings to stabilize.
2.
Press and hold
Cal
for three seconds.
3.
Highlight
ORP
and press
Enter
. If ORP is not listed as an option, check the
System Setup menu to ensure ORP is enabled in the ISE Sensor Type menu.
4.
Use the up and down arrow keys to adjust the ORP calibration solution value.
5.
Wait for the temperature reading to stabilize, then press
Enter
to complete the
calibration or press
Cal
to cancel.
6.
‘
Calibration Successful
’ will display for a few seconds to indicate a successful
calibration and then the instrument will return to the Run screen.
7.
If the calibration is unsuccessful, an error message will display on the screen.
Press the
Cal
key to exit the calibration error message and return to the Run
screen. Refer to the troubleshooting section of the manual for a possible
solution or contact YSI Technical Support.


