background image

PACKAGE CONTENTS 

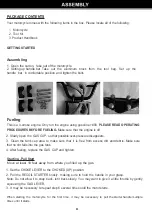
Your motorcycle romes with the following items in the box. Please locate all of the following: 

1.

Motorcycle 

2. Tool Kit

3. Product Handbook

GETTING STARTED 

Assembling 

1.  Open the carton,  take out of the motorcycle. 

2.  Setting up handle bar. 

Take  out  the  aluminum  block  from  the  tool  bag.  Set  up  the 

handle  bar  in comfortable  position  and  tighten the bolts.

Fueling 

This is a 4-stroke engine. 

Only run the engine using gasoline >#90. 

PLEASE READ OPERATING 

PROCEDURES BEFORE FUELING. 

Make sure that the engine is off.

� 

£� 

:i 

-

� .. 

��'. 

2.

 Slowly open the GAS CAP. so that possible over-pressure disappears.

3.

  Clean 

t

he  tank  cap area  to  make  sure  that  it  is  free  from  excess dirt  and debris. Make sure 

that no dirt falls into the gas tank.

4.

 After fueling, replace the GAS CAP and tighten.

Starting - Pull Start 

Move at least 10 feet away from where you filled up the gas. 

1.

 Set the CHOKE LEVER to the CHOKED {UP) position.

2.

 Pull the RECOIL STARTER briskly.  making  sure  to hold  the handle in  your grasp.   


Note: Do not allow it to snap back, let it back slowly

.

 You may want to give it a little throttle by gently 

squeezing the GAS LEVER.

3.


I

t may be necessary to repeat step 6 several  times until the motor starts

.

When  starting  the  motorcycle  for  the  first  time,  it  may  be  necessary  to  pull  the starter handle multiple 

times until it starts. 

Содержание 42CC

Страница 1: ... THIS MANUAL KEEP THIS MANUAL FOR SAFETY WARNINGS PRECAUTIONS ASSEMBLY OPERATION INSPECTION MAINTENANCE AND CLEANING PROCEDURES WRITE THE PRODUCT S SERIAL NUMBER ON THE BACK OF THE MANUAL OR THE MONTH AND YEAR OF PURCHASE IF PRODUCT HAS NO SERIAL NUMBER FOR QUESTIONS PLEASE CALL CUSTOMER SERVICE 909 628 0880 ...

Страница 2: ...hol even on private property Other vehicle operation laws might apply in your area Vehicle Title Registration Laws You may need to title and or register your new mini bike with one or more state or municipal government agencies You are solely responsible for titling and or registering your mini bike and for all related costs Keep your mini bike s Certificate of Origin it may be required to title a...

Страница 3: ...h A WARNING Never modify the mini bike or attach after market accessories Modifications and after market accessories reduce the rider s ability to control and ride the mini bike safely XtremePowerUS is not liable for any damage or injury caused by any after market accessory A WARNING Always perform the necessary maintenance on the vehicle Failure to perform necessary maintenance on the vehicle cou...

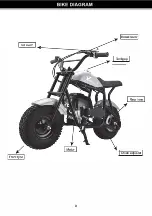
Страница 4: ...I Tankgap I IChian adjuster I 3 ...

Страница 5: ... possible over pressure disappears 3 Clean the tank cap area to make sure that it is free from excess dirt and debris Make sure that no dirt falls into the gas tank 4 After fueling replace the GAS CAP and tighten Starting Pull Start Move at least 10 feet away from where you filled up the gas 1 Set the CHOKE LEVER to the CHOKED UP position 2 Pull the RECOIL STARTER briskly making sure to hold the h...

Страница 6: ...ars Stopping Shutting down 2 Gradually decrease the engine speed to idle and turn off the kill switch on handlebar tube This will turn the engine OFF NOTE If the lever Is pulled aggressively the locking spring may become stretched and then the steering will not lock Into position It Is also advisable to efl5ure the handlebar locks firmly prior to riding WARNING Always shut the engine off before re...

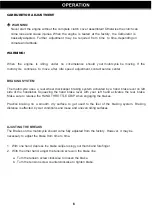
Страница 7: ... by a hand brake lever on left side of the handlebar Squeezing the hand brake lever with your left hand activates the rear brake Make sure to release the HAND THROTTLE GRIP when engaging the brakes Practice braking on a smooth dry surface to get used to the feel of the braking system Braking distance is affected by wet conditions and loose and uneven riding surfaces AJUSTING THE BREAKS The Brakes ...

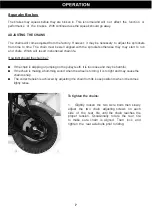
Страница 8: ...ife How tight should the chain be If the chain is skipping or jumping on the pulley teeth it is too loose and may be harmful If the chain is making a humming sound when the wheel is turning it is to tight and may cause the chain to snap The correct tension is achieved by adjusting lt1e chain from Its loose position to when it becomes lightly tense To tighten the chains 1 Slightly loosen the two Ax...

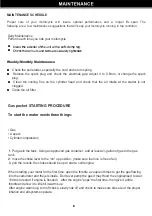
Страница 9: ...s to the gas tank 2 move the choke lever to the on up position make sure fuel line is free of air 3 pull the recoils the choke should be up to start a cold engine When starting your motor for the first time open the throttle a couple of times to get the gas flowing into the carburetor and the jets inside Don t over pump the gas it may Hood the engine need to wait 10mins to restart if engine is flo...

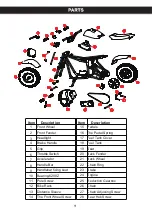
Страница 10: ... 8 Handle Bar 9 Handlebar fixing seat 10 Bearing 6200Z 11 Pole Screw 12 Bike Rack 13 Distance Sleeve 14 The Front Wheel Screw 15 Pedals 16 The Pedal Spring 17 Fuel Tank Cover 18 Fuel Tank 19 Seat 20 Back Fender 21 Back Wheel 22 Chain Ring 23 Brake 24 Engine 25 Reduction Gearbox 26 Chain 27 Chain Adjusting Screw 28 Rear Hub Screw ...

Страница 11: ...FIED AND LICENSED TECHNICIANS AND NOT BY THE BUYER THE BUYER ASSUMES ALL RISK AND LIABILITY ARISING OUT OF HIS OR HER REPAIRS TO THE ORIGINAL PRODUCT OR REPLACEMENT PARTS THERETO ORARISING OUT OF HIS OR HER INSTALLATION OF REPLACEMENT PARTS THERETO Record Product s Serial Number Here __________________ Note If product has no serial number record month and year of purchase instead Note Some parts a...

Отзывы: