


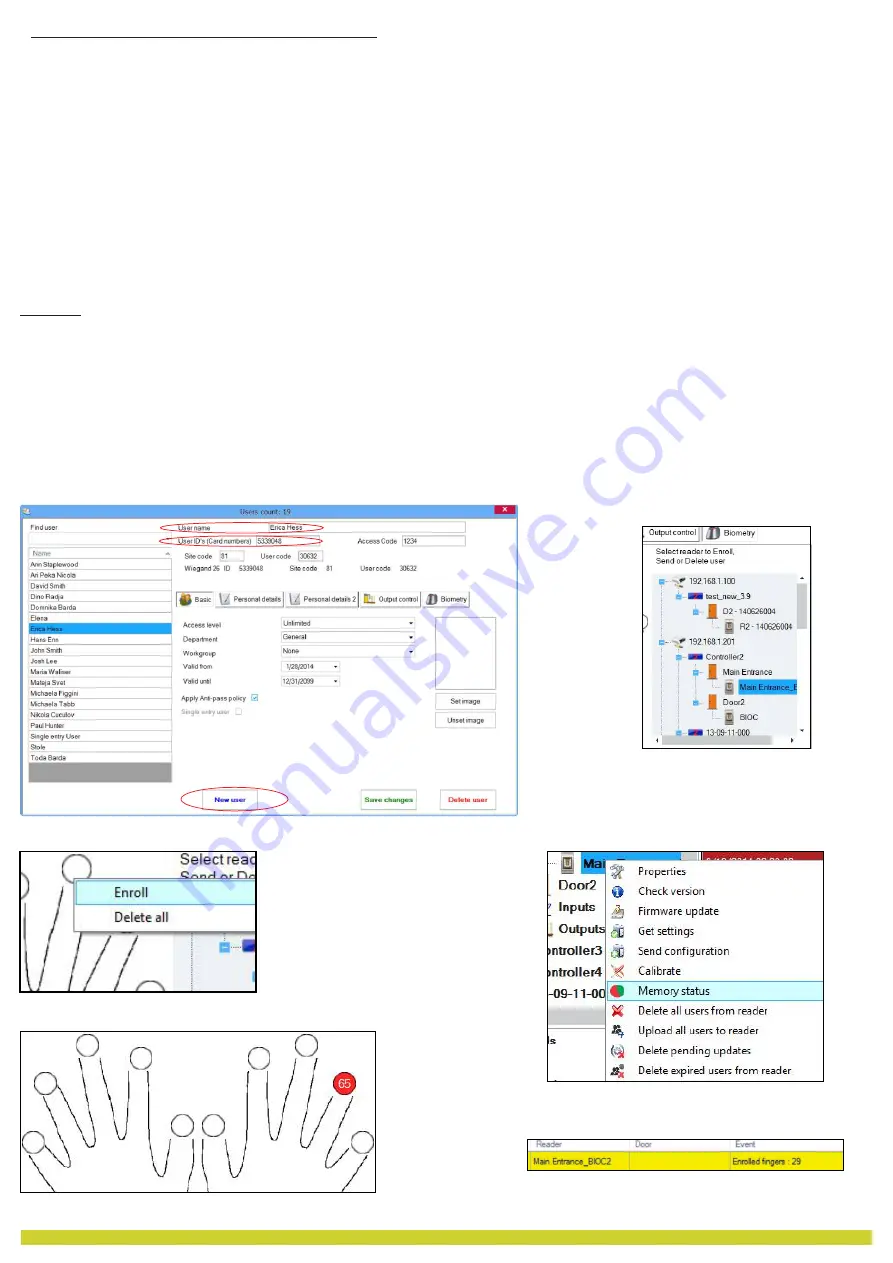
1. Open the Users Window and create a new user.
Click on “New User”, put a name, ID(card number). (8.7)
2. Go to the “Biometric” Tab
3. Select the reader(with left click) from which the enrollment will be done. (8.8)
4. Right click on the fingertip and select enroll. (8.9)
5. In the next 25 sec. present the finger on the selected reader and the finger tip will turn red, with the percentage of
successful enrollment shown next to the fingertip. (8.10)
In these 25 sec. the reader will continuously blink in orange.
6. Repeat point 4&5 for each finger that should be enrolled.
7. Click on “Save New” and the fingerprint will be sent automatically to all Biometric Readers where that user has access, i.e. to
all the readers according to the Access Level assign to that user.
Example:
If the user has “Unlimited” Access level then the fingerprints will be sent to all readers, if the user has Access level only for
Reader1 and Reader 3 then the fingerprints will be sent only to those two readers.
Note:
To check if all the fingerprints are sent to the reader, right click on the reader and select “Memory Status”. (8.11)
In the event window a line will appear indicating the number of fingerprints stored in the reader. (8.12)
Note:
If more fingerprints are added for one user, all finger
s will send the same Wiegand Code to the controller
, the one written
in the field User ID(card Number).
8.7
8.8
8.10
8.9
8.11
8.12
8.2 ENROLLING FINGERPRINTS FROM A READER
9
www.visual-plus.com


