6
XSLATE R12 Getting Started
Model iX125R1
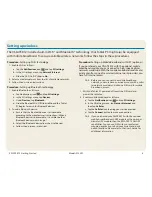
Procedure: Setting up Wi-Fi technology
1. Enable Wi-Fi as follows:
a. Tap the Notifications icon
and tap All settings.
b. In the All settings menu, tap Network Internet.
c. Slide the Wi-Fi On/Off slider to On.
2. Select a wireless network from the list of available networks.
3. Follow the on-screen instructions.
Procedure: Setting up Bluetooth technology
1. Enable Bluetooth as follows:
a. Tap Notifications icon
and tap All settings.
b. In the All settings menu, tap Devices.
c. Under Devices, tap Bluetooth.
d. Slide the Bluetooth On/Off slider to On and the Tablet
PC begins to search for Bluetooth devices.
2. To add a Bluetooth device:
a. Ensure that the Bluetooth device is discoverable
according to the manufacturer’s instructions. (When a
Bluetooth device is discoverable, it is visible to other
Bluetooth devices within range.)
b. Select the Bluetooth device from the list of devices.
c. Follow the on-screen instructions.
Procedure: Setting up Mobile Broadband with GPS (optional)
If you purchased your XSLATE R12 with the optional mobile
broadband module, you can connect to high-speed cellular
networks worldwide. With the mobile broadband module and
a data plan from one of several cellular network providers, you
have full Internet access.
Note
Before you can connect to a mobile broadband
network, you must have an active account with a cellu-
lar network provider and obtain a SIM card for mobile
broadband access.
1. With the Tablet PC powered off, insert the SIM card and
power the tablet on.
2. Enable mobile broadband as follows:
a. Tap the Notifications icon
and tap All settings.
b. In the All settings menu, tap Network Internet and
then tap Cellular.
c. Tap the Cellular icon showing your service provider.
d. Tap the Connect button to make a connection.
Note
If you purchased your XSLATE
R12 with the optional
mobile broadband with GPS module or the optional
discrete GPS module, then the XSLATE
R12 has GPS
capabilities. You can use GPS with your preferred
mapping application to find your current and desti-
nation locations. Please refer to the User’s Guide for
additional information.
Setting up wireless
The XSLATE
R12 includes built-in Wi-Fi® and Bluetooth® technology. Your Tablet PC might also be equipped
with mobile broadband. To set up available wireless networks, follow the steps in these procedures.

