background image

Содержание ix104c4

Страница 1: ......

Страница 2: ......

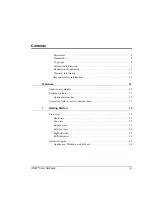
Страница 3: ...on 10 Important safety information 10 Welcome 13 About your computer 14 Package contents 15 Optional accessories 16 Contacting Xplore service and questions 17 1 Getting Started 19 Front view 19 Back v...

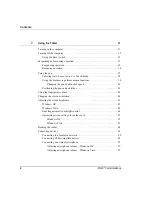
Страница 4: ...uble click speed 40 Positioning the pen and pen tether 41 Using the fingerprint scanner 43 Changing the screen orientation 44 Adjusting the screen brightness 45 Windows XP 45 Windows Vista 45 Enabling...

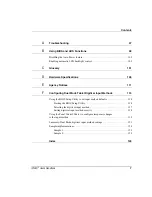
Страница 5: ...external battery charger 54 If you have an external battery charger 55 Removing and installing the battery 55 Removing the battery 55 Installing the battery 57 Discarding batteries 57 Using power opt...

Страница 6: ...ming hot keys to perform other key functions 77 3 Maintaining the Tablet 81 Caring for the tablet 81 Checking power cords and connectors 81 Protecting the computer from damage 81 Preventing the comput...

Страница 7: ...onfiguring Dual Mode Tablet Digitizer Input Methods 115 Using the BIOS Setup Utility to set input method defaults 116 Starting the BIOS Setup Utility 116 Selecting the digitizer input method 117 Setti...

Страница 8: ...8 iX104C4 User s Handbook...

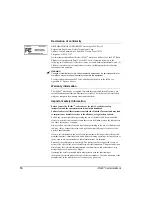
Страница 9: ...et PC Edition are trademarks of Microsoft Corporation PCMCIA and CardBus are registered trademarks of the Personal Computer Memory Card International Association Intel Pentium and SpeedStep are regist...

Страница 10: ...ty instructions and the operation instructions in this handbook Failure to observe all these instructions voids the Limited Warranty and may lead to suspension or denial of services to the offender or...

Страница 11: ...and power supply Route power supply cords so that they are not likely to be walked on or pinched by items placed upon or against them Pay particular attention to cords at plugs and convenience recept...

Страница 12: ...12 iX104C4 User s Handbook...

Страница 13: ...world challenges faced by today s mobile workers Based on years of experience in rugged mobile applications the iX104C4 is designed to withstand the abuses of everyday wear and tear Advanced technolog...

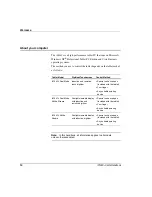
Страница 14: ...ss otherwise noted Tablet Model Digitizer Touchscreen Control Method iX104C4 Dual Mode Inductive and resistive touch digitizer Special enhanced pen included with the tablet Your finger Any suitable po...

Страница 15: ...r multi layer magnesium frames and cavities ISODAMP shock absorbing materials in patented bumpering system and gasket protection mechanisms Shock isolated hard disk Integrated protected wireless LAN a...

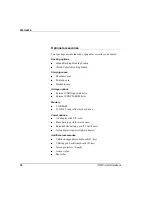
Страница 16: ...se Dockable case Storage options External USB floppy disk drive External USB CD ROM drive Memory 2 GB RAM 32 GB 2 5 inch solid state hard drive Power options AC adapter with U S cord Main battery pack...

Страница 17: ...ur tablet directly from Xplore use any of the following methods to contact Xplore for service and support Before you contact Xplore have the following information ready so that the customer support re...

Страница 18: ...18 iX104C4 User s Handbook...

Страница 19: ...ator HDD indicator Fingerprint scanner Built in microphone Enables you to input mono audio with noise cancellation See page 50 Reset switch Enables you to turn off the computer when using the Power On...

Страница 20: ...t view 20 iX104C4 User s Handbook Auto Light sensor Detects ambient light conditions HDD indicator Indicates hard disk drive activity See page 26 Fingerprint scanner Enables you to use fingerprint ver...

Страница 21: ...radio antennas accessible by authorized service personnel only Pen The main device you use to enter data and control applications instead of a mouse or a keyboard Also called the stylus See Using the...

Страница 22: ...to turn the computer on or off to turn the backlight on or off or to resume operation Air flow vents Help prevent the computer from overheating by forcing heat away from the computer Do not block the...

Страница 23: ...ports For Universal Serial Bus devices compliant with USB Standard Revision 2 0 Note The optional Office and Vehicle Docks include additional USB ports See Optional accessories on page 16 Headphone co...

Страница 24: ...Docking connector for the optional Xplore Tablet Dock Docking connector Enables you to connect the optional xStand Desktop Docking Station or xDock Vehicle Docking Station Guide pin receptacles Help...

Страница 25: ...rial Raised to help protect the computer from damage XPL expansion port A USB port compliant with USB Standard Revision 2 0 that enables you to connect XPL snap on expansion modules with additional fu...

Страница 26: ...tinuous The computer is on ready for use and functioning normally The battery is fully charged Charging green blinking The AC adapter is plugged in and the battery is charging Off state off no light T...

Страница 27: ...r source or install a charged battery On red continuous The computer is on running on battery power and the charge level in the battery has reached a critical state Plug the computer into an AC DC pow...

Страница 28: ...t guide This section is a quick guide to using the main features of your tablet See Chapter 2 for detailed information Application Windows and hot keys Ctrl Alt Delete Secure Attention Sequence key Sc...

Страница 29: ...ch Windows Task Manager Rotate screen orientation between portrait vertical and landscape horizontal Use in combination with another key to perform various functions See page 30 Fingerprint scanner Op...

Страница 30: ...ocuments or go to a Web site on page 71 iX104C4 Dual Mode Select Auto Sense mode Active mode or Touch mode This determines the input devices you can use In Auto Sense mode you can use the pen your fin...

Страница 31: ...ng the tablet Turning on the computer 1 Make sure the computer is off 2 Make sure the battery is charged or that the computer is plugged in to an external power source 3 Press the Power On Off Suspend...

Страница 32: ...ams 4 From the Windows Start menu click Turn Off Computer 5 The Turn off computer dialog box opens 6 Click Turn Off Using the Reset switch If the computer does not seem to be accepting input and you c...

Страница 33: ...computer uses very little power when in Suspend to RAM mode eventually the battery s power does run out If you do not plan to use the computer for an extended period of time turn the computer off or...

Страница 34: ...onnected to a network the network may automatically log you off after a period of inactivity while system operation is suspended Contact your help desk or system administrator to learn your log off ti...

Страница 35: ...mputer The Turn off computer dialog box opens 2 Press Stand By When operation is suspended the Status LED displays a continuous yellow light Method 2 Windows Vista 1 From the Windows Start menu press...

Страница 36: ...the Power On Off Backlight On Off Resume button Note Press the button only once After a minute or two the computer resumes normal operation When the Status LED displays a continuous green light you c...

Страница 37: ...se only the special multi function pen provided with the computer Touch mode Use your finger or another similar pointing device For more information see Selecting Auto Sense Active or Touch mode on pa...

Страница 38: ...only mode In Auto Sense mode you can use the multi function pen provided with the tablet your finger or any other similar pointing device interchangeably on the fly In Active mode you can use only th...

Страница 39: ...object for 1 second The right click icon appears or Press the right click button on the pen while you click the object If your computer is an iX104C4Dual Mode Touch mode In the Windows taskbar press...

Страница 40: ...nd Pen Settings icon If your computer is an iX104C3 Dual Mode In Active mode Click the Tablet and Pen Settings icon In Touch mode Click the Pointer Devices icon 5 Click the Windows tab 6 Follow the in...

Страница 41: ...the pen iX104C4 User s Handbook 41 Positioning the pen and pen tether The pen tether helps prevent the loss of your pen The following illustrations show how to position the pen and pen tether Tether a...

Страница 42: ...Chapter 2 Using the Tablet Using the pen 42 iX104C4 User s Handbook Tether anchored on the side pen tether pen...

Страница 43: ...ngerprint enrollment you will be able to Use your fingerprint as part of computer login security Register Web pages and Windows applications to use your fingerprint instead of passwords Launch applica...

Страница 44: ...rientation 44 iX104C4 User s Handbook Changing the screen orientation To rotate the screen orientation from portrait vertical to landscape horizontal mode or from landscape to portrait mode press the...

Страница 45: ...htness click the brightness control icon on the Windows taskbar then use the slider bar to make the adjustment Windows Vista To adjust the screen brightness 1 Click Start 2 Open the Control Panel 3 Do...

Страница 46: ...utomatic backlight control When the Auto Light sensor is enabled the computer automatically controls the amount of backlight sent to the screen to provide optimum brightness for the lighting condition...

Страница 47: ...ethod to smooth edges of screen fonts is checked and that ClearType is selected from the drop down list Click OK 8 Click the Settings tab Make sure the Screen resolution setting is 1024 by 768 pixels...

Страница 48: ...tablet 48 iX104C4 User s Handbook Docking the tablet If you have the optional xStand office dock or xDock vehicle dock connect it to the tablet at the docking port See the iX104 Docking Stations Handb...

Страница 49: ...vice may need to be enabled in the computer s configuration program Contact your local help desk or Xplore reseller Connecting to a local area network Connect a local area network LAN cable s RJ 45 co...

Страница 50: ...Sounds and Audio Properties window click the Audio tab 4 In the Sound recording area click the Volume button 5 Adjust the volume 6 Click OK Adjusting microphone volume Windows Vista If necessary adjus...

Страница 51: ...ns 2 If the Mute check box is checked uncheck it 3 Move the slider bar up or down to increase or decrease the volume Adjusting headphone or speaker volume Windows Vista 1 Click the audio icon in the S...

Страница 52: ...monitor or projection panel Activating the monitor or projection panel To change the video output to the monitor or projection panel Press the Fn P1 key combination To change the video output back to...

Страница 53: ...ng a device to the optional serial port If your tablet includes the optional serial port you can connect a terminal or other device that uses the RS 232 RS 422 or RS 485 data transfer standard Connect...

Страница 54: ...n the computer 1 Connect a power source such as an AC adapter or cigarette lighter adapter to the power connector on the computer If the battery charge is below 90 the battery begins charging and the...

Страница 55: ...ger to charge it Removing the battery 1 To swap with a charged battery Use one of the methods described in Suspending operation on page 34 to suspend operation If a charged battery is not available Sa...

Страница 56: ...latch toward the lock button The battery unlocks and slightly rises from the computer 4 Pull the battery away from the computer and remove it Note After removing the battery you must replace the batt...

Страница 57: ...is seated 3 Slide the battery release latch to its original position The lock button pops back into the locked position securing the battery in place Discarding batteries Dispose of batteries in accor...

Страница 58: ...g the Tablet Using power options Windows XP 58 iX104C4 User s Handbook Using power options Windows XP Displaying power options On the Windows taskbar click the battery icon The Power Options Propertie...

Страница 59: ...he computer s power schemes In the Power Options Properties window select the Power Schemes tab then select options from the drop down lists Changing battery alarm settings In the Power Options Proper...

Страница 60: ...ery power status In the Power Options Properties window page 58 select the Power Meter tab The window shows the amount of power left in the battery Selecting power settings In the Power Options Proper...

Страница 61: ...ng the Tablet Using power options Windows XP iX104C4 User s Handbook 61 Enabling Hibernation mode In the Power Options Properties window page 58 select the Hibernate tab then check the Enable Hibernat...

Страница 62: ...following window opens displaying the percentage of power remaining in the battery Selecting a power plan 1 On the Windows taskbar click the battery icon The following window opens 2 Select one of the...

Страница 63: ...a iX104C4 User s Handbook 63 Selecting power options 1 On the Windows taskbar right click the battery icon 2 Select Power Options The following window opens 3 Under the selected power plan press Chang...

Страница 64: ...acklight On Off Resume button options To change what happens when you press the button 1 On the Windows taskbar right click the battery icon 2 Select Power Options The following window opens 3 Press C...

Страница 65: ...Suspend operation if you know that you will not be using the system for a while See Suspending operation on page 34 If you do not plan to use the computer for an extended period of time turn it off No...

Страница 66: ...sult in damage to the case and the cover which is not covered under the Xplore Technologies warranty Xplore recommends that you use an approved Xplore Technologies service center for this procedure 1...

Страница 67: ...talling the hard disk drive compartment cover 1 Make sure the sealing gasket is properly placed 2 Reposition the cover on the compartment 3 Use the M1 Phillips screwdriver and a torque wrench to repla...

Страница 68: ...not covered under the Xplore Technologies warranty Xplore recommends that you use an approved Xplore Technologies service center for this procedure 1 Turn off the computer 2 Remove all power from the...

Страница 69: ...talling the PCMCIA compartment cover 1 Make sure the sealing gasket is properly placed 2 Reposition the cover on the compartment 3 Use the M1 Phillips screwdriver and a torque wrench to replace the 6...

Страница 70: ...m to perform different functions as described in this section Table 5 Programmable hot keys Key Default function Starts Help Starts Internet Explorer Starts your email application Table 6 Programmable...

Страница 71: ...1 Programming hot keys to start applications open documents or go to a Web site 1 In the Status area of the Windows taskbar click the iX104C4 Configuration icon The Launch Button QuickShow dialog box...

Страница 72: ...amming hot keys 72 iX104C4 User s Handbook 3 Click the Change button next to the key or key combination you want to program The following options appear 4 Click Launch an Application Document or Web s...

Страница 73: ...lication you want the hot key or Function mode hot key combination to start for example word exe notepad exe excel exe c Click Change 6 To open a document a In the Click Open a Document b Press Browse...

Страница 74: ...the hot key or Function mode hot key combination to open For example 911training dir demo ppt c Click Change 8 To open a Web page a Click Open a Web page b Press Browse to find the URL of the Web page...

Страница 75: ...rform pre defined functions 1 In the Status area of the Windows taskbar click the iX104C4 Configuration icon The Launch Button QuickShow dialog box opens 2 Click the Configure button The Panel Control...

Страница 76: ...ot keys 76 iX104C4 User s Handbook The following options appear 4 Click Start a pre defined function 5 In the Function selection drop down list select an option 6 Program more hot keys or click Close...

Страница 77: ...erform other key functions 1 In the Status area of the Windows taskbar click the iX104C4 Configuration icon The Launch Button QuickShow dialog box opens 2 Click the Configure button The Panel Control...

Страница 78: ...Chapter 2 Using the Tablet Programming hot keys 78 iX104C4 User s Handbook The following options appear 4 Click Press a key or key combination The following options appear...

Страница 79: ...t the hot key or hot key combination to perform the function of a key combination a Check the Ctrl Alt or Shift box b From the drop down list select the additional key or click the key on the keyboard...

Страница 80: ...80 iX104C4 User s Handbook...

Страница 81: ...he power cord immediately if you find any damage Protecting the computer from damage Your computer is designed to sustain a multiple axis drop to a non yielding surface Do not intentionally drop the c...

Страница 82: ...ng The computer monitors its internal temperature As the internal temperature approaches the tolerable limits of heat sensitive components system functions are automatically limited or turned off to p...

Страница 83: ...Caring for the display screen To clean the display screen dampen a soft cotton cloth with water and gently wipe the screen surface Note Do not use isopropyl alcohol to clean the screen Alcohol may dam...

Страница 84: ...ctor Follow the instructions included with your screen protector replacement kit Note If a screen protector is already installed on the display screen remove it before installing the new screen protec...

Страница 85: ...igitizer to adjust the distance error between where the pen or finger is actually touching the screen and where the computer is registering the pen or finger touch You may need to calibrate the digiti...

Страница 86: ...alibrating the digitizer iX104C4 Windows XP Follow these instructions if your computer is running Windows XP 1 From the Start menu select Control Panel The Control Panel opens 2 Click the Tablet and P...

Страница 87: ...ser s Handbook 87 3 In the Calibration area drop down list select the mode for which you want to calibrate the pen Landscape or Portrait then click Calibrate The Calibration program starts 4 Follow th...

Страница 88: ...Calibrating the digitizer iX104C4 Windows Vista Follow these instructions if your computer is running Windows Vista 1 From the Start menu select Control Panel The Control Panel opens 2 Double click th...

Страница 89: ...3 Maintaining the Tablet Calibrating the digitizer iX104C4 User s Handbook 89 3 In the General tab press the Calibrate button 4 Follow the instructions that appear on the screen 5 When you finish cli...

Страница 90: ...omputer as the pointing device In Touch mode you can use the stylus a similar pointing device or your finger Follow the instructions in the sections below to calibrate the digitizer for each mode Cali...

Страница 91: ...ser s Handbook 91 3 In the Calibration area drop down list select the mode for which you want to calibrate the pen Landscape or Portrait then click Calibrate The Calibration program starts 4 Follow th...

Страница 92: ...1 From the Start menu select All Programs Touch Utility The Touch Utility window opens 2 Click the appropriate Calibration button Note Xplore Technologies recommends 5 Pt or 9 Pt calibration for grea...

Страница 93: ...tylus included with the computer as the pointing device In Touch mode you can use the stylus a similar pointing device or your finger Follow the instructions in the sections below to calibrate the dig...

Страница 94: ...ting the digitizer 94 iX104C4 User s Handbook The Tablet PC Settings window opens 3 In the General tab press the Calibrate button The Calibration program starts 4 Follow the instructions that appear o...

Страница 95: ...ting the digitizer Touch mode 1 From the Start menu select All Programs Touch Utility The iTouch window opens 2 Select the Device tab 3 Select the appropriate calibration button Note Xplore Technologi...

Страница 96: ...96 iX104C4 User s Handbook...

Страница 97: ...ow level the computer is forced into Suspend to RAM mode to avoid a total system power failure Connect an external power supply such as the AC adapter or install a charged battery See Using the batter...

Страница 98: ...or cooler location If the Status light is continually yellow the computer is in Suspend or Hibernate mode Press the Power On Off key to resume Cursor is not tracking the pen Calibrate the pen See Cal...

Страница 99: ...ue light LEDs flicker Table 8 Using BIOS and AOS functions In Shifted Mode Button BIOS Key Function BIOS Key Function F1 F1 continues message Up Arrow Navigate up through Multi Boot options and BIOS m...

Страница 100: ...ower feature 1 When the computer is booting press the P2 button to access the BIOS Setup Utility 2 Select the Advanced tab 3 Disable the Dock with Auto Power On option Enabling automatic LCD backlight...

Страница 101: ...and frequency that vary in proportion to are an analog of the value to be transmitted Voice communications are analog signals Application A program that performs specific tasks on your computer such a...

Страница 102: ...or the pen stylus and the computer Disk drive The physical device that enables the computer to read from and write to a disk Display An image producing device used to view computer output Double clic...

Страница 103: ...e display Megabyte MB A unit of data storage equal to 1024 kilobytes Megahertz MHz a unit of wave frequency that equals 1 million cycles per second Modem A device that connects your computer to a tele...

Страница 104: ...D screen which indicates the current status of a particular device or hardware component Stylus A writing instrument For pen computers the stylus is used to interface with the LCD and digitizer Subscr...

Страница 105: ...9mm x 209 3mm x 40 8mm Weight 4 95 lbs 2 50 kgs Processing CPU Intel Pentium M U2500 processor Ultra Low Voltage 5 W Chip set Intel 945GME 533 MHz Processor speed 1 2 GHz Memory storage Main RAM 1GB D...

Страница 106: ...gle Horizontal 30 degrees min Vertical 10 degrees min Contrast Ratio Typ 250 1 Min 100 1 VRAM Intel 945GME chipset with 128MB shared memory using Unified Memory Architecture UMA delivers low power hig...

Страница 107: ...l port KeyPad User Controls Application buttons with primary and secondary functions Power On Off Suspend Resume button Emergency Shutoff Reset button Audio Realtec ACC 262 On board microphone with no...

Страница 108: ...ys Off State Approximately 30 days Bridge Battery 6 cell Li Ion 45mAh Life with Suspend to RAM on bridge battery only 3 to 5 minutes from full charge AC Adapter Auto sensing 100 240V supplying 19 VDC...

Страница 109: ...speed MIL STD 810F Method 510 4 Procedure 1 Salt Fog 5 saline for 48 hr 12 hr wet 12 hr dry 2 cycles MIL STD 810F Method 509 4 Contamination by fluids Detergents brake fluid aromatic hydrocarbons MIL...

Страница 110: ...Appendix D Hardware Specifications 110 iX104C4 User s Handbook Operating system Operating Systems Microsoft Windows XP Professional Tablet PC Edition Microsoft Windows Vista Business...

Страница 111: ...ll not occur in a particular installation If this equipment does cause harmful interference to radio or television reception which can be determined by turning the equipment off and on the user is enc...

Страница 112: ...s evaluated and shown to comply with FCC SAR guidelines Avoid covering or holding antennas when transmitting Antenna locations are shown in the following figure Health and Safety Information Exposure...

Страница 113: ...ass B respecte toutes les exigence du R glement sur le mat rial brouilleur du Canada Notice to Users of the Canadian Telephone Network Notice This equipment meets the applicable Industry Canada Termin...

Страница 114: ...ed Class 2 Adapters with an output rating of 19 VDC with a current of 3 75 A AC Adapter output polarity For authorized repair technicians only WARNING For continued protection against risk of fire rep...

Страница 115: ...tility to set the default input method Use the Panel Control Center to set controls for temporary changes to input methods for single sessions The section Summary Dual Mode digitizer input method sett...

Страница 116: ...ut method defaults Starting the BIOS Setup Utility If your computer is running Windows XP When the computer is starting up press the P2 key If your computer is running Windows Vista From the Start men...

Страница 117: ...Digitizer Selection field select the value from the drop down list as follows Value Description Auto Enables automatic sensing Auto Sense of inputs from touch and from the active pen Note This is the...

Страница 118: ...the Password Setting field select a value from the drop down list as follows 3 Click OK 4 Reboot the computer Value Description Notes No passwords set Anyone can change the digitizer input settings T...

Страница 119: ...rary session based changes to the Dual Mode tablet input method Notes Administrator rights are not required to make temporary settings When the tablet is restarted the temporary settings are lost and...

Страница 120: ...m the drop down list select Digitizer Selection or Touch Panel Toggle 6 Click Close Value Description Digitizer Selection If the digitizer input method is set to Auto in the BIOS Setup Utility toggles...

Страница 121: ...owing tables show the relationships of the BIOS Setup Utility and Panel Control Center settings Table 9 Settings Digitizer Only BIOS Setup Utility Digitizer Selection value Panel Control Center Pre de...

Страница 122: ...ook Table 10 Settings Digitizer Only with Touch Screen disabled BIOS Setup Utility Digitizer Selection value Panel Control Center Pre defined Function value On screen description when key is pressed N...

Страница 123: ...4C4 User s Handbook 123 Table 11 Settings Touch Panel only BIOS Setup Utility Digitizer Selection value Panel Control Center Pre defined Function value On screen description when key is pressed Notes...

Страница 124: ...OS Setup Utility Digitizer Selection value Panel Control Center Pre defined Function value On screen description when key is pressed Notes Touch Only Touch Panel Toggle Touch Panel off Touch Panel on...

Страница 125: ...s Handbook 125 Table 13 Settings Auto Digitizer Only Touch Only settings BIOS Setup Utility Digitizer Selection value Panel Control Center Pre defined Function value On screen description when key is...

Страница 126: ...gitizer input control is Touch only The user can turn off the touch screen The user cannot change any digitizer input control settings Configure settings as follows 1 Use the BIOS Setup Utility to set...

Страница 127: ...change the default digitizer input control settings Configure settings as follows 1 Do not use the BIOS Setup Utility to set a Supervisor password 2 Use the Panel Control Center to set one of the P ke...

Страница 128: ...128 iX104C4 User s Handbook...

Страница 129: ...ibrating 85 using to perform mouse functions 39 double click performing with pen 39 dragging and dropping performing with pen 39 Dual Mode tablet digitizer input method setting up 115 E email starting...

Страница 130: ...nual control 100 LEDs 26 Status LED meanings 26 left button click performing with pen 39 local area network LAN connecting to 49 logging on 29 M microphone connecting external 50 connector location 23...

Страница 131: ...eaker volume adjusting 51 speakers connecting 51 location 19 storing the computer 83 support contacting 17 Suspend mode description 33 ending 36 starting 34 suspending operation 34 Suspend to RAM mode...

Страница 132: ...132 iX104C4 User s Handbook...

Страница 133: ......

Страница 134: ......

Отзывы: