Smart Battery Safety Guidelines
Learning Your Transmitter
• One of the most important components of the Xplorer is the
transmitter that is supplied with this drone. We’ve designed
this transmitter with you, the user, in mind. The features
and functionality of this controller are very intuitive and
relatively easy to master after a few flights. However, it will be
beneficial to review the information below before taking off
with the Xplorer.
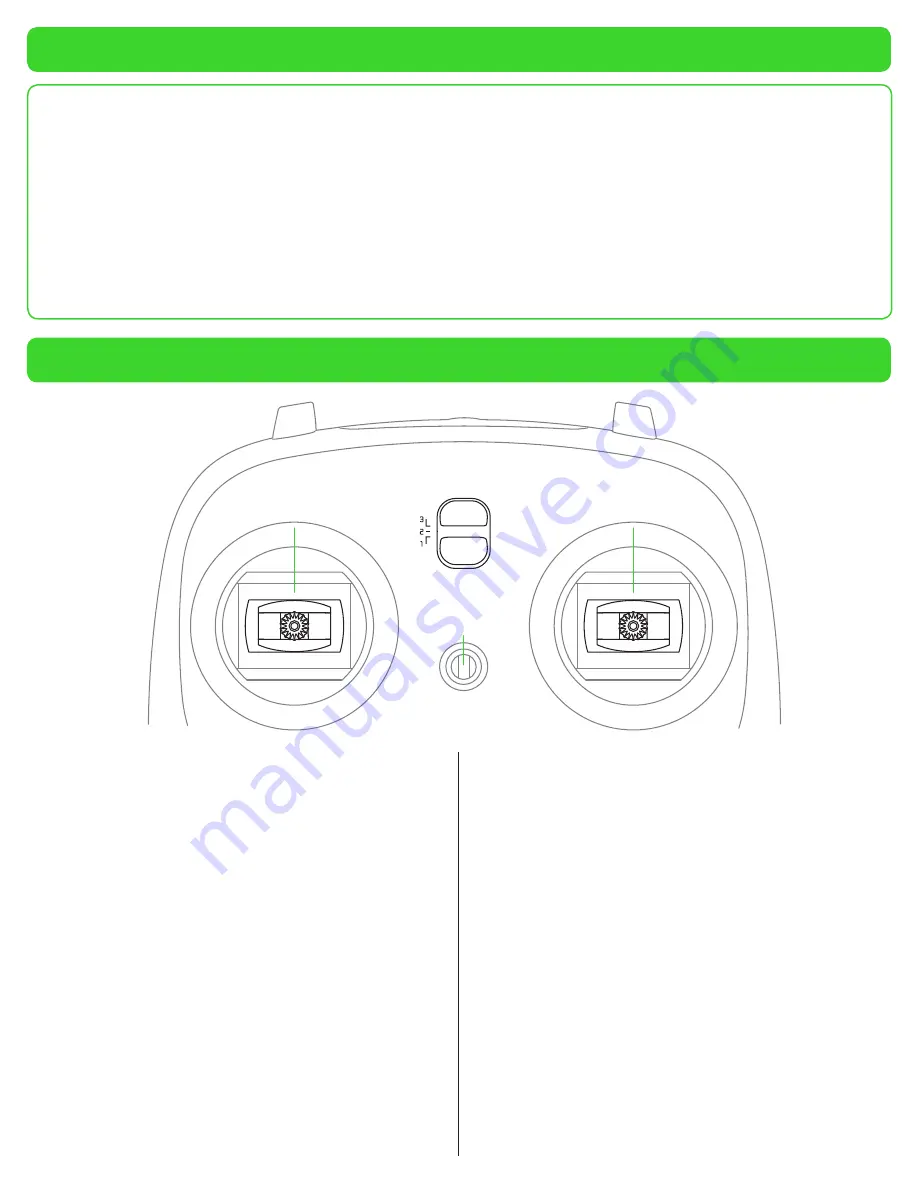
• Looking at the front of transmitter you will note that there are
two sticks, three push-buttons and a selector with numerical
indicators to the left (1, 2, 3). The purpose and functionality
of these items will be covered in this section.
TRANSMITTER STICK INPUT
• The sticks on the front of the transmitter are used to control
some of the functions of the drone’s flight. They are also
utilized to change the flight modes, alter the compliance
configuration and arm/disarm the motors.
• For the purposed of this manual, we will utilize the Mode 2
flight mode, as this is the most popular in the North American
market. Mode 2 is also the default mode for the transmitter.
• Please note that this information is conveyed assuming that
the front of the drone is pointed away from the pilot. The
front (nose) of the drone is indicated by the blinking triangular
power button on top of the drone when the Xplorer has been
turned on.
• In Mode 2, the left stick will control the throttle (causing the
Xplorer to rise or descend) and the yaw input. Advancing
the throttle stick away (towards the top of the transmitter)
increases the propeller speeds and will, therefore, cause the
Xplorer to climb accordingly. Alternatively, pulling the throttle
stick towards the bottom of the transmitter reduces the
propeller RPMs and will cause the drone to descend.
• Once the Xplorer has landed and you have pulled the
throttle stick all the way down and hold it for approximately
three (3) seconds, the motors will disarm (stop the rotation
accordingly).
• If the left stick is moved to the left, the front of the Xplorer will
also rotate to the left (counter clockwise). Conversely, moving
this stick to the right will move the nose of the Xplorer in a
clockwise direction.
• The stick on the right side of the controller is responsible
for moving the Xplorer forward/backward and for banking/
angling the drone to the left or right, as the case may be.
Moving the right stick to the top of the transmitter moves
the Xplorer forward; pulling back will move the Xplorer in a
rearward direction.
• Please see the sections entitled Changing the Transmitter
Operation Mode and Compliance Version Configuration for
additional information on stick input effects.
• Only use the Xiro battery and Xiro battery charger for the
Xplorer. Xiro does not take any responsibility for damages
caused by third party batteries or battery chargers.
•
Do Not
charge the battery immediately after a flight; allow the
battery ample time to cool down prior to charging.
• Replace the battery if it has been discharged over 300 times.
• Never recharge or use a visually defective/damaged battery.
• When not using the battery for a long period of time, please
make sure it is at 50% charge or less.
• Discharge the battery completely once every 20 charge/
discharge cycles. This will help to optimize battery life.
• Please deliver used batteries to designated disposal locations.
• If battery acid gets on your skin or in your eyes, immediately
wash your skin or eyes with fresh water for at least 15 minutes
and contact medical personnel immediately.
• To put out a battery fire use sand or use a dry power
extinguisher that is designed for this application. DO NOT
use water.
•
NEVER
leave a charging battery unattended.
• It is suggested that batteries be both stored and charged in a
fireproof container.
•
While the batteries are charging, it is a good time
to go through this manual and familiarize yourself
with the Xplorer, the transmitter and the gimbal unit
(if applicable).
Left-Stick
Flight Level Selector
Neck Strap
Attachment
Right-Stick
4
Содержание Xplorer
Страница 1: ...USER MANUAL V1 2 EN ...


