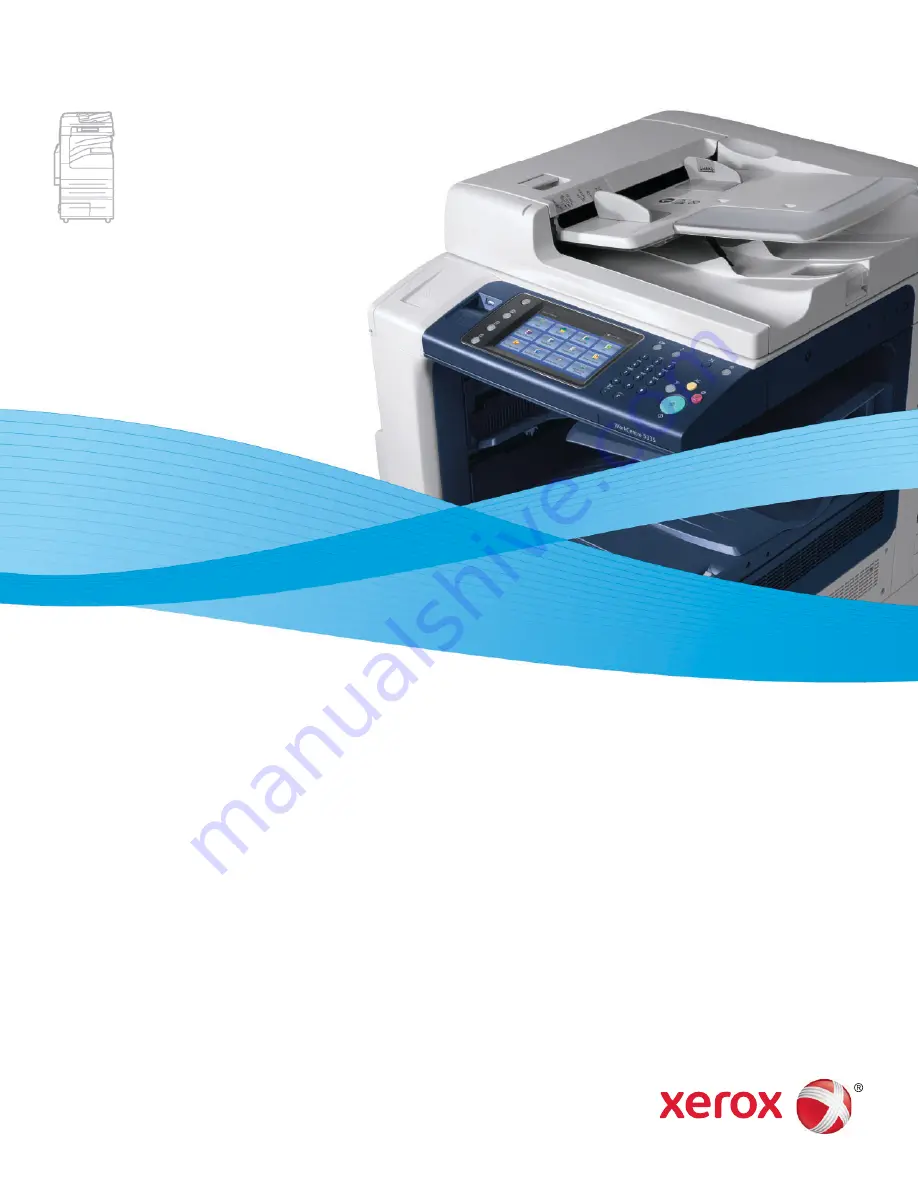
manualshive.com logo in svg
background image

Xerox

®

 WorkCentre

®

5325 / 5330 / 5335

User Guide
Guide d'utilisation

Italiano 

Guida per l’utente

Deutsch

Benutzerhandbuch

Español 

Guía del usuario

Português 

Guia do usuário

Nederlands

Gebruikershandleiding

Svenska 

Användarhandbok

Dansk

Betjeningsvejledning

Norsk

Brukerhåndbok

Suomi

Käyttöopas

Čeština

 Uživatelská 

příručka

Polski

Przewodnik użytkownika

Magyar

Felhasználói útmutató

Русский 

Руководство пользователя

Türkçe

Kullanıcı Kılavuzu

Ελληνικά 

Εγχειρίδιο χρήστη

Română

Ghid de utilizare 

Xerox WorkCentre 5325 / 5330 / 5335

Multifunction Printer
Imprimante multifonction

Содержание WorkCentre 5325

Страница 1: ...uikershandleiding Svenska Användarhandbok Dansk Betjeningsvejledning Norsk Brukerhåndbok Suomi Käyttöopas Čeština Uživatelská příručka Polski Przewodnik użytkownika Magyar Felhasználói útmutató Русский Руководство пользователя Türkçe Kullanıcı Kılavuzu Ελληνικά Εγχειρίδιο χρήστη Română Ghid de utilizare Xerox WorkCentre 5325 5330 5335 Multifunction Printer Imprimante multifonction ...

Страница 2: ...in the United States and or other countries Apple AppleTalk Bonjour EtherTalk Macintosh Mac OS and TrueType are trademarks of Apple Inc registered in the U S and other countries HP GL HP UX and PCL are trademarks of Hewlett Packard Corporation in the United States and or other countries IBM and AIX are trademarks of International Business Machines Corporation in the United States and or other coun...

Страница 3: ...nitialization USB Flash Drive 20 Parts of the Printer 21 Front Left View 22 Covers 23 Left Rear View 24 Document Feeder 25 Internal Components 26 Integrated Office Finisher Option 27 High Capacity Feeder and Office LX Finisher Options 28 Standard Features 29 Configurations 29 Printer Options 30 Energy Saver Mode 31 Control Panel 32 Control Panel Layout 32 Printer Information 33 Accounting 34 3 Ins...

Страница 4: ...tandard Paper Sizes 53 Supported Custom Paper Sizes 54 Loading Media 55 Loading Paper in Trays 1 and 2 55 Loading Paper in Trays 3 and 4 57 Configuring Tray 6 58 Loading Paper in Tray 6 60 Loading Paper in Tray 5 Bypass Tray 60 Loading Envelopes in Tray 5 Bypass Tray 62 Configuring the Envelope Tray 62 Loading Envelopes in the Envelope Tray 62 Printing on Special Media 64 Printing on Envelopes 64 ...

Страница 5: ...inting from a USB Flash drive 86 Printing Special Job Types 87 Printing and Deleting Secure Print Jobs 87 Printing a Sample Set 88 Delayed Printing 88 Charge Print 89 Saving a Print Job to the Printer 89 Sending a Print Job to a Fax Machine 90 5 Copying Basic Copying 92 Document Glass 92 Document Feeder 93 Adjusting Copy Options 94 Basic Settings 94 Image Quality Adjustments 98 Layout Adjustments ...

Страница 6: ...work File Repository 121 Scanning to an Email Address 122 Setting Email Options 122 Scanning to a Computer 124 Scanning to a Home Directory 125 Storing to a USB Flash Drive 126 Setting Scan Options 127 Scan Settings 127 Additional Scanning Options 128 Advanced Settings 128 Using the Xerox Scan Utility 131 Overview 131 Creating a Scan Template 132 Scanning to a Template 133 Network Scan Utility 3 1...

Страница 7: ...ing the Serial Number 155 Billing and Usage Information 155 Cleaning the Printer 156 Cleaning the Document Glass and Document Cover 156 Cleaning the Exterior 157 Cleaning the Document Feeder Rollers 157 Ordering Supplies 159 Consumables 159 Routine Maintenance Items 159 When to Order Supplies 160 Recycling Supplies 160 Installing Staples 161 Staple Replacement for Integrated Office Finisher 161 Ma...

Страница 8: ... Clearing Main Staple Jams in Office Finisher LX 189 Clearing Booklet Maker Staple Jams in Office Finisher LX 191 Print Quality Problems 193 Copy and Scan Problems 194 Fax Problems 195 Problems Sending Faxes 195 Problems Receiving Faxes 196 Getting Help 197 Control Panel Messages 197 Alerts 197 Online Support Assistant 197 Web Resources 198 10 Printer Specifications Physical Specifications 200 Bas...

Страница 9: ...Union 208 Ozone Release 209 Other Regulations 209 Copy Regulations 210 United States 210 Canada 211 Other Countries 212 Fax Regulations 213 United States 213 Canada 214 Europe 215 South Africa 215 Material Safety Data Sheets 216 Energy Saver Mode 217 B Recycling and Disposal Guidelines and Information 220 All Countries 220 North America 220 European Union 220 Other Countries 222 ...

Страница 10: ...Contents WorkCentre 5300 Series Multifunction Printer User Guide 10 ...

Страница 11: ...4 Maintenance Safety on page 15 Printer Symbols on page 16 Product Safety Certification on page 17 Environmental Health and Safety Contacts on page 18 Your printer and the recommended supplies have been designed and tested to meet strict safety requirements Attention to the following information ensures the continued safe operation of your printer ...

Страница 12: ...nter The printer is exposed to water If any of these conditions occur do the following 1 Turn off the printer immediately 2 Disconnect the power cord from the electrical outlet 3 Call an authorized Xerox representative Electrical Supply The printer must be operated from the type of electrical supply indicated on the printer s data plate label If you are not sure if your electrical supply meets the...

Страница 13: ...rized Xerox representative to correct the problem The printer emits unusual odors or makes unusual noises The power cable is damaged or frayed A wall panel circuit breaker fuse or other safety device has been tripped Liquid is spilled into the printer The printer is exposed to water Any part of the printer is damaged Telephone Line Cord WARNING To reduce the risk of fire use only No 26 American Wi...

Страница 14: ...ely 115 kg 253 5 lb Do not place the printer near a heat source Do not place the printer in direct sunlight to avoid exposure to light sensitive components Do not place the printer where it is directly exposed to the cold air flow from an air conditioning unit Operational Guidelines When the printer is printing Do not remove the paper source tray that you selected using either the print driver or ...

Страница 15: ... maintenance procedure that is not specifically described in the documentation supplied with your printer Do not use aerosol cleaners Clean with a dry lint free cloth only Do not burn any consumables or routine maintenance items For information on Xerox supplies recycling programs go to www xerox com gwa ...

Страница 16: ...s warning could cause serious injury or even death Ignoring this caution could cause injury or damage to the property Hot surface on or in the printer Use caution to avoid personal injury Do not touch components with this symbol as personal injury could result Do not burn the item Hot Surface Wait the indicated time before handling ...

Страница 17: ...rkCentre 5300 Series Multifunction Printer User Guide 17 Product Safety Certification This product is certified by the following agency using the safety standards listed Agency Standard TUV UL60950 TUV IEC60950 ...

Страница 18: ...vironmental Health and Safety Contacts For more information on Environment Health and Safety in relation to this Xerox product and supplies contact USA 1 800 828 6571 Canada 1 800 828 6571 www xerox com environment Europe 44 1707 353 434 www xerox com environment_europe ...

Страница 19: ... Multifunction Printer User Guide 19 2 Features This chapter includes Before Using the Printer on page 20 Parts of the Printer on page 21 Printer Configuration on page 29 Control Panel on page 32 More Information on page 35 ...

Страница 20: ... 3 Visit our Customer Website at www xerox com office WC53XXsupport or contact the Xerox Welcome Center Please have your printer s serial number when contacting Xerox The Welcome Center will want to know the following information The nature of the problem the serial number of the printer the fault code if any as well as the name and location of your company Follow the steps below to look up the se...

Страница 21: ... of the Printer This section includes Front Left View on page 22 Covers on page 23 Left Rear View on page 24 Document Feeder on page 25 Internal Components on page 26 Integrated Office Finisher Option on page 27 High Capacity Feeder and Office LX Finisher Options on page 28 ...

Страница 22: ...ion Printer User Guide 22 Front Left View 1 Adjusting Foot 6 Center Upper Tray 2 Tray 5 Bypass 7 Center Lower Tray 3 Stylus Pen Holder 8 Power Switch 4 Stylus Pen 9 Tray 1 2 3 4 5 Control Panel 10 Locking Casters wc53xx 001 7 8 9 10 2 1 5 6 3 4 ...

Страница 23: ...Features WorkCentre 5300 Series Multifunction Printer User Guide 23 Covers 1 Cover C 5 Cover E 2 Cover B 6 Document Cover 3 Cover D 7 Front Cover 4 Cover A wc53xx 111 5 7 6 4 3 2 1 ...

Страница 24: ... 8 USB Device PC to Printer 3 Line 1 9 USB Device Voice Assistance Maintenance 4 Telephone 10 Foreign Interface External Only 5 Ethernet 10 100Base TX Standard Network 11 Ethernet 10 100 1000Base TX Gigabit Network 6 USB Port Optional Card Reader 12 Reset Button wc53xx_002 TEL LINE1 LINE2 LINE3 4 3 2 1 11 10 9 8 7 6 5 12 ...

Страница 25: ...e 25 Document Feeder 1 Confirmation Indicator 6 Document Feeder Tray 2 Lever 7 Document Stopper 3 Left Cover 8 Document Output Tray 4 Inner Cover 9 Constant Velocity Transport CVT Glass 5 Document Guides 10 Document Glass 7 1 2 3 5 6 8 4 wc53xx 004 9 10 wc53xx 104 ...

Страница 26: ...Features WorkCentre 5300 Series Multifunction Printer User Guide 26 Internal Components 1 Toner 3 Drum Cartridge 2 Main Power Switch 1 3 2 wc53xx 003 ...

Страница 27: ...ures WorkCentre 5300 Series Multifunction Printer User Guide 27 Integrated Office Finisher Option 1 Staple Cartridge 4 Center Tray 2 Front Cover 5 Integrated Office Finisher 3 Top Cover 5 4 2 3 wc53xx 007 1 ...

Страница 28: ... Staple Cartridge 2 Front Transport Cover 10 Top Cover 3 Hole Punch Waste Container 11 Finisher Tray 4 Hole Punch Optional 12 Creaser Unit Optional 5 Finisher Transport Cover Center Tray 13 Main Staple Cartridge 6 Tray Attachment 14 Front Cover 7 Booklet Unit Optional 15 Office Finisher LX 8 Booklet Unit Side Cover 8 9 10 11 12 13 14 15 5 4 3 7 2 wc53xx 006 6 1 ...

Страница 29: ...special job types additional forms and macros PCL 6 Ethernet 10 100 1000Base TX connection Configurations The printer is available in two configurations Configuration Description Two paper trays and stand Tray 1 and Tray 2 that each hold up to 520 sheets supporting standard selectable sizes up to A3 11 x 17 in Tray 5 Bypass Tray that holds up to 50 sheets supporting custom sizes up to A3 11 x 17 i...

Страница 30: ...eets Thumbnail Preview High Compression MRC Searchable PDF Finishing Integrated Office Finisher Office Finisher LX with Hole Punch and Booklet Maker options Convenience Stapler Security Data Security Kit Xerox Secure Access Unified ID System Job Based Network Accounting Common Access Card Authentication CAC Digital Signature S MIME FIPS 140 2 Other PostScript Work Surface Envelope Tray High Capaci...

Страница 31: ...time has elapsed If no jobs are sent to the printer for an additional preset time it then enters Sleep Mode The touch screen is dark and the Power Saver button is lit in both modes Press the Energy Saver button to return the printer to normal operation Receipt of a job or accessing the printer using CentreWare Internet Services also cancels Energy Saver mode For details see the System Administrato...

Страница 32: ...ssword using the touch screen keyboard Press again to log out 4 Language Press to change the touch screen language and keyboard settings 5 Energy Saver Button When printer is in low power mode press to enter normal mode 6 Interrupt Printing Temporarily stops the current copy job to allow a priority job to process 7 Clear All Press twice to clear current job settings Touch Confirm on the touch scre...

Страница 33: ... either the Print this Job History Report button or the Print this Job Report button 5 For additional job types touch the Secure Print Jobs More tab then choose from the following Secure Print Sample Set Delayed Print Charge Print Public Folder 9 Start Press to start a copy scan or fax job 10 C Deletes numeric values or the last digit entered using the alphanumeric keys 11 Dial Pause Inserts a pau...

Страница 34: ...lling and controls access to copying scanning faxing and printing for each user When Accounting is enabled each user is required to enter their User ID information to use a controlled feature Controlled features are identified by a lock and key symbol The system administrator must create user accounts and then configure Accounting 1 On the touch screen touch the desired feature button 2 The touch ...

Страница 35: ...h printer User Guide PDF Software and Documentation disc www xerox com office WC53XXdocs System Administrator Guide www xerox com office WC53XXdocs Recommended Media List www xerox com paper United States www xerox com europaper Europe Drivers and Downloads www xerox com office WC53XXdrivers Online Support Assistant www xerox com office WC53XXsupport Technical Support www xerox com office WC53XXsu...

Страница 36: ...Features WorkCentre 5300 Series Multifunction Printer User Guide 36 ...

Страница 37: ...erview on page 38 Physical Connection on page 38 Turning the Printer On on page 38 Turning the Printer Off on page 40 Installing the Software on page 43 Using CentreWare Internet Services on page 47 See also Online Support Assistant at www xerox com office WC53XXsupport System Administrator Guide at www xerox com office WC53XXdocs ...

Страница 38: ...ommunication cables are not included with the printer and must be purchased separately To physically connect the printer 1 Connect the power cable to the printer and plug it into an electrical outlet 2 Connect one end of a Category 5 or better Ethernet cable to the Ethernet port in the back of the printer Connect the other end of the cable to your network port 3 If the fax option is installed conn...

Страница 39: ...n connecting a cable to the printer or when cleaning the printer CAUTIONS To avoid damaging the printer s internal hard drive or causing a printer malfunction switch main power on first using the main power switch Do not switch main power off immediately after switching it on Doing so may damage the printer s internal hard drive or cause a printer malfunction 1 Open the front cover 2 Press the mai...

Страница 40: ...port cover center tray Turning the Printer Off Press the power switch visible on the lower center tray to the off position to turn the printer off Internal processing takes place before the printer shuts off Notes Wait five seconds after any active job completes before turning the printer off When the optional Office Finisher LX is attached the power switch is located behind a clear plastic door i...

Страница 41: ... before unplugging the power cord Unplugging the power cord with the main power on may damage the printer s internal hard drive or cause a printer malfunction Do not switch main power off immediately after switching it on Doing so may damage the printer s internal hard drive or cause a printer malfunction Do not switch main power off immediately after switching the power switch off Doing so may da...

Страница 42: ...2 Assigning a Network Address If the network uses a DHCP server the printer automatically acquires a network address To assign a static IP address configure DNS server settings or configure other TCP IP settings see the System Administrator Guide at www xerox com office WC53XXdocs ...

Страница 43: ...tive network and has a valid IP address To install the driver 1 Insert the Software and Documentation disc into your computer s CD or DVD drive 2 The installer starts automatically unless you have autorun disabled on your computer Note If the installer does not start navigate to the drive and double click Setup exe If the Software and Documentation disc is not available download the latest driver ...

Страница 44: ...tware and Documentation disc into your computer s CD or DVD drive Note If the Software and Documentation disc is not available download the latest driver from www xerox com office WC53XXdrivers 2 Open the Mac folder then open Mac OS 10 5 Universal PS folder 3 Open the dmg file 4 Open the WorkCentre 5325 5330 5335 CD 5 Click Continue three times 6 Click Agree to accept the License Agreement 7 Click...

Страница 45: ...printers 4 Type the IP address or host name of the printer 5 Type a Queue name for the printer or leave it blank to use the default queue 6 Click the printer then click Add Note If the printer was not detected by the network check to make sure that the printer is on and the Ethernet cable is connected properly If you want to connect by specifying the printer s IP address 1 From the Applications fo...

Страница 46: ...fice WC53XXdrivers Xerox Global Print Driver Use to print to any PCL or PostScript enabled printer on your network including those made by other manufacturers The driver configures itself for the printer you select Xerox Mobile Express Driver Use to print to any PostScript enabled printer on your network including those made by other manufacturers The driver configures itself for the printer you s...

Страница 47: ...nments JavaScript must be enabled in the Web browser If JavaScript is disabled a warning message appears and CentreWare Internet Services may not function properly TCP IP and HTTP must be enabled in the printer For details see the System Administrator Guide at www xerox com office WC53XXdocs Finding The Printer s IP Address The printer s IP address is required to use CentreWare Internet Services D...

Страница 48: ...Installation and Setup WorkCentre 5300 Series Multifunction Printer User Guide 48 ...

Страница 49: ...ng Options on page 66 Printing on Both Sides of the Paper on page 69 Selecting Paper on page 71 Printing Multiple Pages to a Single Sheet N Up on page 72 Printing Booklets on page 73 Printing Insert Pages on page 78 Printing Cover Pages on page 76 Printing Exception Pages on page 79 Scaling on page 80 Printing Watermarks on page 81 Printing Mirror Images for Windows on page 83 Creating and Saving ...

Страница 50: ...indows or CMD P for Macintosh 4 Select your printer from the list 5 Access the print driver settings by selecting Properties or Preferences Windows or Xerox Features for Macintosh The title of the button may vary depending on your application 6 Modify the print driver settings as necessary then click OK 7 To send the job to the printer click Print See also Loading Media on page 55 Selecting Printi...

Страница 51: ...om europaper Recommended Media List Europe Ordering Media To order paper or specialty media contact your local reseller or go to www xerox com office WC53XXsupplies CAUTION Damage caused by using unsupported paper and specialty media is not covered by the Xerox Warranty Service Agreement or Total Satisfaction Guarantee The Total Satisfaction Guarantee is available in the United States and Canada C...

Страница 52: ...r is susceptible to damage from ultraviolet and visible light Ultraviolet light which is emitted by the sun and fluorescent bulbs is particularly damaging to paper The intensity and length of exposure to visible light on paper should be reduced as much as possible Maintain constant temperatures and relative humidity Avoid storing paper in attics kitchens garages or basements These spaces are more ...

Страница 53: ... paper that has had one side printed 64 105 g m Hole Punched 64 105 g m Letterhead 64 105 g m Lightweight 60 63 g m Heavyweight 106 169 g m Cardstock 170 215 g m Recycled 64 105 g m Heavyweight Bond 170 215 g m Pre Printed 64 105 g m Labels 106 169 g m Transparency Tray 5 Bypass Tray and Envelope Tray Tray 1 only Envelopes 75 90 g m Tray Number European Standard Sizes North American Standard Sizes...

Страница 54: ...215 x 315 mm DL Envelope 110 x 220 mm C5 Envelope 162 x 229 mm Letter 8 5 x 11 in Legal 8 5 x 14 in Tabloid 11 x 17 in Postcard 4 x 6 4 x 6 in 5 x 7 5 x 7 in Statement 5 5 x 8 5 in Executive 7 25 x 10 5 in 8 x 10 8 x 10 in 8 5 x 13 8 5 x 13 in 9 x 11 9 x 11 in No 10 Envelope 4 1 x 9 5 in Monarch Envelope 3 9 x 7 5 in Commercial 10 4 1 x 9 5 in Trays Custom Size Ranges Trays 1 and 2 Width 140 297 m...

Страница 55: ...ng on Special Media on page 64 Select the appropriate tray depending on the media you plan to use For details see Supported Media on page 51 Note In addition to the standard media types the printer allows up to five custom media type selections For faster printing speeds load paper 305 mm 12 in or shorter for long edge LEF Load paper longer than 305 mm 12 in for short edge feed SEF Loading Paper i...

Страница 56: ... 2 Before loading paper into the paper trays fan the edges to separate any sheets of paper that are stuck together This reduces the possibility of paper jams 3 If required move the paper tray guides further out to load the new paper To adjust the side and front guides pinch the guide lever on each guide and slide the guides to their new position To secure the guides in position release the levers ...

Страница 57: ...ouch screen Loading Paper in Trays 3 and 4 Tray 3 accepts a maximum of approximately 870 sheets of 80 g m paper B5 JIS A4 Executive Letter Tray 4 accepts a maximum of approximately 1130 sheets of 80 g m paper B5 Executive or A4 Letter Trays 3 and 4 accept paper weights from 60 g m through 215 g m To load paper in Trays 3 and 4 1 Pull the paper tray out until it stops 2 Fan the edges of the paper b...

Страница 58: ...paper Change the selection for any incorrect Setting 7 On the printer touch screen touch Confirm Configuring Tray 6 Tray 6 is a dedicated high capacity feeder It must be configured to support the paper in use If the tray has never been used it must be configured for the desired paper size If you are changing the paper size you must reconfigure the tray for the new paper size Before changing the dr...

Страница 59: ...r that correspond with the paper size 4 Slide the top of the spacer plate to engage the peg on the back of the tray into the matching hole in the plate 5 Install the screw to secure the spacer plate 6 Repeat steps 1 5 for the spacer plate at the front of Tray 6 7 Locate the pin at the top of the side gate 8 Lift the pin and guide it to the desired paper size in the slot on the top of the side gate...

Страница 60: ...th the holes toward the right side of the tray Place Letterhead or the top of the page toward the front of the tray Note Do not load paper above the maximum fill line Doing so may cause paper jams 5 Slide the guides so they touch the edges of the paper 6 Close the tray 7 Verify the size type and color of the paper Change the selection for any incorrect Setting 8 On the printer touch screen touch C...

Страница 61: ...her long edge or short edge first Larger paper sizes can only be fed short edge first 3 Slide the guides so they just touch the edges of the stack Note Do not load paper above the maximum fill line Doing so may cause paper jams 4 If required choose paper size type or color on the printer touch screen then touch Confirm 5 If you have not changed the media type touch Confirm on the touch screen wc53...

Страница 62: ... the Envelope Tray The optional envelope tray provides higher volume envelope capacity than the bypass tray The envelope tray replaces Tray 1 in the printer and must be configured before use When the envelope tray is installed the standard Tray 1 cannot be used This feature must be configured by the System Administrator For details see the System Administrator Guide at www xerox com office WC53XXd...

Страница 63: ...osed and on the leading edge toward the left side of the tray Notes Printing will appear on the side facing up Do not load envelopes above the maximum fill line Doing so may cause jams 4 Adjust the guides in the envelope tray so they touch the edges of the stack 5 Push the tray completely into the printer 6 If you have changed the envelope size on the printer touch screen touch Change Settings cho...

Страница 64: ... affect print quality and cause wrinkling Excessive moisture can cause the envelopes to seal before or during printing Do not use padded envelopes To print envelopes 1 Load envelopes in the desired tray 2 In the print driver do one of the following Select Envelope as the paper type Select Tray 5 Bypass Tray as the paper source With the optional Envelope Tray in the Tray 1 position select Tray 1 as...

Страница 65: ...ckaging until ready to use Return any unused sheets of labels to the original packaging and reseal it Do not store labels in extremely dry or humid conditions or extremely hot or cold conditions Storing them in extreme conditions may cause print quality problems or cause them to jam in the printer Rotate stock frequently Long periods of storage in extreme conditions can cause labels to curl and ja...

Страница 66: ...Setting Default Printing Options for Windows When you print from any software application the printer uses the print job settings specified in the Printing Preferences window You can specify your most commonly used printing options and save them so that you do not have to change them every time you print To change Printing Preferences 1 Click the Windows Start button select Settings then click Pri...

Страница 67: ...ick the Paper Output tab 2 Click the arrow to the right of the Finishing section then click the desired finishing options Selecting Options for an Individual Job for Macintosh To use specific printing options for a single job change the settings before sending the job to the printer 1 With the document open in your application click File then click Print 2 From the Printer list select your printer...

Страница 68: ...tional Office Finisher LX installed finishing options such as stapling and creasing are selected in the print driver To select finishing features in the Macintosh print driver 1 In the print driver click the Copies Pages menu then select Xerox Features 2 In the Paper Output dialog box click the arrow to the right of the Finishing section then select the desired finishing options ...

Страница 69: ... printing a 2 sided document verify that the paper type and weight are supported Paper weights in the range of 60 g m to 169 g m can be used for automatic 2 sided printing The following paper types can be used for automatic 2 sided printing Plain Letterhead Heavyweight Recycled Pre printed Punched Lightweight The following paper and media cannot be used for 2 sided printing Reload paper previously...

Страница 70: ... layout for 2 Sided Printing which determines how the printed pages turn These settings override the application page orientation settings Windows 1 In the print driver click the Layout Watermark tab 2 Under Page Layout Options click Portrait Landscape or Rotated Landscape 3 Under Page Layout Options click 2 Sided Print or 2 Sided Print Flip on Short Edge 4 Click OK Macintosh 1 In the application ...

Страница 71: ...ct Other Size In the Paper Size window select the size from the Output Paper Size menu then click OK 3 To change the paper color click the arrow next to the Paper field From the Other Color menu select the paper color 4 To change the paper type click the arrow next to the Paper field From the Other Type menu select the paper type 5 To specify a tray click the arrow next to the Paper field From the...

Страница 72: ... sheet of paper Print one two four six nine or 16 pages per side Windows 1 In the print driver click the Layout Watermark tab 2 Click Pages Per Sheet N Up 3 Click the button for the number of pages you want to appear on each side of the sheet 4 Click OK Macintosh 1 In the Print dialog box click Copies Pages menu then click Layout 2 Select the number of Pages per Sheet and Layout Direction 1 2 4 3 ...

Страница 73: ...he pages to create the booklet Note Booklets can be created using A4 210 mm x 297 mm 8 5 x 11 in paper and A3 297 mm x 420 mm 11 x 17 in paper When you print booklets using the Windows PostScript or Macintosh driver you can specify the gutter and creep Gutter Specifies the horizontal distance in points between the page images A point is 0 35 mm 1 72 in Creep Specifies how much the page images are ...

Страница 74: ...he paper size 5 In the PostScript driver gutter and creep values are set automatically To manually specify the values click the Gutter and Creep arrows 6 Click OK Macintosh 1 In the Print dialog box click Copies Pages click Xerox Features then click the Paper Output 2 Click the arrow to the right of Finishing then select Booklet Creation 3 In the Booklet Creation dialog box under Booklet Finishing...

Страница 75: ...eep values are set automatically To manually specify the values click the Gutter and Creep arrows to specify the values 6 Click OK 7 If desired select Print Page Borders from the drop down list 8 Click OK Macintosh 1 In the Print dialog box click Copies Pages click Xerox Features then click Layout Watermark 2 Under Booklet Layout click Enabled 3 Click Booklet Options 4 The paper size is automatica...

Страница 76: ...me tray as the rest of your document Front Only Prints the first page on paper from the specified tray Back Only Prints the back page on paper from the specified tray Front and Back Same Front and back cover pages print from the same tray Front and Back Different Front and back cover pages print from different trays For the back of your front cover to remain blank when using 2 sided printing page ...

Страница 77: ...r click the Special Pages tab 2 Click Add Covers 3 In the Add Covers window click the desired options then click OK Macintosh 1 In the Print dialog box click Copies Pages click Xerox Features then click Add Covers 2 Click Before document or After document 3 Click the desired options then click OK ...

Страница 78: ...ld displays the Use Job Settings default size color and type of paper to use for the insert pages To change the paper to use for the insert pages click the down arrow to the right of the Paper field then select from the following menu items Other Size Click this menu item then click the paper size desired for the insert pages Other Color Click this menu item then click a color for the paper to use...

Страница 79: ...following menu items Other Size Click this menu item then click the paper size desired for the exception pages Other Color Click this menu item then click a color for the paper to use for the exception pages Other Type Click this menu item then click the type of paper or media to use for the exception pages 2 Sided Printing Click the down arrow then click the desired 2 sided printing option 1 Side...

Страница 80: ... Click the down arrow to the right of the Paper field then click Other Size 3 In the Paper Size window click the arrow to the right of Scale Options then click one of the following options Automatically Scale to scale from one standard paper size to another Manually Scale to scale by a percentage entered in the percentage field Macintosh 1 In the application click File then click Page Setup 2 In t...

Страница 81: ...k in the foreground or background or blend with the print job Use a picture for the watermark Use a time stamp for the watermark Note Not all applications support watermark printing Windows 1 In the print driver click the Layout Watermark tab Click the Watermark down arrow then click the desired existing watermark To modify an existing watermark click the Watermark down arrow click Edit make the d...

Страница 82: ...watermark To modify a watermark click the Watermark down arrow click Edit make the desired settings in the Watermark Editor dialog box then click OK To create a new watermark click the Watermark down arrow click New make the desired settings in the Watermark Editor dialog box then click OK 2 To select watermark printing options click the Watermark down arrow click Options then click the desired pr...

Страница 83: ...Printing Mirror Images for Windows If the PostScript option is installed you can print pages as a mirror image Images mirror left to right when printed 1 In the print driver click the Advanced tab 2 Click the Image Options plus sign click Mirrored Output then click Yes ...

Страница 84: ...indow click the arrow to the right of Output Paper Size then click New 4 In the New Custom Size window type a name in the Name field then type dimensions in the Height and Width fields 5 Click OK twice Macintosh 1 In the application click File then click Page Setup 2 In the Paper Size drop down list click Manage Custom Sizes 3 Click the button to add a new custom page size 4 Double click the name ...

Страница 85: ...ight corner of your computer screen with the name of the job and the name of the printer where it was printed Note This feature is only available when your printer is connected to your Windows computer over a network 1 In the print driver click More Status at the bottom of any tab 2 In the Status window click Notification then click the desired option 3 Click the X in the upper right corner of the...

Страница 86: ...to the USB port on the control panel The USB Device Detected window appears 2 Press Media Print Text 3 To print individual files touch Select from List 4 Touch the desired folder To move down one directory level touch Next To move up one directory level touch Previous 5 Touch the desired files 6 To select a group of files do one of the following To print all files touch Select All then Save To sel...

Страница 87: ...ver click Paper Output click the Job Type menu then click Secure Print 2 In the Secure Print window type and confirm a 1 to 12 digit passcode 3 Click OK Macintosh 1 In the print dialog box click Copies Pages then click Xerox Features 2 Click the Job Type menu then click Secure Print 3 Type and confirm a 1 to 12 digit passcode 4 Click OK Printing or Deleting Secure Print Jobs at the Printer CAUTION...

Страница 88: ...restored 1 On the control panel press the Job Status button 2 Touch the Secure Print Jobs More tab then touch Sample Set 3 Touch your user identification in the list then touch Job List 4 Touch the document in the job list If desired enter the print quantity using the alphanumeric keypad 5 Touch Release 6 To delete the job touch Delete Delayed Printing A print job can be delayed for up to 24 hours...

Страница 89: ...eleted 10 To delete the job without printing touch Delete CAUTION Once deleted a job cannot be restored 11 When finished press the Log In Out button then touch Logout Saving a Print Job to the Printer The Store File in Folder job type stores a print job in a folder in the printer You can print the job from the printer control panel The job is not automatically deleted after printing but it can be ...

Страница 90: ... Click OK 7 Click Print The job is stored in the printer Printing or Deleting a Job at the Printer 1 On the control panel press the Job Status button 2 Touch the Secure Print Jobs More tab then touch Public Folder 3 Touch the job to be printed or deleted 4 If required enter the passcode then touch Confirm 5 If desired specify the number of print sets using the alphanumeric keypad then touch Print ...

Страница 91: ...unction Printer User Guide 91 5 Copying This chapter includes Basic Copying on page 92 Adjusting Copy Options on page 94 See also System Administrator Guide at www xerox com office WC53XXdocs for details on managing copy functions ...

Страница 92: ... or single pages Document Glass CAUTION When scanning a bound document do not attempt to force the document feeder cover closed Doing so may damage the document feeder cover Lift the document feeder cover and place the original facedown toward the back left corner of the document glass The original must be aligned to the matching paper size printed on the edge of the glass The document glass accep...

Страница 93: ...etely 5 If desired change the copy settings For details see Adjusting Copy Options on page 94 6 Press the green Start button on the control panel Insert originals faceup with page 1 on top The confirmation indicator illuminates when the originals are correctly loaded Adjust the paper guides so they fit against the originals The document feeder accepts paper weights from 38 g m to 128 g m for 1 sid...

Страница 94: ...ge 97 Hole Punching Copies on page 97 Creating Booklets on page 97 Reducing or Enlarging the Image To reduce or enlarge the image 1 Touch Copy on the touch screen 2 To reduce or enlarge the image proportionally do one of the following Touch the plus or minus buttons Touch Reduce Enlarge then touch the plus or minus buttons 3 To reduce or enlarge the image proportionally by a preset amount such as ...

Страница 95: ...document feeder and the document glass can be used to copy one or both sides of a 2 sided original To copy both sides of a 2 sided original 1 Touch Copy on the touch screen 2 Under 2 Sided Copying touch 2 2 Sided 3 Press the green Start button The document feeder automatically copies both sides of a 2 sided original Note When using the document glass for 2 sided copying a message appears at the to...

Страница 96: ...g touch the desired setting then touch Save 3 Touch Save To choose Offset Stacking options with a finisher 1 Under Copy Output touch More then touch Offset Stacking 2 Touch the desired setting then touch Save Stapling Copies If the printer has the optional Integrated Office Finisher copies can be automatically stapled with one staple The Office Finisher LX can automatically staple with two staples...

Страница 97: ... the crease 4 Touch Save Hole Punching Copies If the printer has the Office Finisher LX with the Hole Punch option copies can be automatically hole punched Note Hole punch options are dependent on paper size and feed orientation The paper can be fed from a tray with the paper loaded for short edge feed or long edge feed If the desired hole punch option is unavailable touch Paper Supply then choose...

Страница 98: ...s produced c Touch Save Adjusting the Darkness and Sharpness You can lighten or darken copies and adjust the sharpness To adjust these image options 1 On the touch screen touch Copy then touch the Image Quality tab 2 Touch Image Options 3 In the Image Options window a To lighten or darken the image touch the Lighten Darken pointer then move it toward Lighten or Darken b To sharpen or soften the im...

Страница 99: ...not be activated simultaneously Non standard size documents will not be separated into two pages accurately To copy pages from a book or other bound document 1 Touch Copy on the touch screen then touch the Layout Adjustment tab 2 Touch Book Copying In the next screen touch On a To copy both pages of an open book in page order touch Both Pages To specify the Binding Edge Erase amount the space betw...

Страница 100: ...y the Binding Edge Erase amount the space between the image area and the binding touch the plus or minus buttons 5 Touch Save Specifying the Original Size To specify the original size so that the correct area is copied 1 On the touch screen touch Copy then touch the Layout Adjustment tab 2 Touch Original Size a The printer can pre scan the first page of the originals to determine the area to copy ...

Страница 101: ...inals must be positioned correctly for image shift to work correctly For details see Basic Copying on page 92 Document feeder position originals faceup left long edge entering the feeder first Document glass position originals facedown in the back left corner of the document glass long edge to the left To change image placement 1 Touch Copy on the touch screen then touch the Layout Adjustment tab ...

Страница 102: ... the Image Originals can be printed as mirror images This reflects each image left to right on the page Originals can be printed as negative images the positive image is printed as a negative To invert images 1 Touch Copy on the touch screen then touch the Layout Adjustment tab 2 To mirror images touch Invert Image then touch Mirror Image The default is Normal Image which does not mirror the image...

Страница 103: ...the Office Finisher LX with Booklet Maker option is installed touch No Crease Staple Crease Staple or Crease Only 5 You can add margins in the center binding area to compensate for the thickness of the booklet a Touch Binding Shift then touch the plus or minus buttons to set the shift b Touch Save 6 To add covers touch Covers then touch Blank Cover Print on Both or 1 Sided Covers Print Outside Tou...

Страница 104: ...ginal pages onto one side of a sheet of paper The size of the page images is reduced proportionally to fit on the selected paper To copy multiple pages on a sheet 1 Touch Copy on the touch screen then touch the Output Format tab 2 Touch Page Layout 3 Touch Multiple Pages per Side 4 To select the number of original pages for each sheet of paper touch 2 Pages 4 Pages or 8 Pages For 4 Pages Up or 8 P...

Страница 105: ...automatically added to copies To add annotations 1 Touch Copy on the touch screen then touch the Output Format tab 2 Touch Annotations 3 To insert a comment a Touch Comment then touch On b On the next screen touch the desired comment in the list of stored comments c To create a comment touch an Available comment then touch Edit Using the touch screen keyboard enter the new comment then touch Save ...

Страница 106: ... then touch Save f To specify the number of digits touch Number of Digits To select the minimum number of digits necessary touch Auto Assign then touch Save To select a specific number of digits touch Manual Assign then touch the plus or minus buttons to insert up to 9 leading zeros then touch Save g Touch Save 7 To specify the original s orientation as you place it in the document feeder or on th...

Страница 107: ...ve 9 Touch Save Identification Card Copying This feature allows you to copy both sides of a small original such as an identification card onto the same side of a page 1 Open the document feeder and place the card in the upper left hand corner of the document glass Note Place the card slightly away from the top left corner of the document glass to capture the whole image of the card 2 Close the doc...

Страница 108: ...t b Touch the desired copy settings for the first segment c Touch the Job Assembly tab d Touch the Build Job button touch On then touch Save e To scan the first set of originals press the green Start button on the control panel The Copy screen appears on the touch screen 3 Program and scan additional segments a Place the originals in the document feeder or on the document glass for the next segmen...

Страница 109: ...ding Covers on page 104 Select the desired settings then touch Save d Annotations see Adding Annotations on page 105 Select the desired settings then touch Save e Segment Separators to insert separator pages between segments touch Segment Separators then choose from the following No Separators separators are not inserted Touch Save Blank Separators blank separators are inserted To specify the quan...

Страница 110: ...aining copies of the job touch Start or press the green Start button on the control panel 2 If the sample copy is unsatisfactory touch Delete Combining Original Sets If the number of originals exceeds the capacity of the document feeder you can combine the sets into one job To select Combine Original Sets 1 Touch Copy on the touch screen Touch the desired copy settings then enter the number of cop...

Страница 111: ...Only d Touch Save e Additional areas can be defined by selecting Area 2 and Area 3 4 To delete everything inside the specified area when copying a Touch Delete Inside b The area is defined by the rectangle formed between the points as shown on the touch screen Touch Area 1 then touch each coordinate on the touch screen Use the alphanumeric keypad on the control panel to enter the coordinate values...

Страница 112: ... the Job Assembly tab then touch Retrieve Saved Settings 3 Touch the desired saved setting Note To delete a saved setting touch it then touch the Delete Settings button 4 Touch Retrieve The saved settings are loaded for the current copy job Using Form Overlay This feature allows the first scanned original to be saved as a form image in the memory and overlayed onto subsequent originals To enable F...

Страница 113: ...inting Stored Files using CentreWare Internet Services on page 118 Scanning to a Network File Repository on page 121 Scanning to an Email Address on page 122 Scanning to a Computer on page 124 Scanning to a Home Directory on page 125 Storing to a USB Flash Drive on page 126 Setting Scan Options on page 127 Using the Xerox Scan Utility on page 131 See also System Administrator Guide at www xerox co...

Страница 114: ...nd store the image to any of the following destinations Folder on the printer s hard drive Document repository on a network server Email address Windows computer Home directory USB Flash drive Computer using Xerox Scan Utility Application using TWAIN or WIA Notes The printer must be connected to a network to retrieve a scan file Scanning functions require installation of the Scan Drivers For more ...

Страница 115: ...he document feeder for multiple or single page jobs Using the Document Glass Lift the document feeder cover and place the original facedown toward the back left corner of the document glass as shown CAUTION When scanning a bound document do not attempt to force the document feeder cover closed Doing so may damage the document feeder cover Using the Document Feeder Insert originals faceup Adjust th...

Страница 116: ...re a scanned file to a folder 1 Load the original on the document glass or in the document feeder 2 Press the Services Home button 3 On the touch screen touch Store to Folder 4 Touch the desired folder If a password is required enter the password using the alphanumeric keypad then touch Confirm on the touch screen 5 To change any of the scan settings use the four menus at the bottom of the touch s...

Страница 117: ...buttons to examine the enlarged preview c To rotate the preview select the desired rotation from the No Rotation drop down list Note Rotating the preview does not rotate the printed output d When finished touch Close 2 To view a summary of file information a In the touch screen file list touch the desired file b Touch Review c When finished touch Close 3 To delete a file a In the touch screen file...

Страница 118: ...esired file 7 Scroll the page to see the Print File section 8 If desired make selections from the following printing options Paper Supply Output Destination Quantity 2 Sided Printing or Batch Print 9 Click Print File Retrieving Scanned Files to Your Computer Using CentreWare Internet Services Stored files are retrieved by copying them from the printer folder to your computer s hard drive 1 At your...

Страница 119: ...guage of the Original drop down list select the language c To apply Text Compression from the Text Compression drop down list select Enabled Creating a Folder To create a folder using the printer touch screen 1 On the control panel press the Machine Status button 2 Touch the Tools tab then under Features touch Create Folder 3 Touch an Available folder 4 To assign a password to the folder a Under C...

Страница 120: ...es in the folder will be deleted To delete a folder using the printer touch screen 1 On the control panel press the Machine Status button 2 Touch the Tools tab then under Features touch Create Folder 3 Touch the desired folder 4 If a password is required enter the password using the alphanumeric keypad then touch Confirm 5 Touch Delete Folder then touch Delete To delete a folder using CentreWare I...

Страница 121: ...CentreWare Internet Services For details see the System Administrator Guide at www xerox com office WC53XXdocs To use the scan to a network file repository feature 1 Load the original on the document glass or in the document feeder 2 On the control panel press the Services Home button 3 Touch Network Scanning 4 Touch the desired template 5 To override the template scan settings For scanning option...

Страница 122: ...ts to the list When all recipients have been added to the list touch Close 6 A default subject is provided for the email To change the subject touch Subject Using the touch screen keyboard enter the new subject then touch Save 7 To change any of the scan settings touch the four menus at the bottom of the control panel Color Scanning 2 Sided Scanning Original Type and Scan Presets For details see S...

Страница 123: ...elect the desired file type Each file format is described when selected 4 To accept the file format touch Save To request a read receipt 1 On the printer control panel press the Services Home button 2 Touch E Mail then touch the E mail Options tab 3 Touch Read Receipts then touch On 4 Touch Save ...

Страница 124: ... 4 Touch Transfer Protocol then touch FTP SMB or SMB UNC Format then touch Save 5 Touch Server Save in User Name and Password For each setting using the touch screen keyboard enter the data Touch Save Note If the server name was previously stored touch Address Book touch the desired server touch Add then touch Close 6 To change any of the scan settings touch the four menus at the bottom of the tou...

Страница 125: ...n the document glass or in the document feeder 2 On the control panel press the Services Home button 3 Touch Network Scanning 4 Touch the template created by your system administrator 5 The template defines the scan settings as well as the destination of the image To change any of the scan settings touch the four menus at the bottom of the touch screen Color Scanning 2 Sided Scanning Original Type...

Страница 126: ...touch Next To move up one directory level touch Previous 6 To select the storage location touch Save 7 To change any of the scan settings touch the four menus at the bottom of the touch screen Color Scanning 2 Sided Scanning Original Type and Scan Presets For details see Setting Scan Options on page 127 8 To change any of the additional scanning options use the three tabs at the top of the touch s...

Страница 127: ...press Services Home 2 Touch the desired scan method 3 Touch the desired settings in the four menus at the bottom of the touch screen Setting Use Setting Color Scanning Overrides automatic detection Set to Color Black White or Grayscale Setting 1 sided or 2 sided originals Use the document feeder to scan 2 sided originals Select 2 sided scanning to scan both sides of the paper to produce a multi pa...

Страница 128: ...can resolution file size photographs and shadow suppression To use Advanced Settings 1 On the printer control panel press Services Home 2 Touch the desired scan method 3 Touch the Advanced Settings tab 4 Touch the desired setting Setting Use Image Options Choose from Lighten Darken or Sharpness Soften Image Enhancement Choose from Auto Suppression or Contrast Resolution Choose from 200 to 600 dpi ...

Страница 129: ...tting Setting Use Original Orientation Choose from Upright Images or Sideways Images Original Size Choose from Auto Detect Manual Size Input or Mixed Size Originals Edge Erase Choose from All Edges Print to Edge Individual Edges or from a previously created Preset Using the plus or minus buttons enter the value Book Scanning Choose from Left Page then Right Right Page then Left or Top Page then Bo...

Страница 130: ...rmat Choose from PDF Image Only or Searchable PDF A Image Only or Searchable Multi page TIFF TIFF 1 file per page JPEG 1 file per page or XPS Image Only or Searchable Choose Compression Method MRC High Compression or Optimize for Fast Web View Meta Data Assign descriptive metadata to a scanned image If File Already Exists Choose from Do Not Save Rename New File Overwrite Existing File Append to Ex...

Страница 131: ...ice WC53XXdocs You must create a scan template before using the Xerox Scan Utility Overview The following steps summarize the use of the Xerox Scan Utility 1 Create a Xerox Scan Utility scan template using your computer The template contains scanning instructions such as color settings file format and resolution Once created the template data is sent to the printer and stored there for later use 2...

Страница 132: ...ate to Applications Xerox Xerox Scan Utility then double click the Xerox Scan Utility 2 Click Scan Settings then select one of the following options To view the scanned image in both the Scan to Email and Copy to Folder tabs click Preview image in Xerox Scan Utility To automatically save the scanned images in a particular folder without opening the Xerox Scan Utility click Send Image Directly to F...

Страница 133: ...can Options on page 127 5 Press the green Start button The progress screen appears on the printer touch screen When the scan is complete the touch screen will redisplay the Network Scanning tab Your file is stored in the selected folder on your computer Note A password may be required when scanning to a template Contact your system administrator for the password For details see the System Administ...

Страница 134: ...es into an application for Windows 2000 Windows XP Windows Vista and Windows Server 2003 1 Open the file in which you want to place the image 2 Click the application s menu item to acquire the scanned image For example if you are placing an image in a Microsoft Word 2003 document a Click Insert b Click Picture c Click From Scanner or Camera d Click the scanner then click Custom Insert The Xerox Sc...

Страница 135: ...ictures A copy of the image is transferred to the location selected in your application Note If you want to delete the images you selected click Delete Using the Xerox Scan Utility in a Macintosh OS X Application TWAIN To import scanned images into an application 1 Open the file in which you want to place the image 2 Select the application s menu item to acquire the image For example if you are pl...

Страница 136: ...Scanning WorkCentre 5300 Series Multifunction Printer User Guide 136 ...

Страница 137: ...udes Fax Overview on page 138 Sending a Fax on page 140 Server Fax on page 141 Sending an Internet Fax on page 142 Faxing from Your Computer on page 143 Receiving Faxes on page 144 Selecting Fax Options on page 145 Adding Address Book Entries on page 149 Creating Fax Comments on page 151 ...

Страница 138: ... machine Server Fax Document is scanned and sent over an Ethernet network to a fax server which then sends the fax to a fax machine Internet Fax Document is scanned and emailed to a recipient Faxing from your Computer Using the print driver the current print job is sent as a fax Note Fax capability must be enabled by the system administrator before use For details see the System Administrator Guid...

Страница 139: ...hrough the document feeder Use the document feeder for multiple or single page jobs Document Glass Lift the document feeder cover and place the original facedown toward the back left corner of the document glass as shown CAUTION When scanning a bound document do not attempt to force the document feeder cover closed Doing so may damage the document feeder cover Document Feeder Insert originals face...

Страница 140: ...etails see Adding Address Book Entries on page 149 Chain Dial can be performed when viewing the list of individual addresses in the Address Book For details see Using Chain Dial on page 150 6 To include a cover page Touch Cover Page then touch Print Cover Page To add a previously created comment touch Comments then under either Recipient s Comment or Sender s Comment touch an available comment the...

Страница 141: ...use the touch screen Internet Fax button does not appear Sending a Server Fax 1 Load the original on the document glass or in the document feeder 2 On the control panel touch Services Home 3 Touch Fax 4 Enter the number using the alphanumeric keypad then touch Add 5 Touch New Recipients enter the number using the touch screen keyboard touch Add then touch Close 6 To use a number previously stored ...

Страница 142: ...To send an Internet Fax 1 Place the original on the document glass or in the document feeder 2 On the printer touch screen touch Services Home then touch Internet Fax 3 Touch New Recipient 4 To enter the recipient s email address do one of the following Enter the address using the touch screen keyboard then touch Add Repeat for each recipient then touch Close Touch Address Book touch the desired a...

Страница 143: ...ferences Windows or Xerox Features for Macintosh The title of the button may vary depending on your application 4 Select printer features Windows Click the Paper Output tab Macintosh Click Copies Pages then click Xerox Features 5 Click the Job Type menu then click Fax 6 Click Add Recipients 7 Enter the recipient s name and fax number If desired complete the additional information 8 If desired clic...

Страница 144: ...er Guide 144 Receiving Faxes The printer must be configured by the system administrator to receive and print a fax using the Embedded Fax Server Fax and Internet Fax For more information see the System Administrator Guide at www xerox com office WC53XXdocs ...

Страница 145: ... 2 Sided 2 Sided Rotate Side 2 3 For more options touch 2 Sided Scanning then touch More Touch 2 Sided or 2 Sided Rotate Side 2 Touch First Page 1 Sided Selecting the Original Type 1 Touch Fax on the touch screen 2 Touch Original Type then touch the desired option Text Photo Text Photo Setting the Fax Resolution 1 Touch Fax on the touch screen 2 Touch Resolution then touch the desired option Stand...

Страница 146: ... the Original Size 1 Touch Fax on the touch screen 2 Touch the Layout Adjustment tab then touch Original Size 3 Touch one of the following Auto Detect to automatically identify standard size originals Manual Size Input for manual definition of the scan area using standard paper dimensions Mixed Size Originals for scanning originals of different standard sizes 4 Touch Save Book Faxing 1 Touch Fax o...

Страница 147: ...d 4800 bps Priority Send Delay Start Priority Send Off On Delay Start Off Specific Time touch Specific Time then touch desired settings Transmission Header Text Off Display Header Recipient Print Sets 1 Set Multiple Sets touch Multiple Sets then touch plus or minus buttons to set quantity Pages per Side Off On touch plus or minus buttons to set quantity Remote Folder Send to Folder Off On Folder N...

Страница 148: ...e Folder feature Store for Polling Off Store for Free Polling and Store for Secure Polling fax documents stored in the printer are made available for remote polling by enabling Free Polling or Secure Local Polling then touching the folder and file On Hook Manual Send Receive Manual Send touch On Hook touch Manual Send then use the touch screen keyboard to enter destination and passcode Manual Rece...

Страница 149: ...ling list 5 Touch Address Type touch the desired address type then touch Save Each Address Book type requires different settings 6 Touch each desired item in the list enter the information using the alphanumeric keypad or touch screen keyboard then touch Save 7 When all desired settings have been configured touch Save to complete the Address Book entry Deleting an Individual Address 1 On the contr...

Страница 150: ...desired group in the scrolling list 5 Touch Delete then touch Delete to confirm Using Chain Dial Chain Dial creates a single fax recipient telephone number by adding two or more fax numbers together into a single number For example an area code or extension number could be stored separately from the rest of the telephone number Access Chain Dial from the Address Book 1 On the touch screen touch Fa...

Страница 151: ...rol panel press the Machine Status button 2 On the touch screen touch the Tools tab 3 Touch Setup then touch Add Fax Comment 4 On the next screen touch an Available comment in the scrolling list 5 Enter the comment using the touch screen keyboard then touch Save 6 Touch Close The comment is ready to use ...

Страница 152: ...Faxing WorkCentre 5300 Series Multifunction Printer User Guide 152 ...

Страница 153: ...WorkCentre 5300 Series Multifunction Printer User Guide 153 8 Maintenance This chapter includes Maintenance and Cleaning on page 154 Ordering Supplies on page 159 ...

Страница 154: ...ir spray containers contain explosive mixtures and are not suitable for use in electrical applications Use of such cleaners can result in a risk of explosion and fire Do NOT remove the covers or guards that are fastened with screws You cannot maintain or service any parts that are behind these covers and guards Do NOT attempt any maintenance procedure that is NOT specifically described in the docu...

Страница 155: ...on screen If the serial number cannot be read from the printer touch screen it can also be found inside the printer Open Cover A on the left side of the printer The serial number is located on the left hand side Billing and Usage Information The Billing Information screen displays billing and printer usage information 1 Press the Machine Status button 2 Touch the Billing Information tab The total ...

Страница 156: ... optimum print quality regularly clean the glass areas of the printer This helps avoid output with streaks smears and other marks that transfer from the glass area while scanning documents Use a lint free cloth lightly dampened with Xerox Anti Static or another suitable non abrasive glass cleaner to clean the document glass and the CVT glass to its left Use a lint free cloth Xerox Cleaning Fluid o...

Страница 157: ...ntrol panel with a soft lint free cloth Use a cloth to clean the document feeder output trays paper trays and outside areas of the printer Cleaning the Document Feeder Rollers Dirt on the document feeder rollers can cause paper jams or deteriorate print quality For best performance clean the document feeder rollers once a month 1 Lift the lever and open the document feeder top cover until it comes...

Страница 158: ...158 2 While turning the rollers wipe them with a clean lint free cloth moistened with water CAUTION Do not use alcohol or chemical cleaners on the document feed rollers 3 Close the top cover until it clicks into place Make sure the cover is completely closed wc53xx 068 ...

Страница 159: ...s include installation instructions CAUTION Use of toner other than Genuine Xerox Toner may affect print quality and printer reliability It is the only toner designed and manufactured under strict quality controls by Xerox for specific use with this printer Routine Maintenance Items Routine maintenance items are printer parts that have a limited life and require periodic replacement Replacements m...

Страница 160: ...53XXsupplies CAUTION Use of non Xerox supplies is not recommended The Xerox Warranty Service Agreements and Total Satisfaction Guarantee do not cover damage malfunction or degradation of performance caused by use of non Xerox supplies or the use of Xerox supplies not specified for this printer The Total Satisfaction Guarantee is available in the United States and Canada Coverage may vary outside t...

Страница 161: ...is section includes Staple Replacement for Integrated Office Finisher on page 161 Main Staple Replacement for Office Finisher LX on page 163 Booklet Maker Staple Replacement for Office LX Finisher on page 165 Staple Replacement for Integrated Office Finisher WARNING Do not perform this procedure when the printer is copying or printing 1 Open the finisher front cover 2 Remove the staple cartridge b...

Страница 162: ...m 4 Pinch both sides of the staple case 1 and remove the staple case from the cartridge 2 5 Insert the front side of the new staple case into the staple cartridge 1 then push the rear side into the cartridge 2 6 Insert the staple cartridge into the finisher 7 Close the finisher front cover wc53xx 046 1 1 2 wc53xx 047 1 2 wc53xx 048 wc53xx 049 ...

Страница 163: ...cedure when the printer is copying or printing 1 Open the finisher front cover 2 The staple cartridge is located inside the finisher cabinet Pull the staple unit toward you until it stops 3 Push the staple unit to the right 4 Remove the staple cartridge by gripping the orange tab at R1 and pulling it firmly toward you wc53xx 050 wc53xx 051 wc53xx 052 ...

Страница 164: ...e staple case from the cartridge 2 6 Insert the front side of the new staple case into the staple cartridge 1 then push the rear side into the cartridge 2 7 Grip the staple cartridge by the orange tab and insert it into the staple unit until it clicks 8 Close the finisher front cover 1 1 2 wc53xx 047 1 2 wc53xx_048 wc53xx 052 ...

Страница 165: ...ple cartridges contain staples WARNING Do not perform this procedure when the printer is copying or printing 1 Open the booklet maker side cover 2 If the staple cartridges are not visible grip the vertical panels at the left and right of the opening and gently slide them to the center until they stop 3 Grip the orange tabs on both sides of the staple cartridge and pull the cartridge out of the sta...

Страница 166: ...original position in the stapler Note If you have trouble inserting the cartridge make sure the cartridge is oriented with the orange tabs facing up Note The booklet maker uses two staple cartridges Booklet stapling requires that both staple cartridges contain staples 5 Repeat steps 3 and 4 for the other staple cartridge 6 Close the booklet maker side cover wc53xx 057 ...

Страница 167: ... This chapter includes Control Panel Messages on page 168 General Troubleshooting on page 169 Clearing Paper Jams on page 172 Clearing Staple Jams on page 187 Print Quality Problems on page 193 Copy and Scan Problems on page 194 Fax Problems on page 195 Getting Help on page 197 ...

Страница 168: ...owing the location of the problem such as the location of a paper jam Problems which prevent the full operation of the printer have associated fault codes These codes will help pinpoint the specific subsystem with the problem Current faults and fault history can be retrieved at any time To see a list of the fault messages that have been displayed on the printer 1 Press the Machine Status button 2 ...

Страница 169: ...ong directly into a grounded AC outlet only Do not use a power strip If necessary contact a licensed electrician to install a properly grounded outlet Probable Causes Solutions The power switch is not correctly turned on Turn off the printer using the power switch visible on the lower center tray Wait two minutes then turn the printer on Ensure that the main power switch behind the front cover of ...

Страница 170: ...the outlet Turn off the printer confirm that the power cord is correctly plugged into the printer and the outlet then turn on the printer A system error occurred Contact your local Xerox representative with the fault information Check the fault history For details see Control Panel Messages on page 197 Probable Causes Solutions The tray is not installed correctly Open and close the tray you are pr...

Страница 171: ...Guide 171 Scanner Error Probable Causes Solutions Scanner is not communicating Turn off the printer using the power switch visible on the lower center tray Wait two minutes then turn the printer on If the problem is not resolved contact your local Xerox Representative ...

Страница 172: ...182 Clearing Hole Punch Jams in Office Finisher LX on page 183 Troubleshooting Paper Jams on page 185 To avoid damage always remove misfed media gently without tearing it Try to remove the paper in the direction that the paper would normally feed Any piece of media left in the printer whether large or small can obstruct the media path and cause further misfeeds Do not reload media that has misfed ...

Страница 173: ...heck inside the printer for torn pieces of paper 4 Reload the tray with undamaged paper then push the tray in until it stops 5 On the printer touch screen touch Confirm Clearing Paper Jams from Tray 5 Bypass Tray 1 Remove the jammed paper from the tray Make sure there are no sheets of paper in the paper feed entrance area where the tray connects to the printer 2 If the paper is torn check inside t...

Страница 174: ...touch screen Clearing Paper Jams in Document Feeder 1 Lift the lever then open the document feeder top cover until it comes to a stop 2 If the paper is not jammed in the document feeder pull it out in the direction shown 3 If the message on the touch screen instructs you to turn the knob turn it to eject the paper Pull gently on the paper to remove it from the document feeder wc7120 082 wc53xx 062...

Страница 175: ...ble raise the document feeder Remove any jammed paper from under the document feeder or from the document glass 8 Close the document feeder 9 If the jammed paper is not visible lift the document feeder tray and remove the jammed paper 10 Return the document feeder tray to its original position 11 To resume document scanning make sure the paper is not torn wrinkled or folded then reload the entire ...

Страница 176: ...ion to avoid injury CAUTION Do not touch the shiny black transfer belt inside the cover Touching the belt may deteriorate image quality or damage the belt 1 If necessary open Tray 5 1 While lifting up the release lever 2 open cover A 3 2 If you can see the edge of the jammed paper in the output tray remove the paper by pulling in the direction shown Note If the paper is torn remove all torn pieces...

Страница 177: ...inter 4 If paper is jammed in the fuser unit remove paper in the direction shown Lever A1 can be used to move paper out of the fuser WARNING The area around the fuser may be hot Use caution to avoid injury 5 Close cover A Clearing Paper Jams in Cover B 1 If necessary close Tray 5 Bypass Tray 2 Lift the lever up then open cover B wc53xx 071 wc53xx 072 wc53xx 074 ...

Страница 178: ...per is torn remove all torn pieces from the printer 4 Close cover B Clearing Paper Jams in Cover C 1 If necessary close Tray 5 Bypass Tray 2 Lift the lever up then open cover C 3 Remove the jammed paper Notes Paper may be jammed inside the printer Inspect thoroughly and remove any jammed paper If the paper is torn remove all torn pieces from the printer 4 Close cover C wc53xx 075 wc53xx 073 wc53xx...

Страница 179: ...ams in Duplex Module D 1 If necessary open Tray 5 1 While lifting up the release lever 2 open duplex module cover D 3 2 Remove the jammed paper Note If the paper is torn remove all torn pieces from the printer 3 Close duplex module cover D 1 then close Tray 5 2 wc53xx 083 wc53xx 084 wc53xx 085 ...

Страница 180: ...opying or printing WARNING The area around the fuser may be hot Use caution to avoid injury CAUTION Do not touch the shiny black transfer belt inside the cover Touching the belt may deteriorate image quality or damage the belt 1 If necessary open Tray 5 1 While lifting up the release lever 2 open cover A 3 2 Lift the lever up then open cover E wc53xx 069 wc53xx 077 ...

Страница 181: ...rn pieces from the printer 4 Close cover E 5 Close cover A Clearing Paper Jams in Integrated Office Finisher 1 Open the finisher top cover 1 Turn the knob 2 then remove the paper by pulling it in the direction shown 3 Note If the paper is torn remove all torn pieces from the printer 2 Close the finisher top cover wc53xx 078 wc53xx 086 1 2 3 ...

Страница 182: ...ludes Paper Jams under the Top Cover on page 182 Paper Jams in the Finisher Transport on page 183 Paper Jams under the Top Cover 1 To open the finisher top cover pull the lever up 2 Remove the jammed paper Note If the paper is torn remove all torn pieces from the printer 3 Close the finisher top cover wc53xx 087 wc53xx 088 wc53xx 089 ...

Страница 183: ...annot be removed from the printer 2 Remove the jammed paper Note If the paper is torn remove all torn pieces from the printer 3 Close the finisher transport cover Clearing Hole Punch Jams in Office Finisher LX 1 Lift to open the finisher transport cover then open the front transport cover Note The covers are hinged and cannot be removed from the printer wc53xx 090 wc53xx 091 wc53xx 058 ...

Страница 184: ...3 Empty the waste container Note Whenever the waste container is removed it must be emptied before re inserting it in the printer 4 Insert the container all the way into the finisher 5 Locate and remove any paper jams 6 Close the front transport cover then close the finisher transport cover wc53xx 059 wc53xx 060 wc53xx 061 ...

Страница 185: ... paper Do not load paper past fill line The front edges of the paper are not even Remove the media align the front edges then reload it The media is moist from humidity Remove the media from the tray and replace it with new dry media Too much static electricity is present Try a new ream of paper Unsupported media Use only Xerox approved media See Supported Media on page 51 Probable Causes Solution...

Страница 186: ...n the tray are set correctly The number of sheets in the tray exceeds the maximum capacity allowed Remove the excess paper and load paper below the fill line The media guides are not correctly adjusted to the media size Adjust the media guides in the tray to match the size of the media Warped or wrinkled media is loaded in the tray Remove the media smooth it out and reload it If it still misfeeds ...

Страница 187: ... on page 189 Clearing Booklet Maker Staple Jams in Office Finisher LX on page 191 Clearing Staple Jams in Integrated Office Finisher WARNING Do not perform this procedure while the printer is copying or printing 1 Open the finisher door 2 Grip the staple cartridge by the orange handle and remove it by pulling it firmly toward you 3 Check inside the finisher for any loose staples and remove them wc...

Страница 188: ...ammed staples 1 then push the clamp in the direction shown until it snaps into the locked position 2 WARNING The points of the jammed staples are sharp Remove the jammed staples carefully 6 Grip the staple cartridge by the orange handle and insert it into the staple cartridge unit until it clicks 7 Close the finisher front door wc53xx 097 wc53xx 098 1 2 wc53xx 049 ...

Страница 189: ...orm this procedure when the printer is copying or printing 1 Open the finisher front door 2 The stapler is located inside the finisher cabinet Pull the stapler toward you until it stops 3 Push the stapler to the right 4 Grip the staple cartridge by the orange handle and remove it by pulling it firmly toward you wc53xx 050 wc53xx 051 wc53xx 052 ...

Страница 190: ...irection shown WARNING The points of the jammed staples are sharp Remove the jammed staples carefully 7 Remove the jammed staples 1 then push the clamp in the direction shown until it snaps into the locked position 2 8 Grip the staple cartridge by the orange handle and insert it into the stapler until it clicks into place 9 Close the finisher front door wc53xx 053 wc53xx 097 wc53xx 098 1 2 wc53xx ...

Страница 191: ...ING Do not perform this procedure when the printer is copying or printing 1 Open the booklet maker side cover 2 If the staple cartridges are not visible grip the vertical panels at the left and right of the opening and gently slide them to the center until they stop 3 Grip the orange tabs on both sides of the staple cartridge and pull the cartridge out of the stapler WARNING The points of the jamm...

Страница 192: ...e tabs on both sides of the staple cartridge and insert it into the original position in the stapler Note If you have trouble inserting the cartridge make sure the cartridge is oriented with the orange tabs facing up 6 If no jammed staples were found repeat steps 3 to 5 for the other staple cartridge 7 Close the booklet maker side cover wc53xx 101 wc53xx 057 ...

Страница 193: ...not cover damage caused by using unsupported paper or specialty media The Total Satisfaction Guarantee is available in the United States and Canada Coverage may vary outside these areas Please contact your local representative for details Note To enhance print quality toner and drum cartridges for many models of equipment are designed to cease functioning at a predetermined point ...

Страница 194: ... paper from the document feeder passes over the debris creating lines or streaks Clean all glass surfaces with a lint free cloth Spots present in copies taken from the document glass There is debris on the document glass When scanning the debris creates a spot on the image Clean all glass surfaces with a lint free cloth The reverse side of the original is showing on the copy or scan Copy Turn on B...

Страница 195: ...d by the recipient is blurry The document is incorrectly positioned Position the document correctly The document glass is dirty Clean the document glass The text in the document is too faint Adjust the resolution Adjust the contrast There may be a problem with the telephone connection Check the telephone line then send the fax again There may be a problem with the caller s fax machine Make a copy ...

Страница 196: ...and jobs and wait for the existing job to complete This will increase available memory The received fax size is reduced The paper supply in the printer may not match the document size sent Confirm the original size of the documents Documents might be reduced based on the available paper supply in the printer Faxes cannot be received automatically The printer is set to receive faxes manually Set th...

Страница 197: ...problem In many cases the touch screen also displays an animated graphic showing the location of the problem such as the location of a paper jam Alerts Alerts provide messages and instructions to help solve problems Alerts can be viewed on The Status page in CentreWare Internet Services All tabs in the print driver Properties window For detailed status information click More Status Online Support ...

Страница 198: ...emplates helpful tips and customized features to meet your individual needs www xerox com office businessresourcecenter Local sales and support center www xerox com office worldcontacts Printer registration www xerox com office register Material Safety Data Sheets identify materials and provide information on safely handling and storing hazardous materials www xerox com msds U S and Canada www xer...

Страница 199: ...s This chapter includes Physical Specifications on page 200 Environmental Specifications on page 203 Electrical Specifications on page 204 Performance Specifications on page 205 Controller Specifications on page 206 For media specifications and capacities see Supported Media on page 51 ...

Страница 200: ...246 9 lb with Tandem Tray Module TTM Base Unit with High Capacity Feeder Width 932 mm 36 7 in Depth 648 mm 25 5 in Height 1 115 mm 43 9 in Weight 129 Kg 284 4 lb with Tandem Tray Module TTM Base Unit with Office Finisher LX and Booklet Maker Width 1 239 mm 36 7 in with bypass tray closed Depth 651 mm 25 6 in Height 1 115 mm 43 9 in Weight 122 2 Kg 269 4 lb with Stand 137 2 Kg 302 5 lb with Tandem ...

Страница 201: ...ments for Base Configuration Note The clearance requirements do not change with the addition of the optional Integrated Finisher Printer Clearance Requirements With Office Finisher LX and Booklet Maker 30 7cm 12 1in 10cm 3 9in 177 8cm 70 0in 206 7cm 81 4in wc53xx 117 10cm 3 9in 206 7cm 81 4in 217 4cm 86 0in 88 5cm 34 8in wc53xx 118 ...

Страница 202: ...ns WorkCentre 5300 Series Multifunction Printer User Guide 202 Printer Clearance Requirements With Office Finisher LX Booklet Maker and High Capacity Feeder 10cm 3 9in 206 7cm 81 4in 217 4cm 86 0in 88 5cm 34 8in wc53xx 119 ...

Страница 203: ...tion Printer User Guide 203 Environmental Specifications Temperature Operating 10 28 C 50 83 F When the humidity is 85 temperature must be 28 C 83 F or below Relative Humidity Operating 15 85 When the temperature is 32 C 90 F humidity must be 62 5 or below ...

Страница 204: ...es Multifunction Printer User Guide 204 Electrical Specifications 120 V AC 10 60 Hz Power Consumption 1 58 kW maximum 220 240 V AC 10 50 Hz Power Consumption 1 76 kW maximum for 220 VAC 1 92 kW maximum for 240 V AC ENERGY STAR qualified product ...

Страница 205: ...Mode High Speed 600 x 600 dpi Print Mode High Quality 1200 x 1200 dpi Print Speed Print speeds in pages per minute ppm are provided for printing long edge feed LEF on A4 and Letter sized paper Printer Model Print Speed WorkCentre 5325 Multifunction Printer 25 ppm WorkCentre 5330 Multifunction Printer 30 ppm WorkCentre 5335 Multifunction Printer 35 ppm ...

Страница 206: ...ions WorkCentre 5300 Series Multifunction Printer User Guide 206 Controller Specifications Processor 667 MHz Memory 1 GB RAM Standard 2 GB RAM with Optional PostScript Kit Interface Ethernet 10 100 1000Base TX connection ...

Страница 207: ...ction Printer User Guide 207 A Regulatory Information This chapter includes Basic Regulations on page 208 Copy Regulations on page 210 Fax Regulations on page 213 Material Safety Data Sheets on page 216 Energy Saver Mode on page 217 ...

Страница 208: ...ations to this equipment not approved by Xerox can void the authority of the user to operate the equipment Note To ensure compliance with Part 15 of the FCC rules use shielded interface cables Canada Regulations This Class A digital apparatus complies with Canadian ICES 003 Cet appareil numérique de la classe A est conforme à la norme NMB 003 du Canada European Union CAUTION This is a Class B prod...

Страница 209: ... to harm anyone adversely However be sure the room where the product is being used has adequate ventilation especially if you are printing a high volume of materials or if the product is being used continuously over a long period Other Regulations Turkey RoHS Regulation In compliance with Article 7 d we hereby certify It is in compliance with the EEE Regulation EEE yönetmeliğine uygundur ...

Страница 210: ...e done provided the reproduction of the document is performed for lawful purposes Postage Stamps canceled or uncanceled For philatelic purposes Postage Stamps may be photographed provided the reproduction is in black and white and is less than 75 or more than 150 of the linear dimensions of the original Postal Money Orders Bills Checks or Draft of money drawn by or upon authorized officers of the ...

Страница 211: ...n those guilty of making such reproductions 1 Current bank notes or current paper money 2 Obligations or securities of a government or bank 3 Exchequer bill paper or revenue paper 4 The public seal of Canada or of a province or the seal of a public body or authority in Canada or of a court of law 5 Proclamations orders regulations or appointments or notices thereof with intent to falsely cause sam...

Страница 212: ... documents may be illegal in your country Penalties of fine or imprisonment may be imposed on those found guilty of making such reproductions Currency notes Bank notes and checks Bank and government bonds and securities Passports and identification cards Copyright material or trademarks without the consent of the owner Postage stamps and other negotiable instruments This list is not inclusive and ...

Страница 213: ... US AAAEQ TXXXX If requested this number must be provided to the Telephone Company A plug and jack used to connect this equipment to the premises wiring and telephone network must comply with the applicable FCC Part 68 rules and requirements adopted by the ACTA A compliant telephone cord and modular plug is provided with this product It is designed to be connected to a compatible modular jack that...

Страница 214: ...equipment is causing harm to the telephone network the Telephone Company may request that you disconnect the equipment until the problem is resolved Repairs to the machine should be made only by a Xerox representative or an authorized Xerox Service provider This applies at any time during or after the service warranty period If unauthorized repair is performed the remainder of the warranty period ...

Страница 215: ...n the equipment Europe Radio Equipment Telecommunications Terminal Equipment Directive The Facsimile has been approved in accordance with the Council Decision 1999 5 EC for pan European single terminal connection to the public switched telephone network PSTN However due to differences between the individual PSTNs provided in different countries the approval does not of itself give an unconditional...

Страница 216: ...r Guide 216 Material Safety Data Sheets For Material Safety Data information regarding your printer go to North America www xerox com msds European Union www xerox com environment_europe For the Customer Support Center phone numbers go to www xerox com office worldcontacts ...

Страница 217: ...etween U S European Union and Japanese governments and the office equipment industry to promote energy efficient copiers printers fax multifunction machines personal computers and monitors Reducing product energy consumption helps combat smog acid rain and long term changes to the climate by decreasing the emissions that result from generating electricity Xerox ENERGY STAR equipment is preset at t...

Страница 218: ...Regulatory Information WorkCentre 5300 Series Multifunction Printer User Guide 218 ...

Страница 219: ...ion Printer User Guide 219 B Recycling and Disposal This chapter includes recycling and disposal guidelines and information for All Countries on page 220 North America on page 220 European Union on page 220 Other Countries on page 222 ...

Страница 220: ...etermine whether this Xerox product is part of the program For more information about Xerox environmental programs visit www xerox com environment or for recycling and disposal information contact your local authorities European Union WEEE Directive 2002 96 EC Some equipment may be used in both a domestic household and a professional business application Domestic Household Environment In accordanc...

Страница 221: ...ed national procedures These symbols on the products and or accompanying documents mean that used electrical and electronic products and batteries should not be mixed with general household waste For proper treatment recovery and recycling of old products and used batteries please take them to applicable collection points in accordance with your national legislation and the Directive 2002 96 EC an...

Страница 222: ...ase contact your local authorities or dealer and ask for the correct method of disposal Note for the Battery Symbol Removal Batteries should only be replaced by a MANUFACTURER approved service facility Other Countries Please contact your local waste authorities and request disposal guidance This wheeled bin symbol may be used in combination with a chemical symbol This establishes compliance with t...

Отзывы: