02/2000
2-21
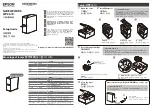
DocuPrint N2125
RAP 13 , RAP 14
Status Indicator Repair Analysis Procedures
Initial Issue
RAP 13 Install Print Cartridge (J3)
The Print Cartridge is not in place or is installed incorrectly.
Procedure
Open the Front Cover and remove the Print Cartridge. Inspect the tab on the top left of the Print
Cartridge that actuates the Print Cartridge Sensor Assembly. The tab on the Print Cartridge
is intact.
Y
N
Replace the Print Cartridge (
).
Press and release the Print Cartridge Sensor Assembly Actuator. The Print Cartridge Sen-
sor Assembly Actuator lever moves smoothly.
Y
N
Replace the Print Cartridge Sensor Assembly (
).
Enter diagnostics and select Component Test. Scroll to Sensor Input test and press Enter.
Manually actuate the Print Cartridge Sensor Assembly Actuator. The number on the LCD
increments each time you press and release the actuator.
Y
N
Switch the printer power off. Remove the Left Interface Cover (
), the Left Cover
(
), and the Left Plate Assembly (
). Install the Print Cartridge. Leave the
Front Cover open. Disconnect P/J25 from the Print Engine Controller PWB. Check for
continuity between J21-4 and J25-3, and J25-2 and J25-1 as you insert and remove the
Print Cartridge. There is continuity between J25-4 and J25-3, and J25-2 and J25-1
when you insert the cartridge and no continuity when you remove the cartridge.
Y
N
The Print Cartridge is a Xerox N2125 Print Cartridge.
Y
N
Replace Print Cartridge with a Xerox N2125 Print Cartridge (
PL 8.1
).
Replace the Print Cartridge Sensor Assembly together with the harness (
).
Replace the Print Engine Controller PWB (
).
Replace the Print Engine Controller PWB (
).
RAP 14 Toner Low (J5)
The Print Cartridge is in a low toner condition.
Procedure
Install a new Print Cartridge. The J5 Error Code still appears.
Y
N
Problem solved.
Remove the Front Cover (
) and the Left Front Cover (
). Cheat the Front Cover
Interlock Switch. On the Connector PWB, check the voltage between P/J42 pin 4 and frame
ground. The voltage is 0.0VDC with the print cartridge installed and 3.3VDC with the print
cartridge removed.
Y
N
Check the voltage between P/J42 pin 3 and pin 1. The voltage is 24VDC.
Y
N
On the Connector PWB, check the voltage between P/J231 pin 11 and pin 12. The
voltage is 24VDC.
Y
N
Check the Connector Harness Assembly. If OK, replace the Print Engine Con-
troller PWB (
).
Replace the Connector PWB (
).
Replace the Toner Sensor (
).
On the connector PWB, check the voltage between P/J231 pin 9 and frame ground. The volt-
age is 0.0VDC with the print cartridge installed and 3.3VDC with the print cartridge
removed.
Y
N
Replace the Connector PWB (
).
Check the Connector Harness Assembly. If OK, replace the Print Engine Controller PWB (
).
manuals4you.com
manuals4you.com
Содержание N2125N - DocuPrint B/W Laser Printer
Страница 11: ...02 2000 1 2 DocuPrint N2125 Initial Issue Service Call Procedures...
Страница 17: ...02 2000 1 8 DocuPrint N2125 1 5 Initial Issue Service Call Procedures...
Страница 19: ...02 2000 2 2 DocuPrint N2125 Initial Issue Status Indicator Repair Analysis Procedures...
Страница 21: ...02 2000 2 4 DocuPrint N2125 Introduction Measurements Initial Issue Status Indicator Repair Analysis Procedures...
Страница 27: ...02 2000 2 10 DocuPrint N2125 Error Code Tables Initial Issue Status Indicator Repair Analysis Procedures...
Страница 61: ...02 2000 2 44 DocuPrint N2125 RAP 50 RAP 51 Initial Issue Status Indicator Repair Analysis Procedures...
Страница 65: ...02 2000 2 48 DocuPrint N2125 RAP 55 RAP 56 Initial Issue Status Indicator Repair Analysis Procedures...
Страница 69: ...02 2000 2 52 DocuPrint N2125 RAP 60 RAP 61 Initial Issue Status Indicator Repair Analysis Procedures...
Страница 73: ...02 2000 2 56 DocuPrint N2125 RAP 66 Initial Issue Status Indicator Repair Analysis Procedures...
Страница 75: ...02 2000 3 2 DocuPrint N2125 Initial Issue Image Quality Repair Analysis Procedures...
Страница 103: ...02 2000 4 4 DocuPrint N2125 Introduction Initial Issue Repair Adjustment...
Страница 111: ...02 2000 4 12 DocuPrint N2125 REP 1 11 REP 1 12 Initial Issue Repair Adjustment...
Страница 117: ...02 2000 4 18 DocuPrint N2125 REP 2 5 Initial Issue Repair Adjustment...
Страница 135: ...02 2000 4 36 DocuPrint N2125 REP 4 10 Initial Issue Repair Adjustment...
Страница 153: ...02 2000 4 54 DocuPrint N2125 REP 7 4 REP 7 5 Initial Issue Repair Adjustment...
Страница 165: ...02 2000 4 66 DocuPrint N2125 REP 9 12 Initial Issue Repair Adjustment...
Страница 177: ...02 2000 4 78 DocuPrint N2125 REP 10 18 Initial Issue Repair Adjustment...
Страница 191: ...02 2000 4 92 DocuPrint N2125 REP 11 19 REP 11 20 Initial Issue Repair Adjustment...
Страница 201: ...02 2000 4 102 DocuPrint N2125 REP 12 13 REP 12 14 Initial Issue Repair Adjustment...
Страница 213: ...02 2000 4 114 DocuPrint N2125 REP 13 17 Initial Issue Repair Adjustment...
Страница 215: ...02 2000 4 116 DocuPrint N2125 ADJ 1 1 Initial Issue Repair Adjustment...
Страница 217: ...02 2000 5 2 DocuPrint N2125 Initial Issue Parts list...
Страница 241: ...02 2000 6 2 DocuPrint N2125 Initial Issue General Procedures Information...
Страница 243: ...02 2000 6 4 DocuPrint N2125 Introduction Initial Issue General Procedures Information...
Страница 263: ...02 2000 6 24 DocuPrint N2125 GP 2 11 Initial Issue General Procedures Information...
Страница 287: ...02 2000 6 48 DocuPrint N2125 GP 4 1 Initial Issue General Procedures Information manuals4you com manuals4you com...
Страница 289: ...02 2000 6 50 DocuPrint N2125 GP 4 1 Initial Issue General Procedures Information Figure 4 PCL Menu...
Страница 293: ...02 2000 6 54 DocuPrint N2125 GP 4 1 Initial Issue General Procedures Information Figure 9 Ethernet Menu...
Страница 295: ...02 2000 6 56 DocuPrint N2125 GP 4 1 Initial Issue General Procedures Information Figure 11 Novell Menu...
Страница 297: ...02 2000 6 58 DocuPrint N2125 GP 4 1 Initial Issue General Procedures Information...
Страница 299: ...02 2000 6 60 DocuPrint N2125 GP 5 1 Initial Issue General Procedures Information...
Страница 301: ...02 2000 7 2 DocuPrint N2125 Initial Issue Wiring Data...
Страница 307: ...02 2000 7 8 DocuPrint N2125 Base Engine Initial Issue Wiring Data Figure 5 Block Diagram 2 of 2...