Renkforce 2356116, User Manual
The Renkforce 2356116 User Manual is a comprehensive guide for operating and maintaining your Renkforce product. With clear instructions and helpful diagrams, this manual ensures a hassle-free experience. Download your free copy of the manual from our website, manualshive.com, and get started with your Renkforce device today.
Share
Download


Reviews:
No comments
Related manuals for 2356116

2500
Brand: EBS Pages: 4

7156
Brand: NCR Pages: 38

OKIDATA OL400e
Brand: Oki Pages: 88

PAGE 14ex
Brand: Oki Pages: 40

IB-9000-6P
Brand: AstroJet Pages: 32

Phaser 220
Brand: Tektronix Pages: 178

MAC TECHNICAL REFERANCE C7350
Brand: Oki Pages: 95

Dynacode II IP107
Brand: Carl Valentin Pages: 168

Pro 3 L
Brand: Felix Storch Pages: 35

5700i - EPL B/W Laser Printer
Brand: Epson Pages: 33
2180 - LQ B/W Dot-matrix Printer
Brand: Epson Pages: 2

2190 - FX B/W Dot-matrix Printer
Brand: Epson Pages: 2

2200 - Stylus Photo Color Inkjet Printer
Brand: Epson Pages: 62
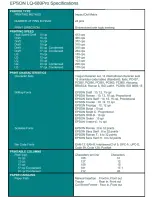
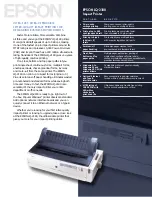
24-PIN DOT MATRIX PRINTER LQ-680PRO
Brand: Epson Pages: 3

221
Brand: Epson Pages: 2

2190 - FX B/W Dot-matrix Printer
Brand: Epson Pages: 48

297
Brand: Epson Pages: 2

480SX
Brand: Epson Pages: 2


