Xerox DocuPrint N24 Скачать руководство пользователя страница 5

Q u i c k   I n s t a l l a t i o n / R e m o v a l   G u i d e  

 5

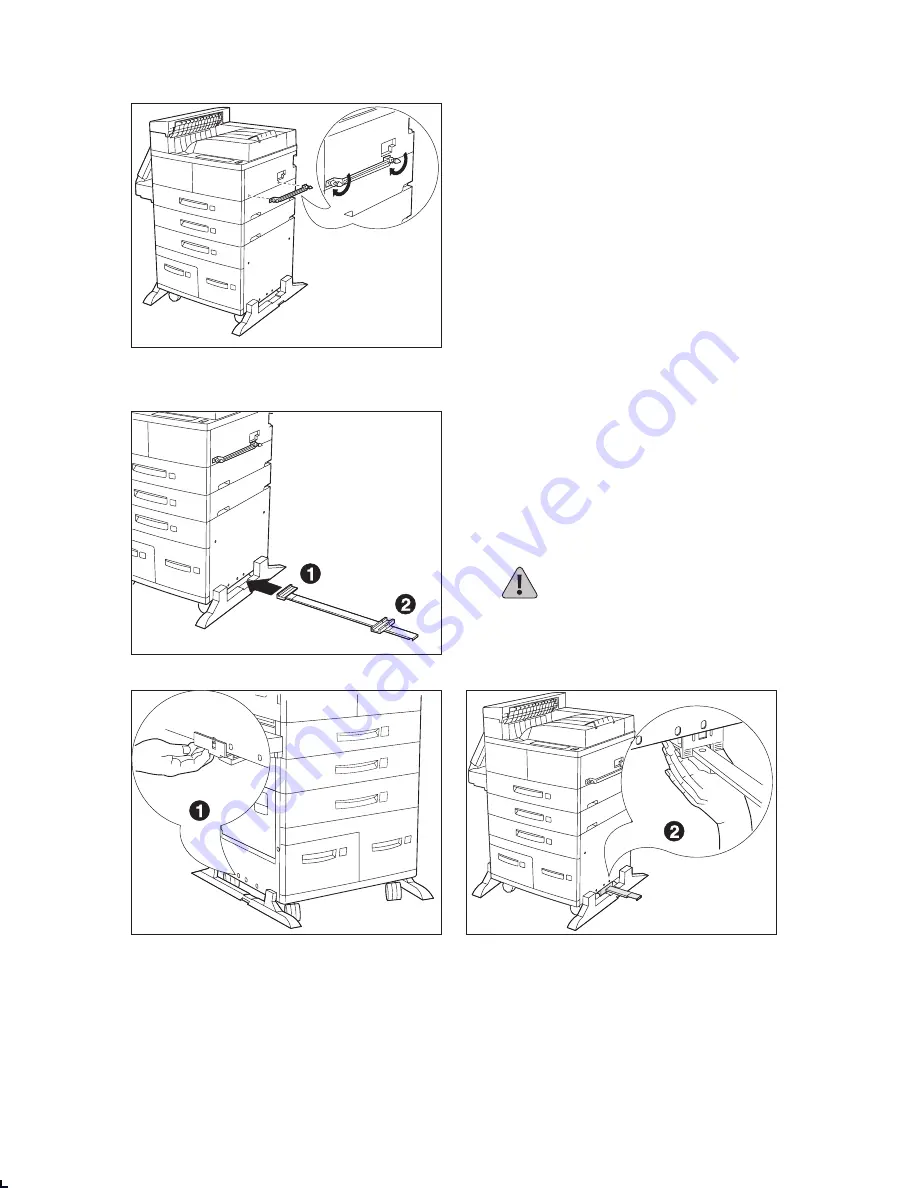
Install the Emissions Bracket Assembly

1

Make sure you install the Emissions 
Bracket Assembly with the “V” shaped 
edge of the bracket seal facing up. Attach 
the Emissions Bracket Assembly to the 
printer inserting the two thumb screws into 
the holes as shown and screwing them in.

Install the Guide Rail

1

Pass the Guide Rail under the center of the 
printer from left to right as shown. The left 
side bracket (#1) should be at the left side 
of the printer, while the right side 
bracket (#2) should be at the right side of 
the printer.

Make sure the Guide Rail is parallel to the 
front of the printer.

CAUTION: Do not tip the printer 
when you attach the Guide Rail 
brackets.

2

At the left side of the printer

, align the #1 

bracket with the third hole from the front, 
lift it over the printer’s plastic cover panel 
and hook its tab in the hole.

3

At the right side of the printer, align the #2 
bracket with the third hole from the front 
and slide it upwards between the printer’s 
plastic cover panel and frame until it snaps 
firmly into place.

Содержание DocuPrint N24

Страница 1: ...The Xerox DocuPrint N24 N32 and N40 2 000 Sheet Finisher Quick Installation Removal Guide...

Страница 2: ...ur DocuPrint N24 N32 or N40 must be at software release 1 2 or higher To verify your release print a software configuration sheet from the printer If you do not have this release you may obtain it fro...

Страница 3: ...Be sure to slide it off the bottom of the box CAUTION This operation should be done by two people Remove any tape and packing material Save the carton and packing materials for later use in case you e...

Страница 4: ...er is placed under the connecting edge of the printer If your printer has the Duplex Module installed you do not need to remove it in order to install the Transport Cover 2 Align the tabs on the Trans...

Страница 5: ...n The left side bracket 1 should be at the left side of the printer while the right side bracket 2 should be at the right side of the printer Make sure the Guide Rail is parallel to the front of the p...

Страница 6: ...t does not tip over 2 Slide the finisher towards the printer until its GFI power cord and connector cable can easily reach the printer 3 Fully extend the Guide Rail that is attached underneath the pri...

Страница 7: ...the thumb screw into the hole at the end of the Guide Rail at the base of the finisher and hand tighten it as shown Then push the finisher against the printer Make sure the pins on the Paper Transport...

Страница 8: ...tions section of the sheet If the finisher does not appear on the Configuration Sheet perform steps 1 through 5 of the next section Removing the Finisher then reinstall the finisher and print another...

Страница 9: ...r Be sure to save all the loose parts from the finisher and the printer 2 Disconnect the printer GFI power cord from the Printer and unplug the finisher connecting cable from the printer 3 Remove the...

Страница 10: ...Guide Rail 9 Remove the Guide Rail from under the printer 10 Remove the Emissions Bracket Assembly from the printer console by removing the two thumb screws 11 Remove the Transport Cover Begin by lif...

Отзывы: