


156
Chapter 3 Upgrading the Software
12.
From the
Start
menu, select
Shutdown
>
Restart the Computer
, to
restart the CSX2000 Color Server. Click
Yes
to confirm your
choice.
13.
Once the CSX2000 Color Server has rebooted insert the CSX2000
Color Server Application Software CD#2 and browse the CD-
ROM to CSX2000_2.0 folder, and locate the
Setup.exe
file. Then,
double-click this file to run Setup. If a
Services or driver fail
message appears, click
OK.
14.
Click
Yes
to the accept the licence agreement.
15.
Click
Yes
if any other messages appear.
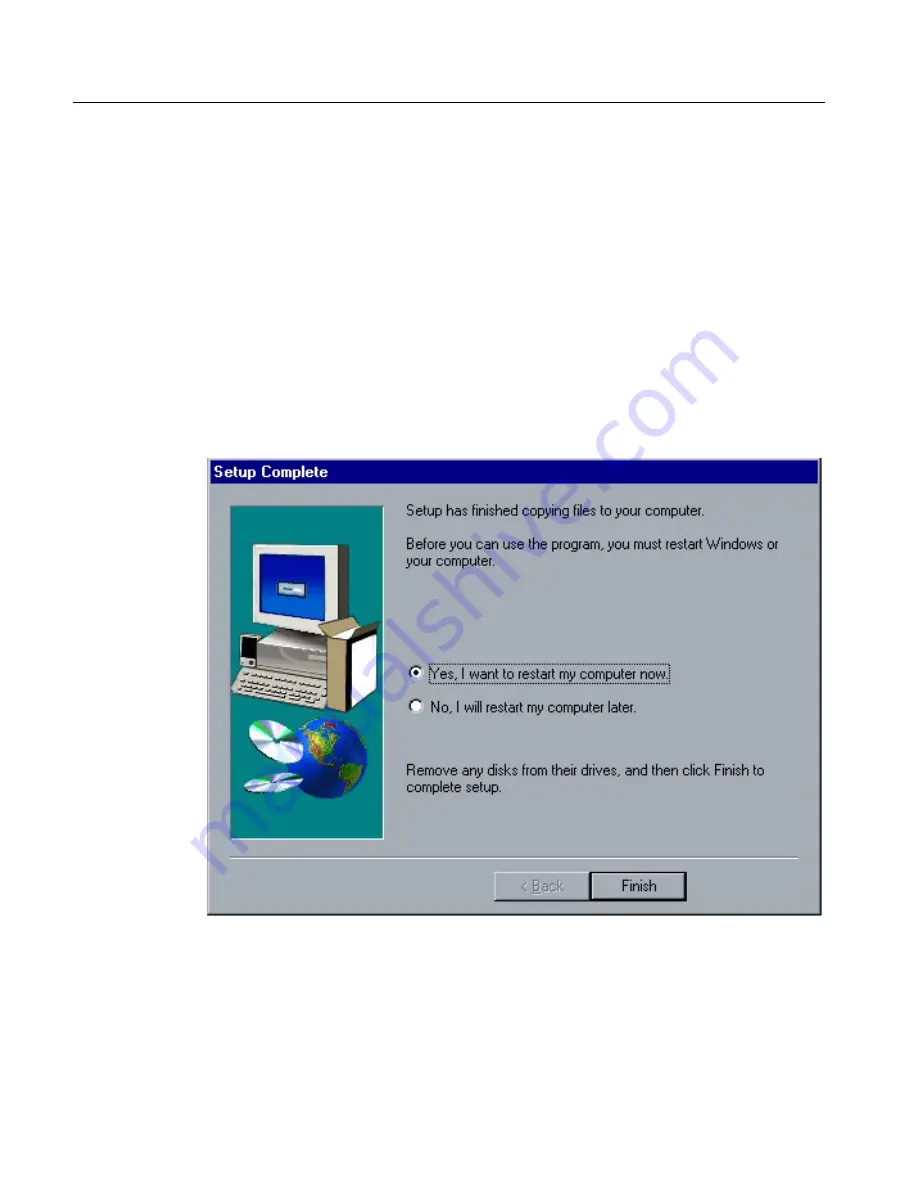
16.
When the setup is complete, click
Finish
to reboot the CSX2000
Color Server.
The Software upgrade is now complete.
Содержание CSX 2000
Страница 1: ...www creo com Installation Guide English CSX2000 Color Server version 2 0 399Z1P569C...
Страница 2: ......
Страница 6: ...This Page Is Intentionally Blank...
Страница 10: ...This Page Is Intentionally Blank...
Страница 14: ...This Page Is Intentionally Blank...
Страница 15: ...5 Safety Precautions Safety Precautions 6...
Страница 20: ...This Page Is Intentionally Blank...
Страница 30: ...20 Chapter 1 Setting Up Client Workstations 3 Select the Ports tab and then click the Add Port button...
Страница 32: ...22 Chapter 1 Setting Up Client Workstations 6 Close the Printer Ports dialog box...
Страница 35: ...Defining a Printer on PC Client Workstations 25 2 When the Welcome message appears click Next...
Страница 47: ...Defining a Printer on PC Client Workstations 37 The following window appears 15 Click Yes...
Страница 49: ...Defining a Printer on PC Client Workstations 39 The following window appears...
Страница 52: ...42 Chapter 1 Setting Up Client Workstations 3 Click Next The following window appears...
Страница 58: ...48 Chapter 1 Setting Up Client Workstations 3 Click Next The following window appears 4 Select Network printer...
Страница 59: ...Defining a Printer on PC Client Workstations 49 5 Click Next The following window appears...
Страница 69: ...Defining a Printer on PC Client Workstations 59 7 Select the printer you wish to setup and click Next...
Страница 74: ...64 Chapter 1 Setting Up Client Workstations 2 When the Welcome message appears on the screen click Next...
Страница 86: ...76 Chapter 1 Setting Up Client Workstations The following window appears 15 Click Yes...
Страница 88: ...78 Chapter 1 Setting Up Client Workstations The following window appears...
Страница 98: ...88 Chapter 1 Setting Up Client Workstations The Connect to Server dialog box appears...
Страница 103: ...Defining a Printer on Macintosh Client Workstations 93 3 Double click the Printer Center icon...
Страница 127: ...Reinstalling the Services for Macintosh 117 4 Select the Services tab...
Страница 131: ...Reinstalling the Services for Macintosh 121 4 Select the Services tab...
Страница 162: ...This Page Is Intentionally Blank...
Страница 163: ...153 Chapter 3 Upgrading the Software Software Upgrade 154...
Страница 169: ...The Administration Window 159 The Administration window appears...
Страница 174: ...164 Chapter 4 Administrating the System 3 Select the Time Zone tab and set the correct time zone 4 Click OK...
Страница 220: ...This Page Is Intentionally Blank...
Страница 221: ...211 Chapter 5 DFE Monitor General Information 212...
Страница 223: ...213 Chapter 6 Adding an External SCSI Device Adding an External Device 214...
Страница 231: ...Adding an External Device 221 The following Confirm message appears 5 Click Yes The following message appears 6 Click OK...
Страница 232: ...222 Chapter 6 Adding an External SCSI Device 7 Right click the disk and from the menu select Format...
Страница 248: ...238 Novell NDS Setup and Configuration 16 Click the Create button Both queues appear now in the Novell NDS window...
Страница 250: ...240 Novell NDS Setup and Configuration 3 Click the Add button The Select Object dialog box appears...


