background image

24

11 

 SYSTEM

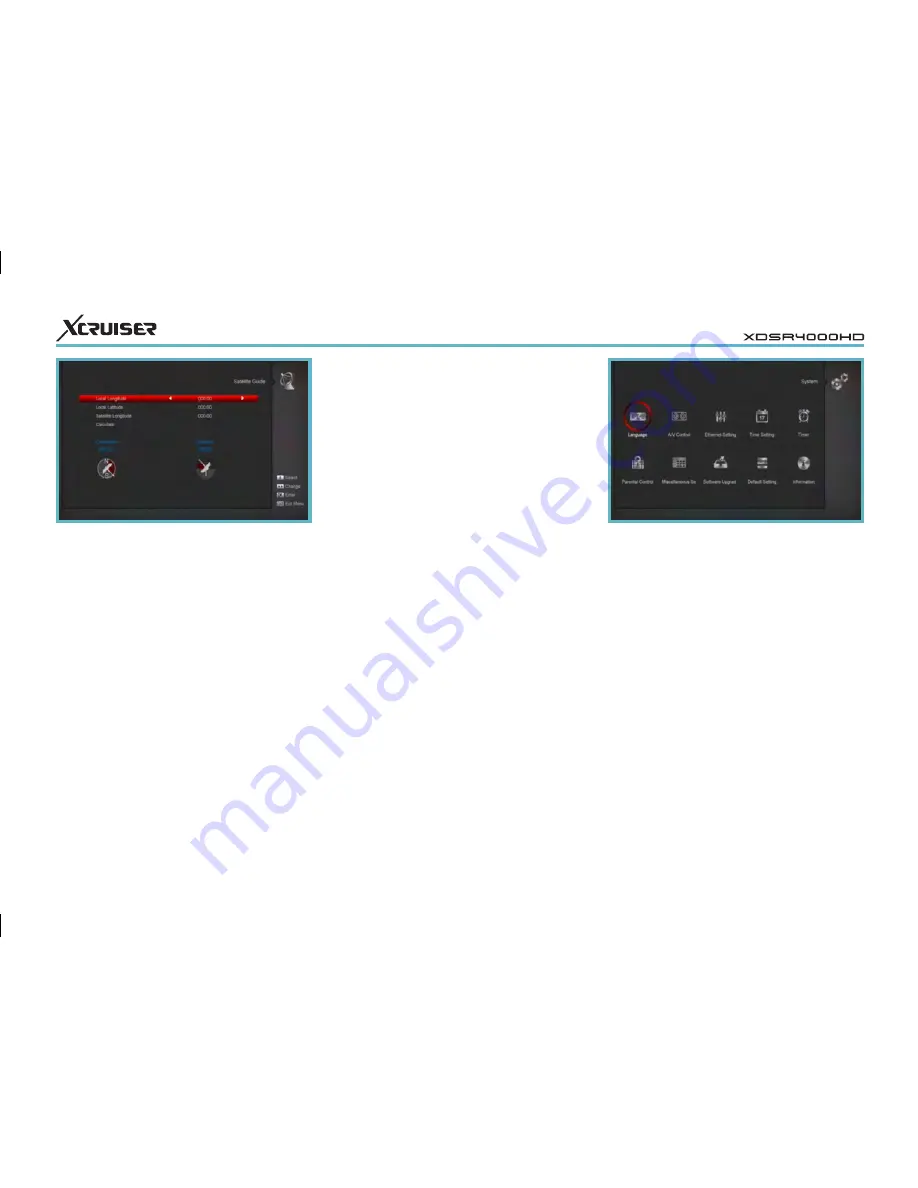
When you enter to “System” menu, you 
will see a screen like above.

In “System” menu:

• Press [Left/Right] key to select menu 

items among Language, A/V Control, 
Ethernet setting, Time setting, Timer, 
Parental Control, Miscellaneous Setting, 
Software Upgrade, Default setting, 
Information.

• Press [OK] key to enter the selected 

item.

You can use number keys to input 
parameters in “Local Longitude”, “Local 
Latitude” and “Satellite Longitude”. 

You can use [Left/Right] key to select 
east or west in “Local Longitude” and 
“Satellite Longitude”, select north and 
south in “Local Latitude”.

Moving highlight to “Start” item and 
press [OK] key. The lower column on the 
screen will calculate the corresponding 
value automatically.

Orientation means the angle between 
south and satellite.

Press [Menu] key to draw back to “Main” 
Menu.

settings. Just press “ OK ” button to enter 
this “Auto Installation” menu then it starts 
scanning and shows you the result at the 
end of scanning.

10.3 Satellite Guide

When you enter to “Satellite Guide” 
menu, you will see the screen like above:

“Satellite Guide” is use for user to enter 
local longitude; local latitude and satellite 
longitude. By the evaluation from the 
receiver evaluate the antenna azimuth 
and antenna elevation; user can follow 
this guidance to adjust antenna.

Содержание XDSR4000HD

Страница 1: ...User s Manual Full HD Digital Satellite Receiver Please read this User s Manual carefully before installing the receiver v1410 ...

Страница 2: ...a Interface and the HDMI Logo are trademarks or registered trademarks of HDMI Licensing LLC in the United States and other countries Manufactured under license from Dolby Laboratories Dolby and the double D symbol are trademarks of Dolby Laboratories ...

Страница 3: ...Recall 13 8 9 Favorite 14 8 10 Audio 14 8 11 Information 14 8 12 EPG 15 8 13 TV RADIO 15 8 14 Channel List 16 8 15 Sleep 17 8 16 Page Up Page Down 17 8 17 TEXT 17 8 18 Subtitle 17 8 19 Find 17 8 20 Zoom 17 8 21 TV RCV 17 8 22 Menu 18 8 23 Video Format 18 8 24 Exit 18 9 SERVICE 18 9 1 Organizing Service 18 9 2 Organizing Favourites 20 10 INSTALLATION 21 10 1 Satellite Installation 21 10 2 Auto inst...

Страница 4: ... 35 13 3 Music 36 13 4 Image 37 13 5 PVR Setting 39 13 6 Disk Manage 39 13 7 Remove USB Device safely 40 14 APPLICATION 41 14 1 Youtube 41 14 2 RSS Reader 42 14 3 Weather Forecast 42 14 4 Google Maps 43 14 5 FTP 43 14 6 Web TV 43 15 GAME 44 15 1 Tetris 44 15 2 Snake 44 15 3 Othello 44 16 EPG 45 17 NEW FEATURES 45 17 1 Equalizer 45 17 2 Time Shift 45 17 3 Record 46 18 TROUBLE SHOOTING 47 19 SPECIFI...

Страница 5: ...ric shock Liquids Keep liquids away from the receiver The apparatus shall not be exposed to dripping or splashing and that no objects filled with liquids such as vases shall be placed on the apparatus Cleaning Disconnect the receiver from the wall outlet before cleaning Use a light damp cloth no solvents to dust off the receiver 1 SAFETY Ventilation The slots on top of the receiver must be left un...

Страница 6: ...ge the functions of receiver If you have any difficulty concerning the operation of your receiver please refer to the relevant section of this manual includingTroubleshooting 2 INTRODUCTION MPEG Fully DVB S DVB S2 H 264 HD compliant 6000 channels TV and Radio programmable Multilingual menu text support Channel switching time less than 1 second Channel list editing Favorite channel list editing Tru...

Страница 7: ...ode 9 MENU Display the Main Menu on the screen or return to the previous menu or status 10 KEY To change channels or to move cursor up or down in the menu 11 OK To select menu option or to updated on entry 12 KEY To adjust volume level or to move cursor left or right in the menu 13 EXIT Cancel the user selection and return to the viewing mode from a menu 14 REC Has different functions per menu 16 ...

Страница 8: ...t output channel number between CH21 and CH69 with up and down key 29 FIND Use to prompt find channels sort by character 30 RECALL Return to the previous menu or status 31 INFO To display channel status or various program information of current service 32 EPG ELECTRONIC PROGRAM GUIDE Display the Programs guide on screen when available 33 PAGE PAGE To move up the cursor to the next or previous page...

Страница 9: ...PANEL OK KEY To see TV Radio channel list or to confirm in the menu REMOTE SENSOR Detects infrared signal from remote control unit POWER INDICATOR While the receiver is power on and at standby mode SIGNAL INDICATOR When receiving signal is strong the signal indicator is lighted CARD SLOT One slot CA Interface for Conax DISPLAY LED type Indicates operating status of receiver USB1 USB 2 0 Host conne...

Страница 10: ...This is used to connect your TV through SCART cable Please refer to the diagram above for all possible connections of your receiver Do not connect the unit to the mains socket until all other connections have been made and checked 6 REAR PANEL VIDEO OUT This RCA connector is used to connect any external video AUDIO OUT These RCA connectors are used to connect any external audio amp or system USB U...

Страница 11: ...the LNB connector on the DiSEqC 1 2 motor All our receivers are designed to be DiSEqC 1 0 and DiSEqC 1 2 compatible audio connections because the HDMI connector can output stereo audio or Dolby Digital audio Connect RCA cable to the RCA jack on the back of the receiver and the other end to a RCA jack on your TV Finally connect the coaxial cable from the LNB of your Dish to the LNB IN jack on the r...

Страница 12: ...oint or DSL cable modem Plug in the wireless USB dongle to the USB port Separate purchase required Set the options for the Wi Fi NETWORK NAME SSID Select the network name of your Wi Fi access point from the list SECURITY TYPE WEP This product supports WEP 40 128bit ASCII and WEP 40 128bit HEX The security type of the Wi Fi and the product shall be set the same PASSWORD When using the security type...

Страница 13: ... playing mode press Pause key the picture will be paused but the sound of the channel will still continues Press PLAY key again the screen s picture will skip over to the current playing picture and the sound of the channel will corresponding playing 8 8 Recall Press RETURN key will directly switch to the previous channel that you played before current channel 8 BASIC OPERATIONS 8 1 Turn on STB Fi...

Страница 14: ...n open the Audio window on the screen You can modify the audio track by pressing Ch Up Ch Down key and 8 9 Favorite In full screen press FAV key to display Favorite list on the left side of the screen as can be seen on above picture In the window of Favorite list you can move highlight by press Channel Up Channel Down key to select Favorite Channels modify the audio mode by pressing Vol Up Vol Dow...

Страница 15: ...mode press TV RADIO key to switch to TV mode Press EPG key to display EPG screen Press Red key to select the channels by different group such as by Favorite Satellite Provider CAS etc Press Green key to select different display mode among Now EPG Next EPG More and Schedule like above picture 8 12EPG With Electronic Program Guide EPG you can navigate channels through all the possible viewing option...

Страница 16: ...betical Order ignore Symbol Press Up Down key to move highlight and press OK key to play the highlighted channel Press Yellow key to change the current channel s property such as FAV Lock Skip Delete Rename Press Blue key to open the Sort window like above There are five kinds of sorting ways You can press Page Page key to move highlight and press OK key to confirm you selection 8 14Channel List I...

Страница 17: ...he channel according your input and list the matched channel Move highlight to OK and press OK key can close Find window and you can select channel from the channels list directly Press Page Up Down key to page up and page down Press Exit key to exit the channel list 8 15Sleep This function can set sleep timer By setting this fuction the system will enter to standby automatically on sleep mode Pre...

Страница 18: ...nel Down key and OK key to select the programs which you want to edit You can press Page Up Page Down key to implement the Page Up Page Down function You can use Red key to switch different Group You can press Green key to select the programs by different select mode 8 22Menu Press MENU key can open the menu exit the current menu to last menu or close the window 8 23Video Format Press P N white ke...

Страница 19: ...own key and OK key Press color key can implement the corresponding function in Organizing Services Groups Press Red key can open the Groups window like above You can press Up Down key to move highlight and press OK key to select group Press Menu key to close Groups List Move the channels to the position which you want and press OK key to confirm Like above picture Lock Select the channels which yo...

Страница 20: ...hannel according your input and list the matched channel Move highlight to OK and press OK key can close Find window and you can select channel from the channels list directly 9 2 Organizing Favourites This menu is helpful in adding and deleting services to and from the favorite group Lock the channel by press OK key Like above picture Delete Select the channels you want to edit in channel list by...

Страница 21: ...s from favorites Mark the desired services by press OK button in Favorite List press to choose Remove mode and press OK button Move You can reorder and move the service to the preferred position in Favorite List Rename Select the desired FAV List by press FAV button using buttons to choose Rename mode and press OK button to display keyboard and rename it Group Options and Find functions Please ref...

Страница 22: ...4 4 4 4 ports DiSEqC 1 8 2 8 8 8 8 ports DiSEqC 1 16 2 16 16 16 16 ports DiSEqC Positioner In Positioner item press Volume Up Volume Down key to switch Off DiSEqC 1 2 USALS functions 22K You can use Left Right key to switch ON Off When this item is switched to ON receiver will receive TV and radio input signal from 22K port If the item is switched to Off the receiver will receive all signal from 0...

Страница 23: ...an all channels or only scan TV Radio channels scan type means preset scan that is searching the existed TP Automatic Scan means blind scan It is no need existed TP info and NIT Search on off After you set up press OK key to start scanning Press White key into the blind scanning immediately TP Scan Press Green key to scan current TP s programs When you press Green key it will display New TP in TP ...

Страница 24: ...orth and south in Local Latitude Moving highlight to Start item and press OK key The lower column on the screen will calculate the corresponding value automatically Orientation means the angle between south and satellite Press Menu key to draw back to Main Menu settings Just press OK button to enter this Auto Installation menu then it starts scanning and shows you the result at the end of scanning...

Страница 25: ...ave corresponded audio with Second Audio system will play the second audio language as default If no audio language corresponds with the Second Audio then the default language of current channel will be played automatically The selections of audio languages include English French German Russian Arabic 11 1Language When you enter to Language menu you will see the screen like above Language Press Le...

Страница 26: ...Menu Style you also can set the transparency of OSD You can press Volume Up Volume Down key to select the values There are 5 levels of transparency 10 20 30 and 40 and NO means no transparency function Brightness Contrast Saturation You can adjust the parameter about the Video image by using the OK button or press Volume Up Volume Down key the default value is Level 10 will makes TV screen flicker...

Страница 27: ...r 3G Dongle Wi Fi By selecting Wireless you can configure Wi Fi wireless as the following step Select Wireless on Default Network Type item Press red button the wireless LAN network list will appear select Wi Fi network and press OK button and input the password Press OK button on Connect item to start connecting In this menu you may assign a dynamic IP address to the digital receiver To do so sel...

Страница 28: ...annel doesn t provide time information you have to input the date and time information manually Press Menu key to draw back from Local Time Setting Menu 11 5Timer Press enter key to open timer menu Current time information will display on the first column if the current time 11 4Time Setting When you enter to Local Time Setting menu you will see the screen like above GMT Usage This item is use for...

Страница 29: ...put your wakeup date On Time Use number keys to input your wakeup time Once the time s up no matter what the system is in standby mode or in playing mode the system will automatically switch to the channel you want and start to play Duration After you set a time for Duration item once the time s up the system will automatically switch to standby mode If you want not work this function set the dura...

Страница 30: ...ntal Control You can set a password for anyone who wishes to operate in the Installation menu And you can also set the password for the lock channels How to set the lock channel please refer to LOCK Here will show you how to setting and how to revising the password 1 In Parental Lock function press OK key there will pop an dialogue for you to input the password When you input the correct password ...

Страница 31: ...time The range of the duration is 1 second 10 seconds 4 OSD Position Control display position of the info bar in full screen mode You can choose Bottom or Top 11 8Software Upgrade By USB In this menu you can upgrade the software from USB conveniently Press Left Right button select USB A or USB B press OK button to enter In this menu you can select the Upgrade Mode among Software No channel list Ch...

Страница 32: ...Up Vol Down keys to switch upgrade mode All SW bootloader All SW Channel list Software no channel list Channel list 2 Highlight Start on master receiver and press OK key to start upgrade 3 Turn on slave receiver and it needn t operate any setting 4 Press Exit key to draw back Backup to USB In this menu you can dump the software to the USB equipment 1 In Backup file you can press OK key to edit the...

Страница 33: ... in the Delete All Channel item it will pop a dialogue ask you whether confirm to delete all channel If you select OK all the channel will be deleted 2 After you input the correct password there will show a warning message to inquiry you The operation will load default and erase all the channels that user added continue 3 If you select OK option the all revised parameters of the receiver will rese...

Страница 34: ...DEL ID S W VERSION H W VERSION LOADER VERSION LATEST UPDATE STB SN STB ID VFD Version Press Exit key to draw back to Tools menu 12 CONDITIONALACCESS 12 1CA Setting We provide two CA slots for user to use Receiver has build in smart card module with CONAX system By using cards in this system provided by operators it is possible to watch many scrambled channels coded in this system This menu shows d...

Страница 35: ...DIA if you enter to the USB Menu you will see the picture like the above Note If no USB Hard Disk insert to the receiver this menu is not available 13 1Record In this menu you can playback the record files and you can press Red key to rename the file or press Green key to lock the file or press Yellow key to delete the file Press 1 key to adjust the volume while you preview the record file on top ...

Страница 36: ...t you want to visit Then Press ok button to enter the music list In this menu you can select the MP3 file to play by press OK key or PLAY key Also you can setting the play list Red key Show play list as below picture You can see the video files in this menu it can support mpeg and ts format file and press play key you can preview the video at the top right corner if you want to watch the video in ...

Страница 37: ... Press STOP button to stop and time return to 00 00 Press PREV button to jump to the beginning of file list if play is over 3 seconds or jump to previous file if play less than 3 seconds Press NEXT button to go to the next file Press FORWARD button to forward 4S Press BACKWARD button to back 4S Yellow key To edit the files or folders in the USB storage Press this button you can see the picture lik...

Страница 38: ...an preview the picture at the top right corner if the scroll bar is on the picture files JPG BMP and show the logo when at MP3 file Move scroll bar when press Up Down key page up or down by page key Go into sub directory when press OK key in the file directory play the selected file when scroll bar is on the file automatic return USB menu after play is over White key In this menu to setting JPEG p...

Страница 39: ...is key you can see the picture like above 13 5PVR Setting Time Shift ON Enable the Time Shift function OFF Disable the Time Shift function Timeshift to Record ON Means when you press the Button to record the program it will merging the Timeshift files and the record files OFF Means when you record the program it just start when you press button not include the Timeshift files Record as Scrambled R...

Страница 40: ...information about the HDD USB Speed Test Press Blue button to enter the USB Speed Test menu like the above picture you can see the Standard speed and your USB harddisk speed according this information you can know what operation your disk can support In this menu and you can press Red button refurbish the USB disk speed 13 6Disk Manage In this menu you can select USB disk for HDD Format HDD inform...

Страница 41: ...ghlight Press ENTER key on one item it will play pertinent video The video will show on top left corner Press ENTER again it only shows video in the centre of your screen Now press ZOOM key the video will play in full screen Press Vol Vol to control volume Press PAUSE key to pause video or press STOP key to stop play Press RED key to display the featured video Press Green key to sort by site and d...

Страница 42: ... delete current channel Blue key To edit current channel information You can edit channel name and channel Url Press OK button to see the detail infomation like the above picture 14 2RSS Reader In this menu you can see the news Red key To update the latest news Green key To add new channels you can input a new website Useing this menu you can add up to 10 channels ...

Страница 43: ...ogle Map menu you will see a screen like above Select left toolbar menu to change different cities and map mode move the highlight to the Begin option and press OK button start to view the map Find box at the bottom left enter city name findcities Press Red key to move the cursor Press Yellow key to zoom in map Press Green key to zoom out map Green key To add new city use this menu you can add 5 c...

Страница 44: ...hree Games include Tetris Snake and Othello Basic operation statement 15 1Tetris a Moving highlight to Setup and press lLeft Right key to select the game level speed b Moving highlight to Start and press OK key to start the game c Moving highlight to Cancel keys and press OK key to draw back from the game d Start on the game Left Right Move shape left or right 14 6WebTV When you enter to Web TV me...

Страница 45: ...onnect the USB HDD and enable the Time Shift function in the menu Main Menu Record PVR Setting Time Shift It will start the Time Shift function automatically after you switch the program and when you press the Tms button the Time Shift info bar will displayed as the following picture b Moving highlight to Start and press OK key to start the game c Moving highlight to Cancel keys and press OK key t...

Страница 46: ...7 3Record If you connect the USB HDD You can press button to start record function as following picture Press button to display the record info bar when you recording Press button again to setting the record time You can press button to pause the video and can save the picture to flash by press P button when the video is paused You can press or button to Fast Backward or Fast Forward ...

Страница 47: ...ly Connected short circuit or open circuit The position of dish is aligned incorrectly Receiver is on but no picture or sound except the following messages NO TV program Channel is not available Channel is scramble Receiver not responding to remote control unit RCU batteries are dead or inserted incorrectly The RCU is pointing toward wrong direction Poor picture Quality The level of Signal strengt...

Страница 48: ... Type DVB S DVB S2 Input Connector F type Connector Female Signal Level 65 to 25 dBm LNB Power Polarization Vertical 13V Horizontal 18V Current Max 400mA Overload Protection 22KHz Tone Frequency 22 1KHz DiSEqC Control Amplitude 0 6 0 2V Version 1 0 1 1 1 2 USALS Available unicable Demodulation QPSK 8PSK Input Symbol Rate 1 45 Mbps Convolution Code Rate Forward Error Correction FEC DVB S 1 2 2 3 3 ...

Отзывы: