Xante ScreenWriter 3 Скачать руководство пользователя страница 94

4-8  PC Setup

bb

__________________________________________

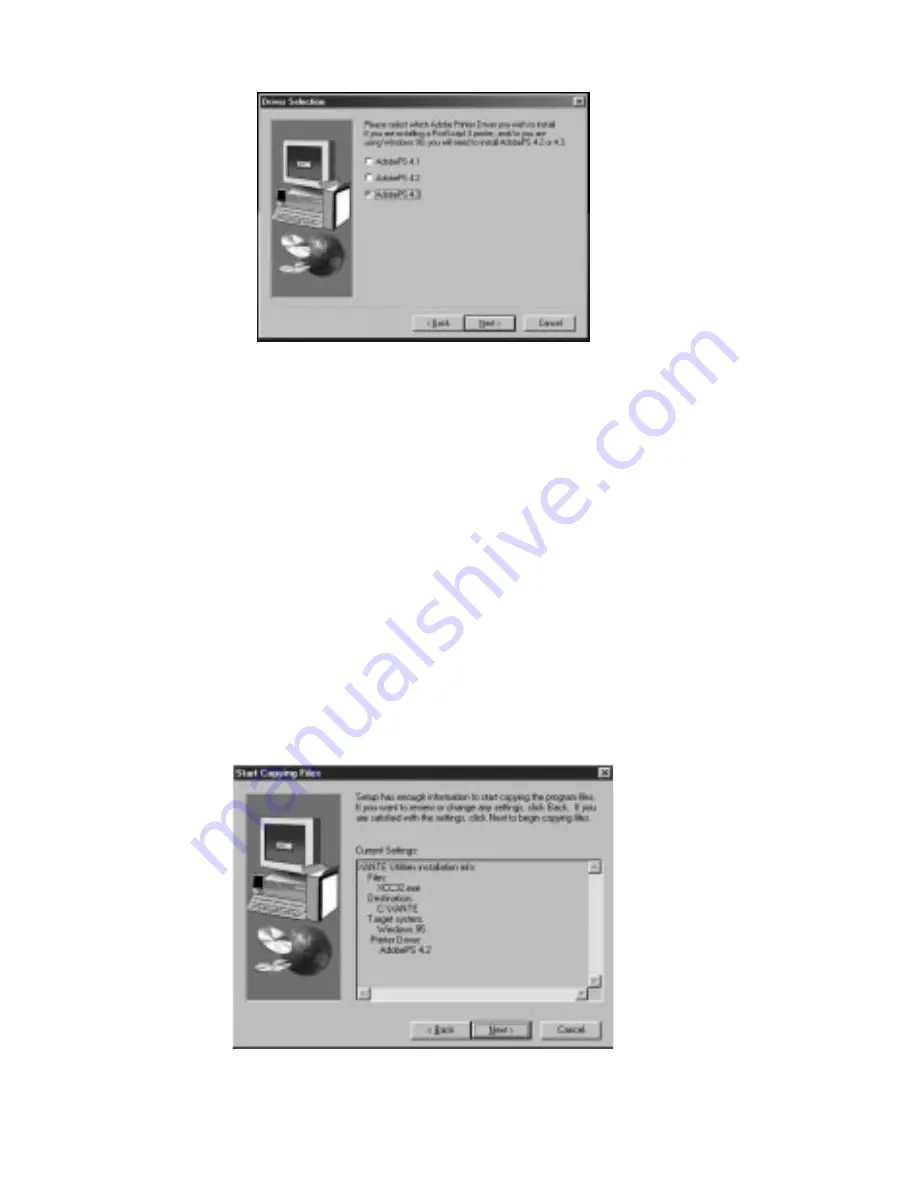
Fig. 4.3  Select the AdobePS Printer Driver

Windows 95 or Windows 98:

AdobePS 4.1 (Adobe PostScript Level 2 only)

AdobePS 4.2 (Adobe PostScript Level 2 and
Adobe PostScript 3)

AdobePS 4.3 (Adobe PostScript Level 2 and
Adobe PostScript 3—Some systems have
problems using this new Adobe 4.3. If so,
revert to AdobePS 4.2)

4.

Review the configuration information in the Start Copying Files
window (fig. 4.4). If you need to make any changes, click Back
and make the appropriate changes.

Fig. 4.4  The Start Copying Files Window

Содержание ScreenWriter 3

Страница 1: ...troduction 1 1 Chapter 1 Introduction Chapter Overview ScreenWriter 3 Printer 1 3 About this Manual 1 4 Manual Conventions 1 5 Printer Features 1 6 Printer Configuration 1 7 Warranty and Product Regis...

Страница 2: ...1 2 Introductionbb ________________________________________ Notes...

Страница 3: ...s features allow you to print images directly to XANT Myriad film process the output through XANT s FilmStar 2 and then use the film to burn silk screen emulsions The innovative economical ScreenWrite...

Страница 4: ...installation of Adobe PostScript printer drivers your printer s PPD and XANT Command Center as well as procedures for using many printer features Chapter 5 Ethernet Setup describes EtherTalk Novell P...

Страница 5: ...references The ScreenWriter 3 Menu quick reference sheet illustrates the printer s front panel menu structure and lists XANT support Manual Conventions The following conventions are used in this manu...

Страница 6: ...r cassettes and from 16 36 lb bond 60 135 g m2 in the multipurpose feeder You can feed transparencies labels envelopes and Myriad film from the multipurpose feeder The optional envelope cassette allow...

Страница 7: ...king with your new printer more efficient Printer Configuration Processor NEC VR 4310 166 MHz RAM 16 MB standard upgradable to 256 MB Printer Language Adobe PostScript 3 Fonts 136 PostScript fonts Res...

Страница 8: ...wsletter This publication features articles on printing new options and tips for using your printer effectively Other Helpful Documentation Please visit our Web site at www xante com for the latest in...

Страница 9: ...idge 2 7 Removing and Installing the Toner Cartridge 2 8 Paper Cassette 2 13 Multipurpose Feeder 2 17 Multipurpose Feeder Tip 2 20 Printer Ports 2 21 Selecting the Printer Interface 2 21 Connecting to...

Страница 10: ...2 2 Installationbb_________________________________________ Notes...

Страница 11: ...onnecting the printer to Macintosh PC and network hardware and connecting to the power supply Printer Location Set up your printer in a location that can support its weight and that provides sufficien...

Страница 12: ...talled Always have two people lift the printer Only lift the printer using the recessed grip areas on the right and left sides 2 Remove the shipping stabilizer on top of the printer then lift the prin...

Страница 13: ...ers RAM internal hard disk resolution and 10 100BaseT Ethernet upgrades ordered with your printer are installed at the factory before shipping If you do not receive your full shipment or if anything i...

Страница 14: ...2 6 Installationbb_________________________________________ Fig 2 4 Printer Rear View Fig 2 5 Printer Inside Front View...

Страница 15: ...unopened and 6 months opened Never move the printer with the cartridge installed Toner spills can damage the printer Do not expose the cartridge to bright lights or direct sunlight Keep the cartridge...

Страница 16: ...Remove all media from the output tray 2 Squeeze the top cover latch to release the lock fig 2 6 Fig 2 6 Release the Top Cover Latch 3 Lift the top cover The multipurpose feeder opens automatically fig...

Страница 17: ...it slowly out of the printer fig 2 8 Caution Once you begin pulling the cartridge out of the printer remove it completely The cartridge s shutter may not open properly or may be damaged if the cartri...

Страница 18: ...any compacted toner Turning on the printer with toner still compacted may damage the cartridge Fig 2 9 Shake the Toner Cartridge 7 Place the toner cartridge on a flat surface holding it in place with...

Страница 19: ...on 2 11 8 Insert the pins on both sides of the cartridge into the guide channels in the printer fig 2 11 Fig 2 11 Insert the Pins into the Guide Channels 9 Slide the cartridge into the printer until i...

Страница 20: ...___________________________ 10 Close the top cover by pressing down on the center section until the latch engages fig 2 13 Fig 2 13 Close the Top Cover 11 Close the multipurpose feeder fig 2 14 Fig 2...

Страница 21: ...75 envelopes can be purchased as an option for your printer This section describes loading and installing the standard paper cassette Chapter 7 covers media types and sizes for the paper cassette and...

Страница 22: ..._____________ b Lift up slightly on the cassette then pull it from the printer fig 2 16 Fig 2 16 Remove the Cassette from the Printer 2 Place the cassette on a flat surface and remove the cassette cov...

Страница 23: ...ation 2 15 3 Lift the paper length guide to release it Slide it forward fig 2 18 Fig 2 18 Move the Length Guide 4 Squeeze the sides of the paper width guide to release it Slide it to the outside of th...

Страница 24: ...first Fig 2 20 Load the Media 6 Adjust media guides to the size of the media stack Caution To prevent jams make sure the media fits between the paper guides and under the cassette s retaining clips fi...

Страница 25: ...20 lb bond 60 lb text weight 65 g m2 paper or media such as Myriad Film label stock and transparencies to a stack height of approximately 70 18 mm The multipurpose feeder supports non standard size m...

Страница 26: ...handle and pulling down fig 2 22 Caution The multipurpose feeder does not open to a 90 angle To prevent damage do not exert strong pressure or place heavy objects on the feeder Fig 2 22 Open the Multi...

Страница 27: ...g edge toward the back fig 2 24 See Media Source in chapter 7 to determine whether to load media short or long edge first Caution To prevent jams make sure the media stack fits under the media guide s...

Страница 28: ...onitor sends a prompt message to put paper into the manual feed tray and click OK To disable this prompt Note This prompt can only be turned off in Print Monitor You cannot turn the manual feed messag...

Страница 29: ...g the Printer Interface Connect to the appropriate printer interface for your host computer or network environment Macintosh without Ethernet LocalTalk Port PC without Ethernet PC Printer distance 10...

Страница 30: ...t the two LocalTalk connector boxes with the RJ 11 phone cable 5 Plug the terminating resistor s into the open socket s in the connector box es fig 2 28 Note Terminate open sockets on the ends of your...

Страница 31: ...arallel port This cable s printer end has a 36 pin male connector and the computer end has a 25 pin male connector 36 pin Connector To Printer 25 pin Connector To Host Computer Fig 2 29 Bidirectional...

Страница 32: ...the serial cable s 9 pin male connector into the printer s serial port 3 Plug the other connector either a 25 pin or a 9 pin female connector into the computer s serial port 4 Turn on your printer an...

Страница 33: ...repeaters routers gateways or to other hubs UTP cable is the wire used in many telephone installations The connectors used for an Ethernet network using UTP cable are RJ 45 plugs which are similar to...

Страница 34: ...onfigure the Ethernet interface See chapter 5 for details Connecting the Power Cord 1 Make sure the printer s power switch is off the O is pressed in 2 Connect the power cable s female connector to th...

Страница 35: ...ect the Power Cord to the Printer Warning Never use a power cord that is damaged Check the cord and plug monthly and replace immediately if you find any damage Turning the Printer On Press the on the...

Страница 36: ...gy X ACT in chapter 3 Macintosh or 4 PC Following initialization a start up page prints if that feature is enabled This page lists the selected resolution installed RAM hard disk identities page count...

Страница 37: ...11 PSPrinter 8 3 1 3 12 Configuring the PPD 3 14 Configuring the Printer 3 16 App Drivers Folder 3 17 PageMaker 5 PPD Folder 3 17 QuarkXPress PDF Folder 3 18 ScenicSoft Preps 3 19 Downloads Folder 3 1...

Страница 38: ...3 2 Macintosh Setupbb ____________________________________ Notes...

Страница 39: ...er in this chapter The App Drivers folder contains printer drivers required by some Aldus products QuarkXPress and ScenicSoft Preps See App Drivers Folder later in this chapter for details The ATM 4 0...

Страница 40: ...PDF files of some XANT printer manuals Use Adobe Acrobat Reader 3 0 to view and print these manuals Read1st txt describes Adobe Acrobat Reader 3 0 installation Readme PDF summarizes the XANT Utilitie...

Страница 41: ...bat icon 3 Check the ReadMe Reader file Double click the Reader 3 0 Installer icon to install Acrobat Reader 3 0 XInstaller Use XInstaller to load XANT Utilities your printer s PPD and QuarkXPress PDF...

Страница 42: ...he installation destination for the files in the Install Location box 5 Select Quit and go to the appropriate section listed below after the utility programs PPD s and PDF s are installed If you only...

Страница 43: ...edures in Configuring the PPD and Configuring the Printer later in this chapter Adobe PostScript Printer Drivers The XANT CD ROM contains the Adobe PSPrinter driver and printer PPDs Before using your...

Страница 44: ...dobe PostScript Level 2 support Full ColorSync 2 1 support Simplified printer setup and printing interface Ability to change printers from the Print dialog box Collation to print multiple document cop...

Страница 45: ...ox Single pass foreground printing for faster printing of large or complex documents Adobe PSPrinter 8 3 1 The Adobe PSPrinter driver requires the following system setup Macintosh running System 7 or...

Страница 46: ...the AdobePS 8 6 folder before beginning driver installation Installing AdobePS 8 6 1 Insert the XANT Utilities CD ROM into your Macintosh 2 Double click the XANT Utilities 4 X icon 3 Double click the...

Страница 47: ...overwrite other printer drivers Check the appropriate language folder s Readme First file in the AdobePS 8 5 1 folder before beginning driver installation Installing AdobePS 8 5 1 1 Insert the XANT U...

Страница 48: ...1 Chooser version 7 3 if necessary the PSPrinter Read Me and the latest PPDs It overwrites any earlier PSPrinter version but will not overwrite other printer drivers Installing PSPrinter 8 3 1 and th...

Страница 49: ...pter to complete driver setup PSPrinter 8 3 User Guide Each language directory in the PSPrinter 8 3 folder has a user guide covering installation and use Print the guide less than 50 pages using the A...

Страница 50: ...g 3 4 2 Select AdobePS or PSPrinter from the box on the left top left in a network environment a list of available printers appears to the right Note If the printer does not appear in the list verify...

Страница 51: ...inter select Off for Background printing to maximize processing performance when the Chooser window reappears This option does not appear if the AdobePS driver is selected 5 Close the Chooser window t...

Страница 52: ...or XANT Command Center See Spooler in chapter 6 and Spooler later in this chapter for details c Select the amount of RAM installed on your printer 8 Click OK twice The Chooser window reappears Then cl...

Страница 53: ...Drivers Folder Some Aldus PageMaker and FreeHand versions QuarkXPress and ScenicSoft Preps applications require special files in addition to the standard PPD supplied for your printer These files are...

Страница 54: ...ins PDFs Printer Description Files for each XANT printer QuarkXPress versions 3 3X and earlier require these files in addition to the PPD to ensure the highest quality output from your printer and Qua...

Страница 55: ...3 series PlateMaker 3 and ScreenWriter 3 printers XInstaller installs these files automatically if you have the ScenicSoft Preps application on your system Downloads Folder The Downloads folder contai...

Страница 56: ...ommunication devices currently configured for your printer SETZONE PS allows you to set your printer s EtherTalk zone name Open the file in a text editor such as SimpleText and change name of zone in...

Страница 57: ...General menu allows you to communicate with the printer to perform margin and line length calibrations get printer settings and status control printer spooling download PostScript files to the printer...

Страница 58: ...tion allows you to adjust the printer margin Printer margin refers to the imageable area not to margin settings for a document in an application The imageable area is the portion of a page on which th...

Страница 59: ...ou to configure your printer s optional Ethernet interface for Novell Print Server emulation AppleTalk and the TCP IP communication fig 3 8 Only the System Administrator should use these options See c...

Страница 60: ...twork EtherTalk Zone Name allows you to change your printer s default zone assigned by the network router TCP IP The TCP IP menu allows you to enable the TCP IP protocol and set the TCP IP address on...

Страница 61: ...r a specific job from the Print dialog box or set as the default from the printer s front panel See Calibration with a Densitometer Gamma later in this chapter Adobe Downloader Use Adobe Downloader to...

Страница 62: ...The Special menu allows you to check printer status and manage fonts downloaded to your printer Printer Status This option allows you to check current printer status XANT Command Center s General menu...

Страница 63: ...ng later See Spooler in chapter 6 for details Spooling can be enabled for each interface independently through XANT Command Center or the printer s front panel Interface menus Command Center also allo...

Страница 64: ...________ 1 Open XANT Command Center then choose General Spooling The Spooling window appears fig 3 11 Fig 3 11 Spooling Window 2 Select Devices from the Configure box The Select Spool Device window ap...

Страница 65: ...5 Select the interface that you use to send files to the printer then click Ok The Spooling window reappears fig 3 11 6 Click Ok The Spooling window closes Choose File Quit to close Command Center Ma...

Страница 66: ...e Job status can be W waiting to be processed P currently processing or H already processed and held using the Save Spooled Job feature 2 Use the Control buttons to manage the queued jobs Print Prints...

Страница 67: ...oofing This affordable easy to use densitometer will be used in this manual for example purposes Seven standard curves are supplied with XANT s Halftone Calibration Technology and you can create up to...

Страница 68: ...Linearization window LPI setting in the Print box fig 3 15 to achieve 256 levels of gray for the resolution at which you are printing Note For 600 dpi select 85 lpi for 1200 dpi select 106 lpi Any lpi...

Страница 69: ...the output from the press a Select Emulsion Side Down if you want to print a mirror image Note The printed calibration page will still look like a positive but the patch box values will be reversed b...

Страница 70: ...again later in the process resets the calibration cancelling any linearization you have already done Fig 3 16 Sample Calibration Page Using the Densitometer A densitometer uses a standard light sourc...

Страница 71: ...pears fig 3 17 Fig 3 17 Densitometer Data Entry Window 2 Measure individual patches on the calibration page by placing the page on a white background then center the densitometer s lens over the patch...

Страница 72: ...media type click Cancel 6 Click Save to Disk fig 3 15 if you want to save the data file for future use Then specify a new file name and select a folder for saving the file Click Save Otherwise skip to...

Страница 73: ...ves that you created and downloaded using the densitometer and Command Center from your printer and save them on your system These files can be downloaded to the printer again as needed To manage cust...

Страница 74: ...w 2 Choose Reset Custom Gamma X to factory setting the X will be replaced by the number of the curve you highlighted in step 1 or choose Reset all to factory settings Then select Negative Film if the...

Страница 75: ...key until SETUP MISC appears Then press the Enter key 3 Press the Menu key until MISC XACT appears Then press the Enter key 4 Press the Menu key until XACT TEST PAGE appears Then press the Enter key A...

Страница 76: ...T TEST PAGE reappears and press the Enter key to print a new test page 8 Repeat steps 5 and 6 until the line measurements agree with the lengths listed on the test page 9 Press the On Line key when th...

Страница 77: ...1 Fig 3 19 More X ACT Calibration Window 2 Make sure that the same type of media you will use for final printing is loaded in the printer 3 Select a setting for the media type you are using from the M...

Страница 78: ...ns to make sure the paper media source and print settings are correct If any of the settings are incorrect click Change Options when the More X ACT Advanced Setup window appears fig 3 21 make the nece...

Страница 79: ...Measure dashed line from top edge of paper to left arrow tip enter results in millimeters in box B A B C F A Measure dashed line from left edge of paper to top arrow tip enter results in millimeters...

Страница 80: ...8 8 Copy the recorded measurements in boxes A through F I and J and the fixed values in boxes G and H from the calibration page to the corresponding boxes in the Enter Calibration Values section of th...

Страница 81: ...aper cassette with the Margin Adjustment function 1 Open XANT Command Center Select General Margin Adjustment The Printer Margin Control window appears Fig 3 23 Printer Margin Control Window 2 Select...

Страница 82: ...warning dialog box Print another alignment test page using the factory defaults 6 Measure the distance from the edge of the page to the x line This distance is dependent on the y coordinate To move t...

Страница 83: ...oaded to printer memory only remain during the current power cycle Fonts downloaded to an optional hard disk survive a power cycle Caution Fonts downloaded to memory may cause PostScript errors due to...

Страница 84: ...the fonts in the open folder Selected font s appear in the list on the right of the window Note To remove fonts from the selected list highlight the fonts and click Remove 5 Click Download to send the...

Страница 85: ...ctory Window 3 Select the font storage area from the Device menu to view the fonts present in that area 4 Remove a font from printer memory or a hard disk by highlighting the font and clicking Delete...

Страница 86: ...3 50 Macintosh Setupbb ____________________________________...

Страница 87: ...PostScript Printer Drivers 4 10 Deleting Previous Driver Versions 4 10 Windows 95 98 and NT 4 0 Drivers 4 13 Configuring the Printer 4 24 PDFs Folder 4 24 PS_Files Folder 4 25 XANT Command Center 4 27...

Страница 88: ...4 2 PC Setupbb __________________________________________ Notes...

Страница 89: ...Read1st txt file for details The Atm folder contains an installation program for Adobe Type Manager and the expanded font set for use with Adobe PostScript 3 Run the Install exe in the ATM302 folder W...

Страница 90: ...to open this file Xantent is used by the Adobe PostScript printer driver installation for Windows NT 3 5x The Xinstall folder contains an installation program for XANT Command Center the PDF Printer...

Страница 91: ...each screen to complete installation 4 See the CD ROM s Read1st txt file and the Adobe Acrobat 3 0 Readme file installed with the program on your system XANT Utilities Installer XANT Utilities Instal...

Страница 92: ...ect Start Run Windows 95 or 98 b Use Browse to select the CD ROM s Xinstall exe file Windows 95 98 NT 3 5X and NT 4 0 then click OK 2 Click Finish in the XANT Utilities Welcome window to begin install...

Страница 93: ...or PDFs for your printer in the default printer directory for those applications or in another directory you choose d Select the destination directory for XANT Utilities and click Next e Select the p...

Страница 94: ...obe PostScript Level 2 and Adobe PostScript 3 AdobePS 4 3 Adobe PostScript Level 2 and Adobe PostScript 3 Some systems have problems using this new Adobe 4 3 If so revert to AdobePS 4 2 4 Review the c...

Страница 95: ...2 or 5 X and the Printer PPD For AdobePS 4 2 Skip to step 3 in Installing the AdobePS Printer Driver and Printer PPD For AdobePS 4 3 When the following screen appears continue to step 6 Fig 4 5 The S...

Страница 96: ...in this chapter to load XANT Utilities manually See PDFs Folder later in this chapter to load QuarkXPress PDF files manually Deleting Previous Driver Versions Normally you do not have to delete previo...

Страница 97: ...Adfonts mfm a Enter the name of the file to be deleted in the Name field Fig 4 7 b Select Include subfolders c Make sure C is selected under Look in d Click Find Now The file name should appear in the...

Страница 98: ...the Windows desktop Select Start Settings Printers Then locate your XANT printer highlight the printer name and press the Delete key to delete the printer from the list 8 Restart your computer and in...

Страница 99: ...me ADOBEPS port Delete this line PrinterPorts printer_name ADOBEPS port 15 45 Delete this line If the device line in the windows section of the Win ini file refers to AdobePS delete that line also Win...

Страница 100: ...tion d Double click the Setup exe icon in the CD ROM s Ps41 or Ps42 folder s appropriate language folder to begin installation e Go to step 2 AdobePS 4 3 or step 3 AdobePS 4 2 or 4 1 to continue insta...

Страница 101: ...tory on your PC Then click Next The Printer Type window appears Note If an Existing Files On Local Disk window appears click Next to install the files again or Skip to not reinstall the files 4 Select...

Страница 102: ...name in the Network Path window 6 Click Next to bring up the Install PostScript Printer from PPD window fig 4 10 With a networked printer for AdobePS 4 1 go to step 7 or for AdobePS 4 2 skip to step...

Страница 103: ...Note You can only select one PPD per installation To install a PPD in addition to the standard PPD click Add Another in step 14 9 Select the port through which your PC is connected to the printer fro...

Страница 104: ...is point d Click Next Note If you get an attempt to install an older version message with AdobePS 4 2 click Continue or with AdobePS 4 1 delete the older file 12 Click OK The Printer Properties window...

Страница 105: ...or to upgrade the existing PostScript printers to AdobePS version 4 3 in the Printer Installation Type window Then click Next Fig 4 13 Printer Installation Type Window 2 Select the type of printer co...

Страница 106: ...nter Name field Select Yes to use the new printer as the default printer Then select Yes to print a test page and click Next 6 Review the configuration information in the Setup Information window If y...

Страница 107: ...g under Change Setting Windows NT 4 X highlight the option in the top half of the Device Settings window then select the setting in the bottom half of the window Fig 4 15 Device Options Tab a Select I...

Страница 108: ...4 X use Installable Options InstalledMemory and then skip to step 8 4 Click the Graphics tab and set the printer s default resolution for the highest resolution available on your printer 5 Click the D...

Страница 109: ...timized for portability ADSC b Under PostScript header select Download header with each print job c Under PostScript timeout values make sure the setting are Job timeout 0 Wait timeout 240 7 Click the...

Страница 110: ...r s communication interface using the front panel 1 Select the SETUP I F menu 2 Select the menu for the printer interface connected to your computer RS232 PARALLEL LPR NETBEUI or NVL PSRV 3 Select the...

Страница 111: ...onal information PS_Files Folder This folder contains Adobe PostScript files to help setup and maintain your printer and a PDF file Overview pdf which describes these files These files can be download...

Страница 112: ...all information stored on the disk Novell34 ps prints instructions for setting up a XANT printer on a Novell network Parmdump ps prints a list of current settings for the communication devices config...

Страница 113: ...in this chapter for installation instructions File and Help menus are similar to other Windows applications and are not described in this section Note Your PC must be directly connected to the printe...

Страница 114: ...at is a diagnostic communication tool to be used only as directed by XANT Technical Support Chat only works through a serial connection between the PC and printer Get Info provides the current printer...

Страница 115: ...r Set Printer Name allows you to rename your printer on a network other than Novell Your printer s default name is the product name which can be confusing on networks where there may be more than one...

Страница 116: ...upgrade for example this file can be downloaded to your printer to restore your customized configuration Linearize This menu allows you to create and download custom curves to your printer These curv...

Страница 117: ...Delete All File Servers allows you to delete all Novell file servers from the list that your printer polls for print jobs Printing Allows you to enable and disable printing and file server login func...

Страница 118: ...ugh which you are connected to the printer for XANT Command Center Fig 4 20 Ports Menu Procedures This section covers procedures for using XANT Utilities Spooler If your printer has an optional hard d...

Страница 119: ...erface Control in chapter 6 for details 1 Select the Interface SETUP I F menu 2 Select the printer interface SERIAL PARALLEL ETALK LPR NETBEUI or NVL PSRV that you use to send files 3 Select the Spool...

Страница 120: ...NE to disable spooling then click OK The Spooler window reappears fig 4 19 4 Choose Configure I O Interfaces to Spool the Select I O Interfaces to Spool window appears fig 4 23 Fig 4 23 Select I O Int...

Страница 121: ...ig 4 24 Spooler Window and Job Queue Note The Job queue lists the ID status title spool device and file size of all jobs in the spooling queue Job status can be W waiting to be processed P currently p...

Страница 122: ...supplied with XANT Halftone Calibration Technology and you can create up to seven custom gamma curves You can select any custom or standard gamma curve on a job by job basis using the front panel Gam...

Страница 123: ...al output 3 Print a Calibration Page to measure the printer s current performance as a basis for the calibration To do this use the following procedure Note Always print the calibration page using the...

Страница 124: ...I option to match the lpi listed for the selected curve To select a different lpi setting use the LPI option and scroll to the desired setting Note If you select a custom lpi for a listed curve the lp...

Страница 125: ...ssed as a percentage of gray Like any other precision instrument the densitometer must be calibrated before each use Refer to its documentation for instructions on calibrating and using the densitomet...

Страница 126: ...ther click the black button on top of the XD 1 or click the measure button on the Densitometer Data Entry window fig 4 26 The measurement appears in the box to the right of the Measure button 3 Make s...

Страница 127: ...el to stop 6 Click Save fig 4 25 if you want to save the data file for future use Then specify a new file name and select a folder for saving the file Click Save Otherwise skip to step 7 7 Click Close...

Страница 128: ...ow appears fig 4 27 4 Click Linearize fig 4 27 The new curve replaces the existing curve on your printer The Linearization window reappears 5 Click Close the Linearization window closes Then select Fi...

Страница 129: ...Resetting Custom Curve Defaults You can reset one or all custom curves to the factory setting s To reset a custom gamma curve to the factory default which is a copy of the standard Gamma 0 curve 1 Hig...

Страница 130: ...to every media size so you do not have to make individual adjustments for each size 1 Make sure the printer is on and idle Then make sure that media the size of your final output is loaded in the pri...

Страница 131: ...Menu key until the amount which would most closely adjust the line to the desired length appears Then press the Enter key For example if Line B is 389 mm instead of 388 61 mm as it should be select 0...

Страница 132: ...PPD installed before you can use Command Center s X ACT You also will need a 1 2 millimeter ruler 1 Open XANT Command Center and select Controller More X ACT The More X ACT window appears fig 4 30 Fig...

Страница 133: ...s your media type If you also calibrate for 11 x 17 tabloid paper choose User defined 1 as your media type 4 Check Options to make sure the paper media source and print settings are correct If any of...

Страница 134: ...ld be close to the value shown in box H B Measure dashed line from top edge of paper to left arrow tip enter results in millimeters in box B A B C F A Measure dashed line from left edge of paper to to...

Страница 135: ...Repeat steps 5 through 8 until the measurements in the corresponding boxes are within 5 mm of each other Note Your application printer properties must match your calibration settings For example if yo...

Страница 136: ...dicate the change from the factory default in dots per inch When you make a change using the slide bar coordinates at the bottom of the screen display the change in the same units Note If current sett...

Страница 137: ...4 mm from the edge of the paper go back to step 4 and repeat the process 9 When the x and y lines are set correctly click Close Then select File Exit to close Command Center Managing Fonts on an Opti...

Страница 138: ...________________________ To remove specific fonts downloaded to a hard disk see the documentation for your font downloader program To remove all fonts downloaded to a hard disk reinitialize the disk b...

Страница 139: ...Print Server Emulation 5 15 Configure the Novell Print Server Interface 5 19 Install the Adobe PostScript Driver 5 21 Line Printer Configuration 5 21 Configure the Line Printer Interface 5 22 TCP IP A...

Страница 140: ...5 2 Ethernet Setupbb ______________________________________ Notes...

Страница 141: ...twork Note Typically only Macintosh computers are installed on an EtherTalk network If you have PCs operating in an EtherTalk network see the documentation that came with your PC EtherTalk interface T...

Страница 142: ...e On an EtherTalk network with more than one zone the network router assigns your printer a default zone Check with your System Administrator to determine the correct zone for your printer then if nec...

Страница 143: ...r on a Novell network Chapter 2 covers step 1 this section covers steps 2 through 4 and chapter 3 Macintosh or 4 PC covers step 5 1 Connect your XANT printer to the network through the Ethernet port 2...

Страница 144: ...t name The printer PostScript name ScreenWriter 3 becomes the default print server name SCREENWRITER_3_PS The Novell System Administrator may assign a print server name other than the default and may...

Страница 145: ...with supervisory privileges 3 Type PCONSOLE and press Enter 4 Set up the print server name using the following procedure To use a print server name other than the default see the previous section Not...

Страница 146: ...queue name that you entered in step 5 b and press Enter 2 Highlight Queue Servers and press Enter 3 Press Insert and highlight the print server name that you entered in step 4 c and press Enter b For...

Страница 147: ...ovell print server name the file server name of the Novell server and the Printer AppleTalk name if it is different See Selecting the Novell Names earlier in this chapter for details Also use Command...

Страница 148: ...organization where the printer will be installed fig 5 3 Then select Object Create fig 5 3 The New Object Window appears fig 5 4 Fig 5 4 New Object Window 4 Select Print Queue and then click OK fig 5...

Страница 149: ...5 6 Fig 5 6 Select Object Window 7 Highlight the print server volume in the left side of the Select Object window This will be the file server name_sys Then click OK the Create Print Queue window reap...

Страница 150: ...5 7 Create Printer Window 11 Enter the printer name as it appears on the printer s start up page for example ScreenWriter 3 Note In a Macintosh environment the printer can be renamed using XANT Comma...

Страница 151: ...name in the left of the Select Object window Then click OK The Network Administrator window reappears fig 5 3 15 Highlight the main organization where the printer will be installed Then select Object...

Страница 152: ...ears fig 5 11 Fig 5 11 Print Server Window 18 Click Assignments and then click Add The Select Object window reappears fig 5 9 19 Highlight your printer s name in the left side of the window Then click...

Страница 153: ...the Novell System Administrator assigns the printer a list of file servers to poll and gives it the login name and password if required to access each server This section describes configuring the pr...

Страница 154: ...with the print server name set up on the file server Note If you used the printer s default Novell print server name see Selecting the Novell Names earlier in this chapter this step is not required a...

Страница 155: ...6 Repeat steps 2 through 5 to add up to four file servers 7 Print a start up page by taking the printer off line pressing the front panel Test button and then putting the printer back on line Check t...

Страница 156: ...Ware 3 X and 4 X see step 4 c change the print server name to agree with the print server name set up on the file server Note If you used the printer s default Novell print server name see Selecting t...

Страница 157: ...eat steps 2 through 5 to add up to four file servers 7 Print a start up page by taking the printer off line pressing the front panel Test button and then putting the printer back on line Check the pag...

Страница 158: ...us See chapter 3 Macintosh or 4 PC to install and configure Command Center on your host computer Using XANT Command Center PC 1 Open XANT Command Center by double clicking its icon 2 Choose Controller...

Страница 159: ...versions prior to 3 12 Click OK to return to Command Center s main menu 6 Choose File Quit Command Center closes Install the Adobe PostScript Driver The Adobe PostScript printer driver must be install...

Страница 160: ...XANT Command Center Macintosh to enable your printer s Line Printer interface if necessary See chapter 6 to use front panel menus See Setting the TCP IP Address later in this section to use Command C...

Страница 161: ...the network The remaining 24 bits are used as host IDs The class A address begins with the numbers 1 through 126 The class B address is used for networks with more than 256 28 but less than 65 536 21...

Страница 162: ...as they identify the host within the given network See your System Supervisor for the correct address to use Network Masks The server uses a network mask to identify all workstations on the same netw...

Страница 163: ...ox Check with your System Supervisor for details about your network s subnet addresses Set the TCP IP Address Your printer s default TCP IP address should be changed to agree with the your network s T...

Страница 164: ...he appropriate option button 5 Change the printer s default TCP IP address to the address assigned by your System Supervisor using the scroll bars under each octet 6 Click OK The main menu reappears 7...

Страница 165: ...Macintosh LPR Communications Control Window b Click the option buttons to enable ON or disable OFF the Line Printer interface on your printer c Click Ok The main menu reappears 6 Choose File Quit Comm...

Страница 166: ...following procedure to configure your printer for Windows NT 4 X network printing 1 Make sure that the TCP IP address has been setup on your printer for your network and that you can PING this address...

Страница 167: ...Window 5 Enter the printer s TCP IP address in the field requesting the name or address of the print server Then enter the printer name in the field below Click Close 6 Select the General tab then cli...

Страница 168: ...lk Printing Devices will appear as an option for this procedure You may need the Microsoft NT CD to load this service 4 Click on the desired zone name A window appears listing printers in that zone 5...

Страница 169: ...NT printer and NetBEUI you need to keep the following constraints in mind NetBEUI allows only one PC to send a print job at a time There is a time limit for each NetBEUI job to be processed by the pri...

Страница 170: ...smit the data to the printer The printer becomes a host PC on the network Host Setup To set up your PC in a NetBEUI environment 1 Go to your desktop and click Start 2 Select Settings and click Control...

Страница 171: ...o the left of Entire Network A domain called XANT Printer should appear if a XANT printer with NetBEUI interface is on the network 4 Click to the left of XANT printers to see a list of printers 5 Sele...

Страница 172: ...5 34 Ethernet Setupbb ______________________________________ Your XANT printer is set as the default printer Note Make sure NetBEUI is enabled on the printer s front panel in the SETUP IF NETBEUI menu...

Страница 173: ...9 Selecting PPD Options Windows NT 4 0 6 11 PPD Menus 6 12 Configuring Printer Features 6 13 Accurate Calibration Technology X ACT 6 13 Accurate Screens 6 14 Clean Transfer Roller Cleaning 6 14 Dot Ga...

Страница 174: ...____________________________________ Notes RAM Disk 6 26 Resolution Options 6 26 Smooth Shading 6 26 Soft Error 6 27 Spooler 6 27 Start up Page 6 28 Toner Cartridge Control 6 29 Toner Page 6 30 Tray S...

Страница 175: ...ings for a specific job or for all jobs sent to the printer from your host Front Panel The printer s front panel provides printer status information and allows you to configure some printer features f...

Страница 176: ...panel control keys allow you to configure some printer features and to access the configuration menus ONLINE Online key is used to take the printer on and off line The window reads READY IDLE when th...

Страница 177: ...printer off line and press the Test key Then press the Online key MENU Menu key allows you to enter the menu structure when READY IDLE or OFFLINE appears in the window and to scroll forward through m...

Страница 178: ...DPI appears 5 Press the Enter key to enter the DPI menu 6 Press the Menu key until dpi 1200 1200 appears 7 Press the Enter key to select 1200 dpi as the default The selection changes to all capital l...

Страница 179: ...on menu groups are the Miscellaneous MISC menus and the Interface I F menus fig 6 2 Use Miscellaneous menus to set printer feature defaults Use Interface menus to set printer RS232 parallel LocalTalk...

Страница 180: ...nter s PPD must be installed and configured properly See chapter 3 Macintosh or 4 PC for details In most applications printer specific options in the PPD are accessed through the Device Options tab in...

Страница 181: ...wn menu to select its setting Repeat to configure other printer options 6 Click Save Settings to save the Print dialog box settings as the defaults for all jobs sent to the selected printer 7 Click Pr...

Страница 182: ...box appears Fig 6 5 Windows 95 and 98 Print Dialog Box 3 Make sure your printer is selected in the Name box fig 6 5 then click Properties 4 Click the Graphics tab to set the Resolution option 5 Click...

Страница 183: ...setting scroll through the Installable options until you see VMOption Highlight it then select the amount of memory on the printer see the memory size listed on the printer s start up page Click Apply...

Страница 184: ...e feature in the top box then select the setting from the options in the bottom box fig 6 8 6 Click OK The Print dialog box reappears Then click OK to send the file to the printer PPD Menus PPD settin...

Страница 185: ...Temperature Mirror Print Tray Switch Enhanced Screens PC Menu only Note Some applications require additional configuration to access certain features See your application documentation and the append...

Страница 186: ...this feature is enabled there may be an increase in processing time because of additional demand on printer resources Set Accurate Screens from your application Print dialog box False the factory def...

Страница 187: ...ative image without changing the image in the application The graphs in figure 6 9 show the changes to the midrange gray levels for Gamma curves 0 through 6 You may want to create and download up to s...

Страница 188: ...hite Input Levels Gamma 2 Black White 1 1 0 Output Levels Black White Input Levels Gamma 1 Black White 1 1 0 Output Levels Gamma 0 Black White Input Levels Black White Fig 6 9 Gamma Corrections 0 thro...

Страница 189: ...nloaded to an optional hard disk on the printer and RAM disk is enabled for 1 MB or more Set Font Accelerator from the MISC FONT ACCEL configuration menu Options indicate the percentage of RAM disk th...

Страница 190: ...allel port allow you to send files from Macintosh and PC computers concurrently The optional Ethernet port supports EtherTalk Novell Print Server NetBEUI and TCP IP LPR See chapter 5 about configuring...

Страница 191: ...D printer mode PS STD is the factory default for all interfaces except parallel which is set to PS TBCP Spool Menus Use Spool menus to enable YES or disable NO the spooling feature on each interface S...

Страница 192: ...int Server interface set the printer for the NetWare protocol frame type used on your network You can also specify a printer timeout on the network The Protocol Menu allows you to select 802 3 which i...

Страница 193: ...the last page processed after a paper jam is cleared Set Jam Recover from the MISC JAM RECOVER configuration menu Options are Yes to enable and No the factory default to disable this feature Note If...

Страница 194: ...settings apply to Film Hvypaper heavy paper Hvyfilm heavy film and five user defined types of media The MEDIA CONFIG menu allows you to select media types and choose submenus to configure that media...

Страница 195: ...l the factory default when printing to Myriad film paper envelopes labels and transparencies Select Warm for heavy paper and heavy film Media Weight Media Weight allows you to designate the type of me...

Страница 196: ...es it Fig 6 11 Mirror Image Multipurpose Feeder Media Sizes Set the media size used in the multipurpose feeder from the MISC MAN FEED Manual Feed configuration menu The factory default media size is L...

Страница 197: ...C POWER SAVE configuration menu Off the factory default disables this feature On enables it Printer Timeout The Timeout feature allows you to select the number of seconds the printer waits for additio...

Страница 198: ...nter Memory Requirements in chapter 9 about the RAM required to print at higher resolutions Set available resolutions using either the MISC DPI configuration menu or the Print dialog box s Resolution...

Страница 199: ...printer has an optional hard drive you can use the spooler to place up to 250 print jobs into a queue on that drive The spooler reduces return to application time for a print job by freeing the commun...

Страница 200: ...e feature prints a page listing the selected resolution installed RAM hard disk identities page count enabled interfaces and network information if the Ethernet upgrade is installed each time the prin...

Страница 201: ...ter See Toner Cartridge in chapter 2 Adjusting Print Density You can increase or decrease the amount of toner laid down by the printer using the print density dial Note The amount of toner used increa...

Страница 202: ...place a toner cartridge The setting for the previous cartridge may be too high or low for the new cartridge Toner Page The Toner Page feature automatically prints a toner reorder form when the cartrid...

Страница 203: ...allow you to choose a specific tray or use the printer s default to print all pages of a job The First page from and Remaining from options allow you to specify one tray for the first page and a diffe...

Страница 204: ...ssettes and the multipurpose feeder Off the factory default disables chaining The Tray Switch menu in the Print dialog box of Windows 95 and 98 as well as some Macintosh applications allows you to ove...

Страница 205: ...ns 7 1 Chapter7 MediaOptions Chapter Overview Introduction 7 3 Media Specifications 7 3 Guidelines for Selecting and Storing Media 7 3 Media Sizes 7 4 Media Types 7 6 Media Handling 7 6 Media Path 7 7...

Страница 206: ...7 2 Media Optionsbb ______________________________________ Notes...

Страница 207: ...ia that can withstand a temperature of 302 F 150 C Preprinted inks such as letterheads that cannot withstand these temperatures can damage the printer s fusing rollers permanently meets weight and med...

Страница 208: ...6 F 10 to 30 C and a stable relative humidity from 30 to 65 in a dark area do not expose it to direct sunlight Media Sizes Your printer allows you to use media from 3 94 x 5 83 100 mm x 148 mm up to 1...

Страница 209: ...28 mm Executive 7 25 x 10 50 7 16 x 10 35 185 mm x 266 mm 182 mm x 263 mm Universal 13 00 x 18 50 12 69 x 18 42 13 x 18 5 330 mm x 469 mm 322 mm x 468 mm 13 x 35 5 13 00 x 35 50 12 69 x 35 23 330 mm x...

Страница 210: ...nting at a lower resolution or using only printer resident fonts Media Types Your printer supports paper envelope label transparency and film media with weights from 16 36 lb bond 60 135 g m2 See Medi...

Страница 211: ...artridge Drum Multipurpose Feeder Standard Tray Optional Trays Paper path when Trays 2 and 3 are installed 2 3 Fig 7 1 Printer Media Path 1 Media is pulled from the multipurpose feeder or a paper cass...

Страница 212: ...your printer to increase input capacity to approximately 1 650 sheets Chapter 10 covers feeder installation and chapter 2 covers loading paper cassettes Paper Cassettes The universal cassette included...

Страница 213: ...encies labels or sheets of Myriad film Loading Media Select the cassette or multipurpose feeder as the media source using your application s Print dialog box or the printer s front panel Tray Select k...

Страница 214: ...mm Fig 7 2 Media Orientation Tray Chaining Tray chaining directs the printer to automatically switch to another source for media when the current source is empty You can chain to all paper cassettes a...

Страница 215: ...aper using the following guidelines Note For best results when printing on the second side feed sheets individually or slip feed feed a blank sheet between each printed sheet to prevent toner from sti...

Страница 216: ...7 12 Media Optionsbb ______________________________________...

Страница 217: ...___ Printing with Various Media Types 8 1 Chapter 8 Printing with Various Media Types Chapter Overview Introduction 8 3 Printing Computer to Film 8 3 Printing Envelopes 8 5 Printing Labels 8 5 Printin...

Страница 218: ...8 2 Printing with Various Media Typesbb______________________ Notes...

Страница 219: ...3 when processed through FilmStar 2 Always use the multipurpose feeder following the procedure in chapter 2 the media specifications in chapter 7 and these guidelines when printing film Use only XANT...

Страница 220: ...540 7091 US and Canada Myriad Film Myriad Film Part Number Size 200 100001 8 50 x 11 00 215 mm x 279 mm 200 100002 8 26 x 11 69 210 mm x 297 mm 200 100003 11 00 x 17 00 279 mm x 431 mm 200 100004 11...

Страница 221: ...velopes in your application and run a plain paper test print to check flap alignment before running on more expensive envelope stock Use the Cool fuser temperature setting when printing envelopes Prin...

Страница 222: ...y to prevent fingerprints and scratches Keep the paper path clean see chapter 9 dust or dirt can scratch transparencies and reduce the print quality Load fewer transparencies if jams occur The weight...

Страница 223: ...hapter Overview Introduction 9 3 Maintenance 9 3 Handling the Printer 9 3 Storing the Printer 9 4 Moving the Printer 9 4 Cleaning the Printer 9 5 Technical Specifications 9 10 Printer Memory Requireme...

Страница 224: ...9 2 Maintenance and Specificationsbb ________________________ Notes...

Страница 225: ...r Warning The printer weighs approximately 58 5 lbs 26 5 kg without the toner cassettes and media installed Always have two people lift the printer Only lift the printer using the recessed grip areas...

Страница 226: ...e power source 2 Remove all media from the multipurpose feeder Close the multipurpose feeder and if necessary the top cover See chapter 2 for instructions 3 Store the printer and media properly a Stor...

Страница 227: ...from light If you no longer have this bag place the cartridge in a dark bag or wrap it in a dark cloth b Make sure the cartridge stays level during the move Rock it gently to redistribute toner before...

Страница 228: ...orange tab Pull the right side of the fuser toward you while sliding the entire unit to the right Then lift the assembly out of the printer using the orange tabs 5 After removing the fuser assembly p...

Страница 229: ...ghten the two screws 10 Close the fuser cover assembly Transfer Roller Cleaning 1 Turn off and unplug the printer 2 Remove the toner cartridge 3 Remove the roller assembly by turning up the roller s p...

Страница 230: ...pressed Toner and Manual Feed Area Cleaning Clean the toner and manual feed area after removing a media jam or replacing the toner cartridge 1 Turn off the printer and disconnect it from the power so...

Страница 231: ...n cracking and deformation of the case do not use alcohol ammonia based cleaners or other volatile cleaners on or around the printer Never spray or pour solutions directly on the printer Always put th...

Страница 232: ...Maximum 580 W Running Maximum 5 W Pause Mode 50 60 Hz 47 63 Hz 3 2 Amps Noise Level Printing less than 49 5 dB Standby less than 35 dB Dimensions W 22 82 580 mm D 23 68 602 mm with cassette H 16 24 41...

Страница 233: ...e Control Positive Film Technology Density Mirror Print Spooling Font Accelerator Internal IDE Hard Disk optional Toner cartridge 14 000 sheets letter 5 coverage Requires optional IDE hard disk Printe...

Страница 234: ...ce engineers perform service on your printer In addition to the one year limited warranty XANT offers a cross ship exchange program and an on site service plan for users in the United States and Canad...

Страница 235: ...ed to your site by the end of the next business day to begin servicing your printer For details of these plans or to request service under one of these plans call XANT Customer Support at 800 926 8839...

Страница 236: ...ecific legal rights and you may also have other rights which vary from state to state ALL IMPLIED WARRANTIES INCLUDING IMPLIED WARRANTIES OF MERCHANTABILITY AND FITNESS FOR A PARTICULAR PURPOSE ARE LI...

Страница 237: ...eder 10 3 Installing the Paper Cassette Feeder 10 4 Removing the Paper Cassette Feeder 10 7 Controller Board Upgrades 10 7 Removing the Controller Board Panel 10 8 Installing SIMM and Firmware Upgrade...

Страница 238: ...10 2 Optionsbb __________________________________________ Notes...

Страница 239: ...de Factory or User Internal IDE hard disk Factory or User Paper Feeder User only RAM upgrades Factory or User All factory installable options ordered with your printer are installed before the printer...

Страница 240: ...der from the shipping carton Remove all plastic tape and stabilizing material Save the carton and packing material to use for storing the feeder The package should contain the following items Feeder u...

Страница 241: ...ter weighs approximately 58 5 lbs 26 5 kg without the toner cassettes and media installed Always have two people lift the printer Only lift the printer using the recessed grip areas on the right and l...

Страница 242: ...oles on the bottom of the printer fig 10 3 Tighten the screws to secure the feeder to the printer Fig 10 3 Secure the Printer to the Feeder 9 Unpack the cassette load it with paper and install the fir...

Страница 243: ...kg without the toner cassettes and media installed Always have two people lift the printer Only lift the printer using the recessed grip areas on the right and left sides 5 Lift the printer off of th...

Страница 244: ...rd disk and Ethernet board Use approved anti static procedures when working with the controller board and upgrades Removing the Controller Board Panel 1 Make sure the printer displays a READY IDLE mes...

Страница 245: ...ptions 10 9 4 Slide the panel toward the printer s back until it stops Pull the panel down and out to remove it from the printer fig 10 6 Fig 10 6 Remove the Panel Figure 10 7 illustrates upgrade inst...

Страница 246: ...nd 64 MB SODIMMs the pair of 64 MB SODIMMs must be installed in the DRAM banks labeled 0 0 0 and 0 1 The following list shows valid DRAM SODIMM installations for your printer Bank 0 0 16 MB 16 MB 16 M...

Страница 247: ...anizations Density Org Config RAS CAS Quantity Addressing 16 MB 4M x 32 4M x 4 bit 11 11 8 64 MB 16M x 32 4M x 4 bit 12 12 8 Resolution Upgrade The 1200 dpi upgrade consists of a Flash SIMM a FIFO SIM...

Страница 248: ...e existing SIMM s or SODIMM s if necessary using the following procedure fig 10 8 Note Remove the DRAM SIMM closest to the front of the printer first To remove or install a SIMM in the DRAM banks labe...

Страница 249: ...___________________________________________ Options 10 13 Fig 10 9 Open the Latches and Remove the SIMM Fig 10 10 Remove the SODIMM...

Страница 250: ...orner to the left of its bank 3 SODIMM hold the SODIMM straight above its bank with the notched corner toward the center of the DRAM bank b Push the SIMM or SODIMM into its bank using the following ap...

Страница 251: ...ovell Print Server NetBEUI and Line Printer protocols on your printer After installing the Ethernet upgrade see chapter 6 for information about configuring and using the Ethernet options Required Tool...

Страница 252: ...u may have to squeeze the parallel connector locks together as you pull the bracket off 4 Replace the blank Ethernet access panel with the Ethernet interface panel fig 10 10 using a Phillips screwdriv...

Страница 253: ...ng procedure fig 10 12 a Carefully slide the interface bracket on the printer You may have to squeeze the parallel connector locks together as you put the bracket on b Replace the hex nuts on each sid...

Страница 254: ...vides extra space to store downloaded fonts and allows you to implement the Font Accelerator and spooling features on your printer See Printer Options earlier in this chapter to order the upgrade See...

Страница 255: ...Chapter Overview Introduction 11 3 Status Messages 11 3 Power and Setup Issues 11 6 Print Quality Issues 11 10 Mechanical Issues 11 16 Media Jams 11 17 Preventing Jams 11 17 Locating Jams 11 18 Clear...

Страница 256: ...11 2 Troubleshootingbb____________________________________ Notes...

Страница 257: ...or media jam EARLY PAPER JAM A media jam has occurred along the paper path caused by media reaching a position earlier than expected E FIFO The FIFO SIMM or SODIMM is not present is not properly inser...

Страница 258: ...printer is warming up and performing setup routines LATE PAPER JAM A media jam has occurred caused by the media not reaching the exit roller at the correct time LOW PAPER The media stack is low in the...

Страница 259: ...is on line and ready to accept a print job READY PRINTING The printer is completing a print job and ready to accept a new job to begin processing RESET 1 The printer has reset to factory default setti...

Страница 260: ...ts Make sure the start up page feature is enabled See Start up Page in chapter 6 Check the front panel for a status message See Status Messages in this chapter Make sure the toner cartridge is install...

Страница 261: ...See Interface Control in chapter 6 Make sure you install screen fonts to match the printer fonts you use See XANT Utilities CD ROM in chapter 3 My printer does not respond properly to my PC using a p...

Страница 262: ...sure communication settings in your application printer and PC match See Interface Control in chapter 6 Make sure the previous job has been cleared from the printer by sending an end of job marker usi...

Страница 263: ...ce Make sure that you are using a crossover or UTP test cable if your are using twisted pair cable to direct connect a printer and a Ethernet configured host without a hub Do not use a transceiver tha...

Страница 264: ...es This section provides tips for resolving output quality problems Solid black print on the image or text is washed out Media may be damp or otherwise damaged Make sure it meets the requirements in M...

Страница 265: ...ted media The toner cartridge may need replacing See Toner Cartridge in chapter 2 Repetitive defects appear on the printed media The paper path may be dirty Print several blank sheets to clean the pat...

Страница 266: ...cessary replace the media See Paper Cassette and Multipurpose Feeder in chapter 2 The fuser may not be working properly The printer displays the E FUSER status message if there is a hardware problem w...

Страница 267: ...Media Specifications in chapter 7 If necessary replace the media See Paper Cassette and Multipurpose Feeder in chapter 2 The sealing tape may not be pulled completely out of the toner cartridge Remov...

Страница 268: ...der in chapter 2 The toner cartridge may need replacing See Toner Cartridge in chapter 2 Vertical blanks appear on my image or text The toner cartridge may not be installed properly Reinstall it See T...

Страница 269: ...nter in chapter 9 Use the cassette cover to prevent dust and debris from settling on the media and in the printer Media may be damp or otherwise damaged Make sure it meets the requirements in Media Sp...

Страница 270: ...screen produces more levels of gray which results in a more accurate image representation Only a portion of my document printed Make sure the document size in your application s page setup section mat...

Страница 271: ...d during printing Turn off the printer and wait a few seconds Turn on the printer and wait for the READY IDLE message then try to remove the cassette Media Jams This section contains suggestions for s...

Страница 272: ...e output tray does not become overfilled Remove all media from the multipurpose feeder before turning on the printer Reinsert the media when the printer displays the READY IDLE message Use XANT suppli...

Страница 273: ...s on removing the jam 1 Check for media jams in the paper cassette or multipurpose feeder from which the media was fed 2 Check for media jams in the paper exit area under the fuser cover 3 Check for m...

Страница 274: ...ig 11 2 Note If media is in the output tray remove it before lifting the top cover Fig 11 2 Release the Top Cover Latch 2 Lift the top cover The multipurpose feeder opens automatically as you open the...

Страница 275: ...___________________________ Troubleshooting 11 21 Fig 11 3 Open the Top Cover and Multipurpose Feeder 3 Remove all media from the multipurpose feeder fig 11 4 Fig 11 4 Remove Media from the Multipurpo...

Страница 276: ..._______ 4 Remove any jammed media from the multipurpose feeder fig 11 5 Fig 11 5 Remove the Jam from the Multipurpose Feeder 5 Remove the cassette from the printer a Pull the cassette straight out unt...

Страница 277: ...___ Troubleshooting 11 23 b Lift up slightly then pull the cassette from the printer fig 11 7 Fig 11 7 Lift up and Pull out the Cassette 6 Remove any crumpled media from the cassette fig 11 8 Fig 11 8...

Страница 278: ...e Jam from the Paper Feeder Clearing a Back of Paper Feeder Jam 1 Open the feeder s back cover by grasping the notch on the top side of the cover and pulling down fig 11 10 Caution The cover may be he...

Страница 279: ...____ Troubleshooting 11 25 2 Remove any jammed media in the back of the paper feeder fig 11 11 Fig 11 11 Remove the Jam from the Back of the Paper Feeder 3 Close the paper feeder s back cover fig 11 1...

Страница 280: ...ACHE PRECAUTION SURFACE CHAUDE AVVERTENZA SUPERFICIE CALDA CUIDADO SUPERFICIE CALIENTE No toque el rodillo interior Non toccare it rullo interno Ne pas toucher le rouleau interne Beruhren Sie nicht di...

Страница 281: ...e flat on a level surface To prevent stains protect the surface with old newspapers or cloth Follow all procedures in Handling the Toner Cartridge in chapter 2 2 Remove any jammed media from the back...

Страница 282: ...for at least 40 minutes Note When the printer is turned off all print job information still in memory is lost the Jam Recover feature cannot print the last page processed CAUTION HIGH TEMPERATURE VORS...

Страница 283: ...ooting 11 29 2 Open the fuser drum cover using the colored tabs on each side of the cover fig 11 18 Fig 11 18 Use the Tabs to Open the Fuser Drum Cover 3 Remove any jammed media from the fuser area fi...

Страница 284: ...the fuser drum cover using the colored tabs on each side of the cover fig 11 20 Fig 11 20 Close the Fuser Drum Cover 5 Close the fuser cover fig 11 21 Note Make sure the fuser cover is closed properl...

Страница 285: ...uide channels Slide the cartridge into the printer until it stops making sure it seats properly fig 11 22 See Toner Cartridge in chapter 2 Fig 11 22 Reinstall the Toner Cartridge 2 Reload the paper ca...

Страница 286: ...e media fits completely inside the tray See Multipurpose Feeder in chapter 2 Note If the printer was turned off to clear the jam turn on the printer before loading the multipurpose feeder 5 Verify tha...

Страница 287: ...cal Support To assist our technicians in serving you more effectively please have the following information available when calling for Technical Support Troubleshooting Information A start up page fro...

Страница 288: ...our name your company name and the troubleshooting information listed earlier in this section Indicate whether you wish the response to be faxed or emailed and include the appropriate number or addres...

Отзывы: