


26
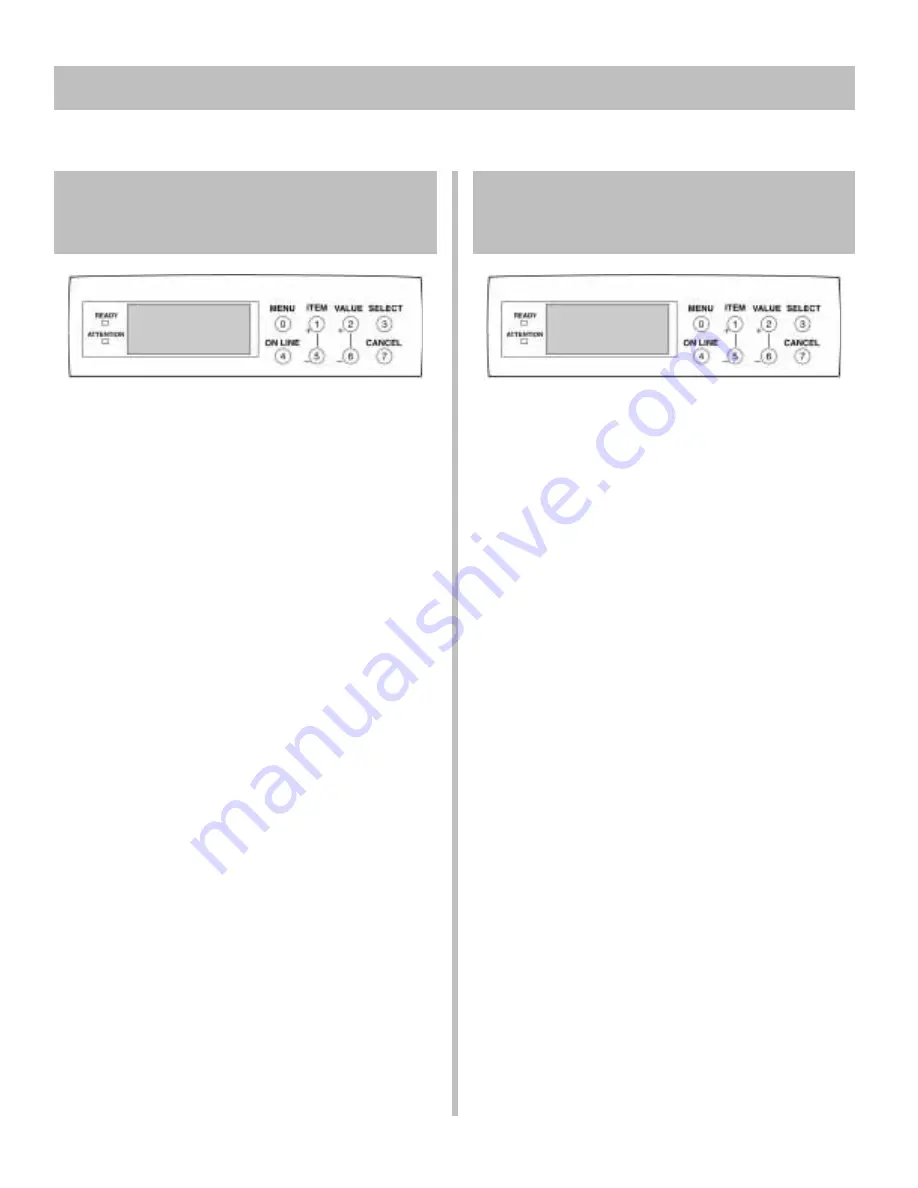
Changing Media Settings for
Tray1 in the Printer Menu
Transparencies Only:
Set Media Type
Press MENU repeatedly until
MEDIA MENU
appears
on the display.
Press ITEM repeatedly until
TRAY1 MEDIATYPE
appears on the display.
Press VALUE (+ or -) repeatedly until
TRANSPARENCY
appears on the second line of the
display.
Press SELECT to engage the new setting.
An Asterisk (*) appears next to the new setting.
Press ON LINE to save the setting and exit the menu.
Other Special Media:
Set Media Weight
(Not used for Transparencies)
Press MENU repeatedly until
MEDIA MENU
appears
on the display.
Press ITEM repeatedly until
TRAY1 MEDIAWEIGHT
appears on the display.
Press VALUE (+ or -) repeatedly until the desired
setting appears on the second line of the display.
Press SELECT to engage the new setting.
An Asterisk (*) appears next to the new setting.
Press ON LINE to save the setting and exit the menu.
18
Check the Media Settings (cont.)
Changing Media Settings for
MP Tray in the Printer Menu
First, Set Media Size
Press MENU repeatedly until
MEDIA MENU
appears
on the display.
Press ITEM repeatedly until
MP TRAY PAPERSIZE
appears on the display.
Press VALUE (+ or -) repeatedly until the desired
setting appears on the second line of the display.
Press SELECT to engage the new setting.
An Asterisk (*) appears next to the new setting.
Next, Set Media Type or Weight:
Transparencies Only: Set Media Type
Press ITEM repeatedly until
MP TRAY
MEDIATYPE
appears on the display.
Press VALUE (+ or -) repeatedly until
TRANSPARENCY
appears on the second line of
the display.
Press SELECT to engage the new setting.
An Asterisk (*) appears next to the new setting.
Other Special Media: Set Media Weight
(Not used for Transparencies)
Press ITEM repeatedly until
MP TRAY
MEDIAWEIGHT
appears on the display.
Press VALUE (+ or -) repeatedly until the desired
setting appears on the second line of the display.
Press SELECT to engage the new setting.
An Asterisk (*) appears next to the new setting.
Finish by Saving the Settings
Press ON LINE to save the setting and exit the menu.


