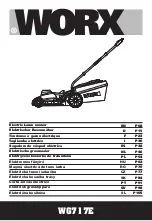
Cordless Lawn Mower
EN
12
OPERATION
1. ELECTRICAL SUPPLY CABLE STRAIN
RELIEF (See Fig. D)
For strain relief of the cable, form a loop at the
end of the extension cable. Hitch the extension
cable around the power cord hook (a). Pull the
cable back to secure.
2. STARTING AND STOPPING (See Fig. E)
STARTING
Connect the plug to the mains and switch ON.
The switch box is provided with a lock-
off button to prevent accidental starting.
With one hand press and hold the Safety
Button (5), with the other hand squeeze the
Switch Lever (1) towards the handle, and
release the Safety Button. The machine is now
started; wait until the product is at full speed
before cutting the grass. Then use both your
hands to hold the Switch Lever to keep it
running.
STOPPING
Release the switch lever.
3. HOW TO MOW
For cutting convenience, it may be best to start
mowing at a point close to the power supply
and to work your way away from the supply.
Mow the lawn at a right angle from the power
supply and place the power cable to side
which has already been cut.
When this occurs, remove the plug from
the power supply.
Release the switch lever,
Clear any obstruction, then restart it.
If the mower cuts out again increase the
height of cut to reduce the load on the
motor.
WARNING!
When mowing do not
allow the motor to labor particularly in
heavy conditions. When the motor labors the
speed of the motor drops and you will hear a
change in the motor sound, when this occurs,
stop mowing, release the switch lever and
raise the height of cut. Failure to do so could
damage the machine.
4. GRASS BAG FILLING INDICATOR(3) (See
Fig. F)
To remind you immediately to empty when
the Grass Collection Bag is full, the mower
provides an indicator on the top of bag to
show the collection status. And you can follow
as below:
Empty status: Flap float (a)
Fully status: Flap fall down (b)
5. REAR DISCHARGE (See Fig. G)
The mower provides a rear discharge function,
so that you can mower without bag collection.
The debris will be discharged from the rear
chute.
6. ADJUSTING THE CUTTING HEIGHT (See
Fig. H)
WARNING:
Realease the swith lever,
unplug tool, and wait for blade to come
to a complete stop .The blades continue to
rotate after the machine is switched off, a
rotating blade can cause injury.
Caution: Do not touch rotating blades.
The lawn mower can be set to 6 cutting
heights between 20mm and 70mm. For this
purpose, pull the cutting height adjustment
lever outwards then adjust to the preferred
position
MAINTENANCE
WARNING: Stop the mower and
unplug the tool before performing
any maintenance.
NOTE:
To ensure long and reliable service,
perform the following maintenance
procedures regularly. Check for obvious
defects such as a loose, dislodged or a
damaged blade, loose fittings and hardware,
and worn or damaged components. Check
that the covers and guards are all undamaged
and are correctly attached to mower. Carry
out any necessary maintenance or repairs
before operating mower. If the mower should
happen to fail despite regular maintenance,
please call our customer helpline for advice.
Содержание WG717E
Страница 3: ...1 2 3 4 5 6 7 8 9 10 11 ...
Страница 4: ...7 A1 6 8 7 A4 7 7 B1 Front Part Back Part A2 A3 A5 a A5 ...
Страница 5: ...1 2 3 7 B2 7 B3 7 B4 7 C1 1 2 7 C2 a 7 C3 9 ...
Страница 6: ...1 2 a 7 D 7 E 7 F a b 7 G H ...
Страница 7: ...13 12 I2 J I1 ...

