15
Electric lawn mower EN
MAINTENANCE
WARNING: Stop the mower and
unplug the tool before performing
any maintenance.
NOTE:
To ensure long and reliable service,
perform the following maintenance
procedures regularly. Check for obvious
defects such as a loose, dislodged or a
damaged blade, loose fittings and hardware,
and worn or damaged components. Check
that the covers and guards are all undamaged
and are correctly attached to mower. Carry
out any necessary maintenance or repairs
before operating mower. If the mower should
happen to fail despite regular maintenance,
please call our customer helpline for advice.
BLADE MAINTENANCE (See K1, K2)
WARNING:
Never carry out any
assembly operations or adjustments
with the power connected to the mower.
Always ensure that the power button is in
the off position and that the power plug is
disconnected from the supply.
Always handle the blade with care-sharp
edges could cause injury use gloves.
Follow these procedures to remove and
replace the blade. You will need garden
gloves (not provided) and a spanner wrench
to remove the blade. Hold the blade (14) and
unscrew the blade bolt (13) anticlockwise
using a spanner wrench. Remove blade and
attach a new one to the blade bolt.
Ensure that the blade is properly positioned as
seen in Fig.K1, then firmly tighten the bolt.
Do not over tighten.
Renew your metal blade after 50hrs mowing
or 2 years, which ever is the sooner-regardless
of condition.
If the blade is cracked or damaged
replace it with a new one.
STORAGE: (See L )
Stop the mower and unplug the tool.
Clean the exterior of the machine thoroughly
using a soft brush and cloth. Do not use water,
solvents or polishes. Remove all grass and
debris, especially from the ventilation slots.
Turn the machine on its side and clean the
blade area. If grass cuttings are compacted
in the blade area, remove with a wooden or
plastic implement.
Store the machine in a dry place. Do not place
other objects on top of the machine.
To aid storage, release the handle cam lever,
and rotate or fold the upper handle.
You could carry the mover by carry handle
(10).
Ensure cables are not stuck or entangled when
folding or unfolding upper handles. do not
drop the handles.
Содержание WG708E
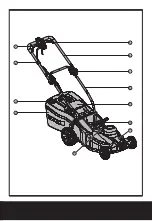
Страница 3: ...1 2 3 4 5 6 7 8 9 10 11 15...
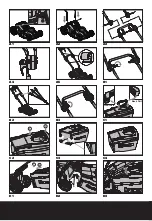
Страница 4: ...7 Front Part Back Part 1 2 3 1 2 a A1 A2 A3 A4 A5 B1 B2 B3 C1 C2 C3 C4 D1 D2 D3...
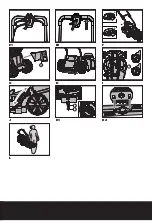
Страница 5: ...14 13 15 a b 12 E1 E2 F G H I J K1 K2 L...
Страница 155: ...155 GR 1 2 3 4 5 6 7 8 9 10 11 12 G 13 K1 14 K1 15 I...
Страница 157: ...157 GR 100 C 1 1 1 2 2...
Страница 158: ...158 GR a b c d a...
Страница 159: ...159 GR b c d a b c d e V f g h i j k l...
Страница 160: ...160 GR m n o p a b c d e f g...
Страница 161: ...161 GR RCD 30mA...
Страница 163: ...163 GR 1 E1 E2 5 1 2 3 F 4 G 1 2 3 4 5 G 1 2 3 4 6 H...
Страница 164: ...164 GR 7 I 1 20mm 2 8 J 6 20mm 70mm 9 1 2 38 mm 3 4 5...
Страница 165: ...165 GR K1 K2 14 13 K1 50 2 L 10...
Страница 166: ...166 GR...
Страница 168: ...168 RU 1 2 3 4 5 6 7 8 9 10 11 12 G 13 K1 14 K1 15 I...
Страница 169: ...169 RU WG708E 705 719 220 240 50 1600 40 20 70 6 50 II 14 5 LPA 82 4 KPA 3 LWA 72 8 KPA 3 LwA 96 3 16 2 3 32 2 K 1 5 2...
Страница 170: ...170 RU 100 C 1 1 1 2 2...
Страница 171: ...171 RU a b c...
Страница 172: ...172 RU d a b c d a b c d e f g h i...
Страница 173: ...173 RU j k l m n o p P a b c d...
Страница 174: ...174 RU e f g 30...
Страница 176: ...176 RU 9 1 E1 E2 5 1 2 3 F a b 4 G 1 2 3 4 5 G 1 2 3 4...
Страница 177: ...177 RU 6 H 7 I 1 20 2 8 J 6 20 70 9 1 2 38 3 4...
Страница 178: ...178 RU 5 K1 K2 14 13 K1 50 2 L 10...
Страница 179: ...179 RU...
Страница 181: ......
Страница 182: ......
Страница 183: ......
Страница 184: ...AR01280200 Copyright 2016 Positec All Rights Reserved www worx com...


