


2
Quick Start Guide
This guide will give you a basic understanding of how the system functions and step through how to get the
RF Terminal and RF Base up and running with a simple demo program.
Step 1: System Overview
The RF Terminal system consists of three main parts, the Terminal, the Base and the application program running on the host comput-
er. The RF Base works much like an access point and allows multiple RF Terminals to interact with the host application program
simultaneously. In a nutshell, the system operates as follows:
All communication between the host and terminal is initiated by the terminal (there are exceptions but this is the most common sce-
nario). First the terminal “signs-in” to the host. This lets the host program know that a new terminal is active and ready to be used.
The host responds by sending a prompt to the terminal. All communication passes through the base. The base keeps track of the data
and makes sure that nothing gets lost. The terminal responds to the prompt with some data and the host responds to the data with an-
other prompt. This process repeats over and over until there is no more data to be entered and the terminal is either “signed-out” or
turned off.
Step 2: Hardware Overview
The most common implementation is a single base connected to a host computer by a USB or serial cable. Each base can communi-
cate with multiple terminals and thus forms a “star” network with the base as the central “hub” funneling all data from the terminals to
the host computer.
The high powered radios used in the Base and Terminal have a range of several miles when used outdoors without obstructions and
can easily cover a large warehouse indoors. However, if more range is required, Relays can be attached to the Base to extend the
range further. This sometimes happens when the Base is located within a heavily shielded room or there is a great deal of RF blocking
or absorbing material near the Base. The exact range is difficult to determine since there are so many variables to consider and every
installation is different. The RF signal will not interfere with WiFi and has considerably longer range.
Step 3: Connecting the RF Base to the Host Computer
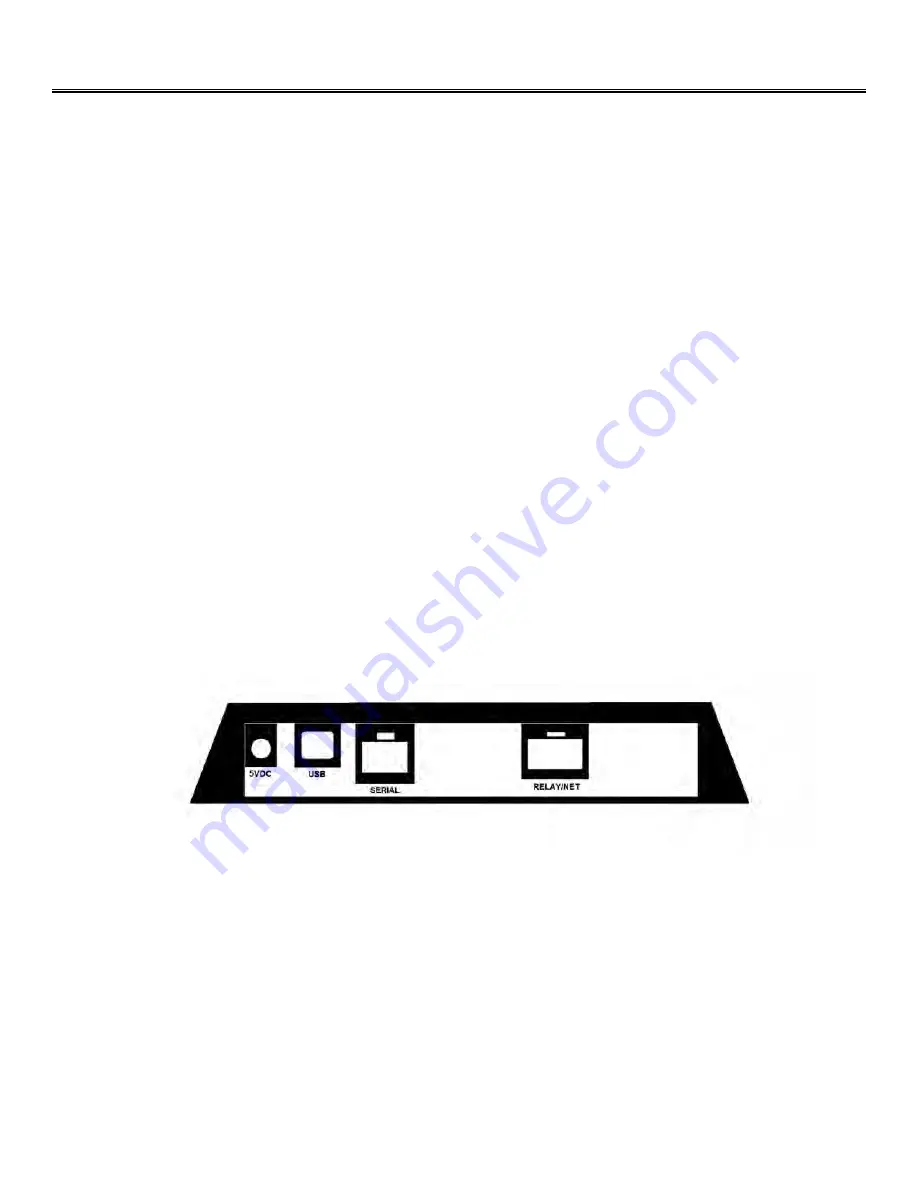
The Base can be connected to the host computer by either an RS-232 serial cable or a standard USB cable. Looking at the back of the
base you will see 4 connectors (older bases do not have the USB connector):
The simplest way to connect the Base to the host computer is with an RS-232 cable since no driver is required. If you will be using
the USB port for communication refer to the Base Installation chapter for detailed information on how to connect the Base by USB
and install the driver. A separate 5VDC power supply is required when using the RS-232 cable.
First plug the RS-232 cable into an available serial port on the host PC then plug the RJ45 plug into the SERIAL port on the back of
the Base. Then plug in the 5VDC power supply and power up the Base. The LED on the front of the Base should briefly blink orange
then blink green three times and stay green. If that’s not the case then refer to the Base Troubleshooting section.
Now you can do a quick test to verify that the Base is running. Turn on the RF Terminal (Press the green button in the upper left hard
corner) and select option #4 for RF SITE SURVEY. Press ENTER to begin the test. The RF Terminal will now send several test
packets to the Base to test the RF communication. After several seconds the RF Terminal will report the results of the test. You
should see 90% or greater for both tests if you are near the Base. More information about site testing can be found in the Base Instal-
lation chapter.
Содержание 7100 RF Terminal Series
Страница 5: ......


