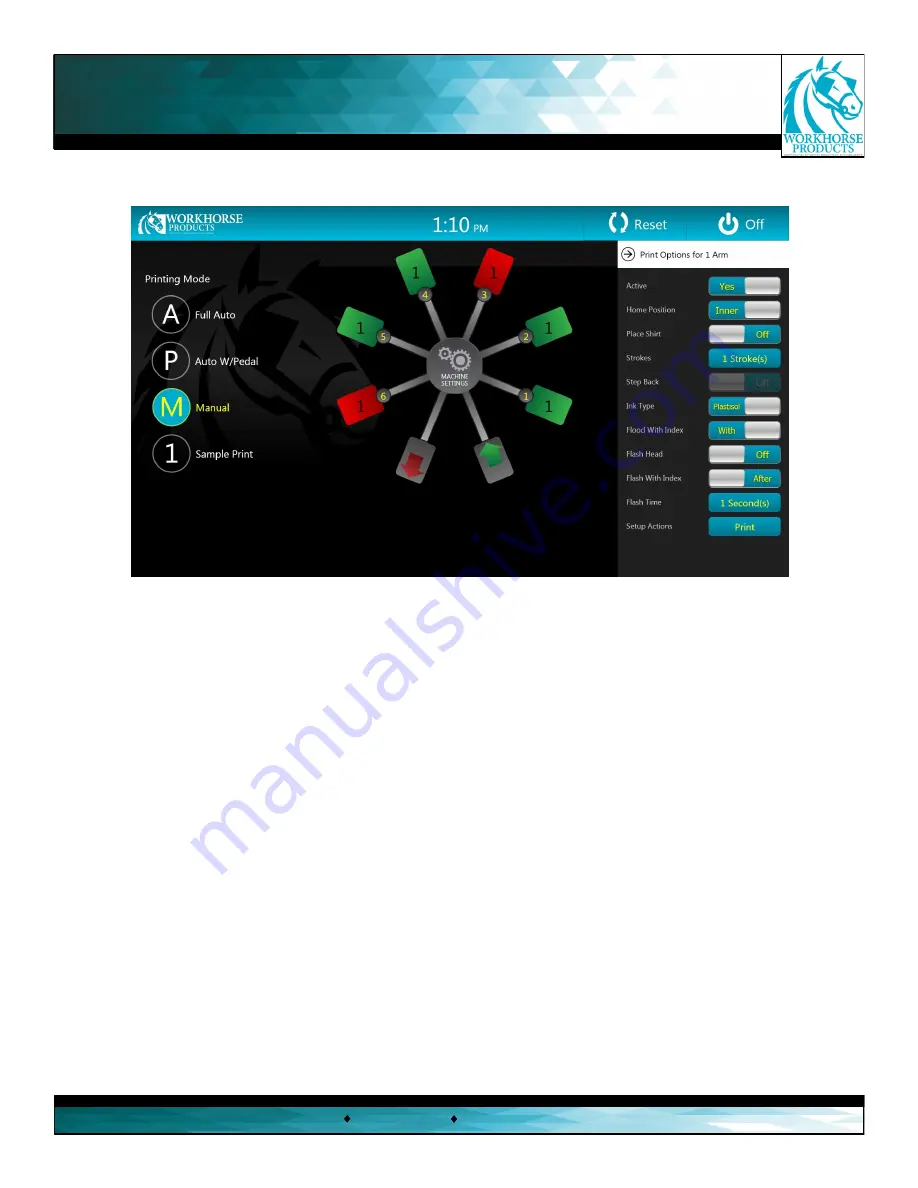
To access the “Print Options” menu, press on the specific print head that needs to be adjusted. In this menu the following
can be set:
A. “Active”
- This button activates or deactivates a print head. An active print head will appear in green, while an inactive print head will appear
as red. An inactive print head will not perform any functions during a print sequence.
B. “Home Position”
- This button will specify where the print head should be while in a rest state. “Inner” denotes nearest to the center of the
machine. This can be used to reverse the flood and print direction on a print head.
C. “Place Shirt”
- This button will virtually place a shirt under a specific print head, which is signified by a shirt icon. This indicates there is a shirt
ready to be printed under the head.
D. “Strokes”
- This feature the operator to set up multiple print strokes on a specific head. Press the “1 Stroke(s)” button to open a sub menu
which allows the operator to enter the desired amount of strokes. Press the green checkmark to save the selection.
E. “Step Back”
- The head will step backwards by one print head before continuing. Reference page 11 of this manual.
F. “Ink Type”
- This button lets the operator select either water based or plastisol ink. This function determines when the head should flood to
minimize drying issues with water based ink.
G. “Flood With Index”
- This button will direct the head to flood the screen while indexing. Selecting “With” will significantly increase production.
H. “Flash Head”
- Selecting this button will prevent the machine from flooding or printing on a head that contains a flash cure.
This button is necessary when working with a Workhorse Flashback in the heads-up position or any flash unit that does not plug into the flash
jack on the print arm control panel. When using a Workhorse Quartz Flash or Flashback the system will automatically detect that a flash has
been connected. A lightning bolt icon will appear on a digital print head if a Workhorse Quartz Flash or Flashback has been connected, or when
the “ON” button has been pressed.
I. “Flash with Index”
- This button will begin the flash cycle as the index cycle begins. The “Flash with Index” function can help increase productivi-
ty by pre-heating the flash.
J. “Flash Time”
- When selected, a sub menu opens and a number pad will appear to allow the operator to specify the number of seconds the
flash will be energized. When using a Workhorse Quartz Flash, the time will be controlled automatically. When using a different flash, including a
Workhorse Flashback, this will allow the machine to not lower the table before the time has expired.
K. “Print”/ “Flash ”
- This button will immediately cycle the print sequence for this print head only. The head will either print or flash, depending
on the settings.
3730 E. Southern Avenue, Phoenix, AZ 85040 USA
800-778-8779
Workhorseproducts.com
10
Touchscreen Controls
A.
B.
C.
D.
E.
F.
G.
H.
I.
J.
K.


