
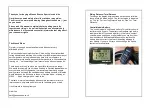
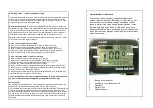


The Woosh Electric Bike Warranty
All Woosh electric bikes come with a standard one year
warranty.
Details of this are fully covered earlier in this manual..
Second hand buyers:
Please note that if you sell your bike second hand, the
balance of the warranty is transferable, but all aspects of our
sales conditions (such as weight and height restrictions) and
all warranty terms will apply to your new purchaser.
If you have purchased your bike second hand from one of
our customers, please note that we cannot accept responsi-
bility for the condition of the bike when it is sold to you.
and no refund can be offered to you under any circum-
stances. We will do our best to support you as a second
hand purchaser but this may be limited at our discretion.
Cleaning and lubricating:
Make sure your chain is kept lubricated.
We specify stainless steel fixings throughout our bikes but
occasional fixings such as clamps or rings may be chrome
and may rust. Applying rust treatment to these at an early
stage will extend the life of the bike.
Washing: we advise against ‘heavy’ washing or using a hose
or power washer, as water may enter connector points and
damage the electrics. We suggest simply using a damp
cloth and wiping dry afterwards.
Always take care when cleaning mud or debris from the
underneath of the bike not to dislodge cables or connectors.
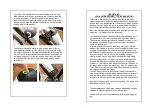
Unpacking
Two people are required to unpack the bike.
Stand the carton upright and then lift the bike out of the car-
ton and lean it against a sturdy surface.
DO NOT
destroy the
carton as it may be required if the bike needs to be returned
in the future.
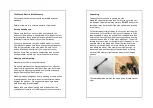
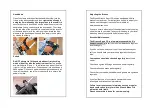
Fit the front wheel straight away, then you can rest the bike
on its stand. To fit the front wheel you will first need to fit the
skewer/spindle. Detach the skewer from the wheel and then
simply slide it through the wheel ensuring you have a spring
on each side and then re-fit the black plastic nut. The quick-
release lever should be on the right side of the wheel i.e. the
opposite side to the brake disc. Lower the frame onto the
wheel, give the clamp and nut a few clock-wise turns and
then clamp the wheel, if the clamp is not tight enough, re-
lease the clamp and then tighten the clamp and nut some
more until the clamp is tight enough when in the clamped
position.
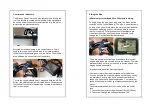
The rear wheel also features the same quick release mecha-
nism.


