7
Motor Wheel
Swap the tyre, tube and freewheel/cassette (in the case of a rear wheel) from your original wheel over to
the motor wheel.
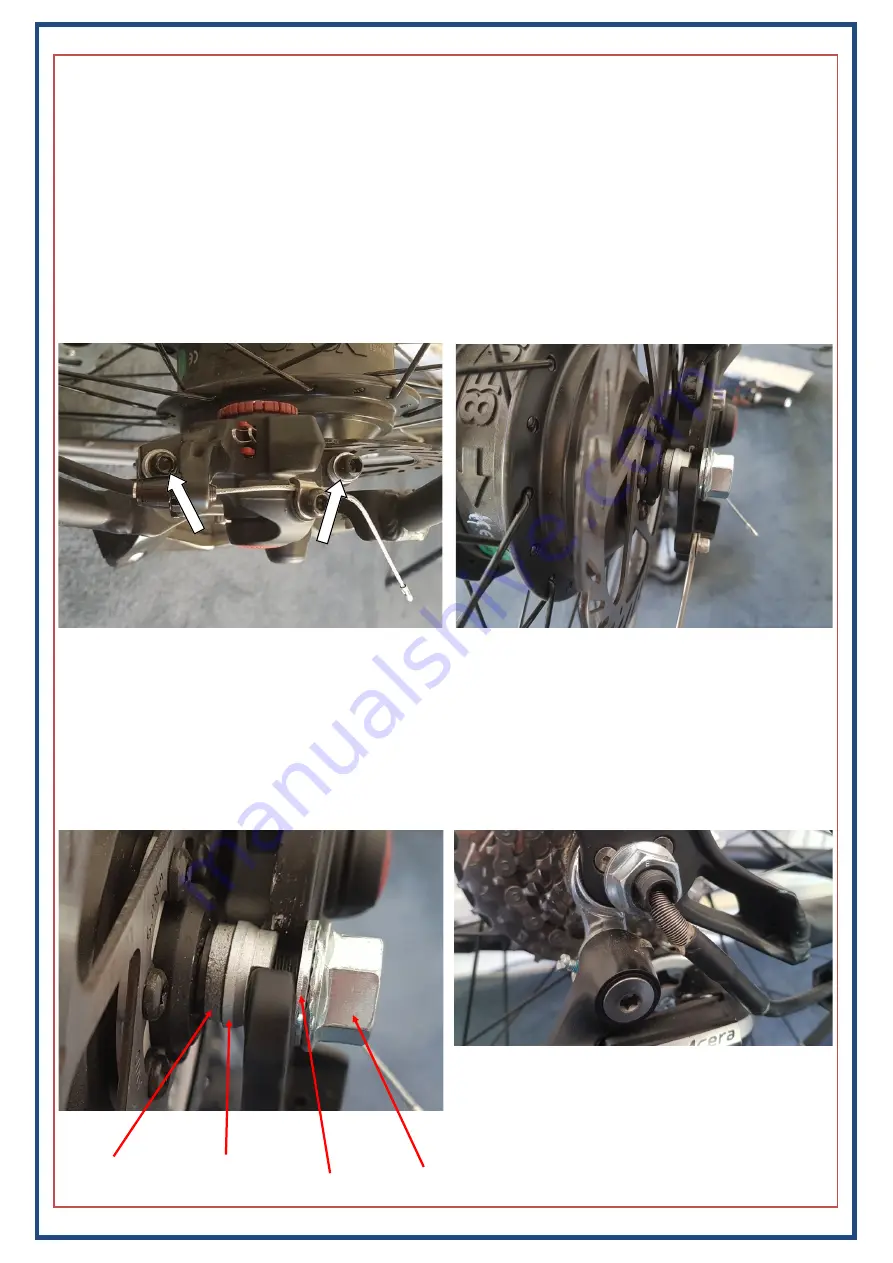
The wheel comes with the nuts and washers that you will need, they should normally be fitted in the or-
der shown below, but sometimes it is necessary to re
-
arrange them, or to fit additional washers to ensure
the wheel is correctly aligned. The anti
-
rotation washer for instance, can be flipped around and fitted on
outside of the drop
-
outs if necessary. If you have disc brakes, loosen the two bolts indicated below
-
left
before fitting the wheel to the bike. This will allow you to make any minor adjustments immediately. If
you are experienced, you can remove the callipers if you prefer and re
-
fit them later. Don
’
t forget to tight-
en the calliper bolts after the wheel is correctly fitted and the rotor correctly aligned.
The normal order for the nuts/washers is as below
-
left, but as mentioned above, it may be necessary to re
-
arrange them to suit your particular bike. On the drive
-
side, try to leave enough space so that if the chain
were to come off, it won
’
t get jammed between the frame and cassette/freewheel.
Ensure that the motor cable exits downwards, and also ensure that the metal coil is far enough down the
cable so that it protects the cable from the edges where it exits the spindle. It can be slid down further by
hand if it
’
s not in the correct position.
Thick washer
Torque washer
Thin washer
Nut
There is a cut
-
out where the cable exits the axle.
This cut
-
out and the cable should face downwards
towards the ground. In the case of a
front
wheel
,
the cable should also
exit downwards before loop-
ing back up
towards the fork. This is to prevent wa-
ter collecting at the aperture.


