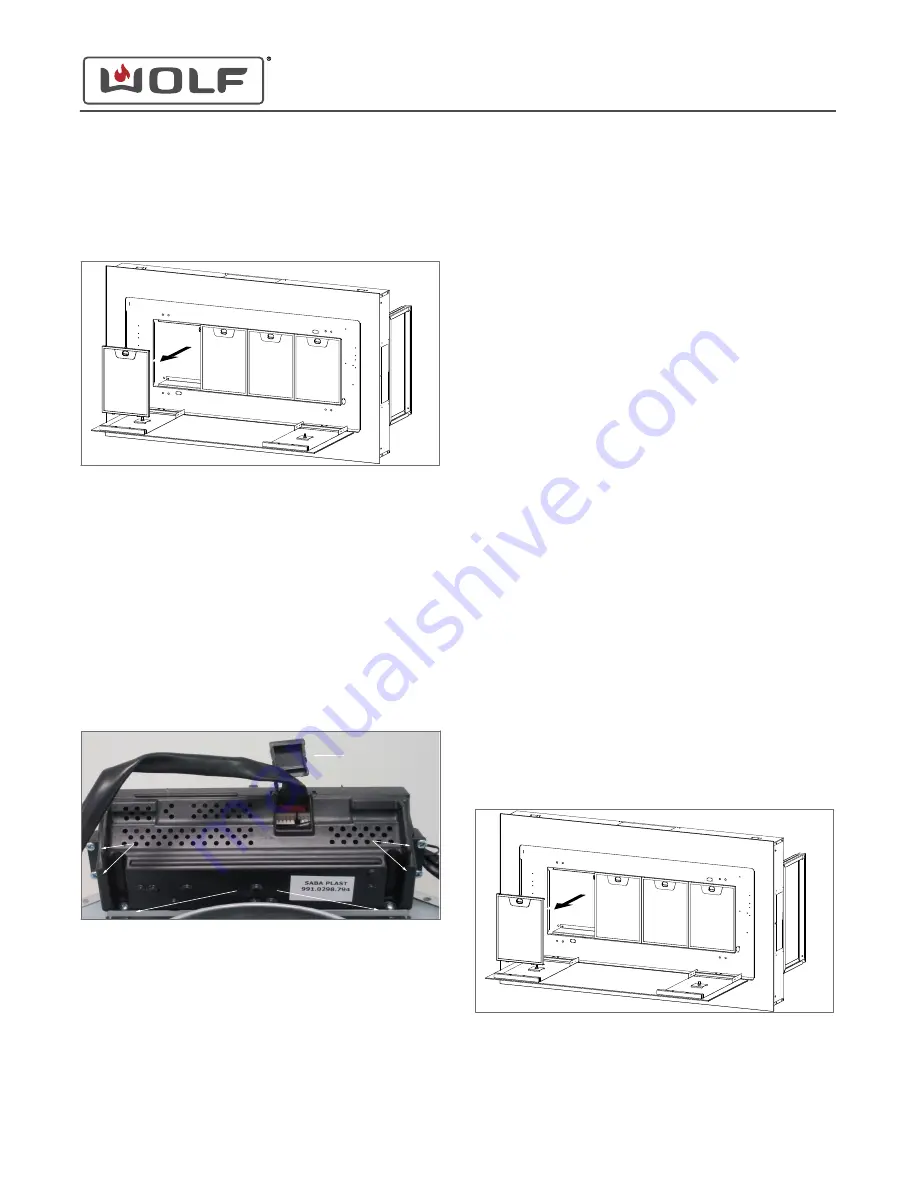
Remove the Filter
1
Push the plastic tab on the front end of the filter toward the
rear of the hood, and pull down.
2
Pull the filter forward, and remove it from the unit.
Remove the Power Board and Transformer Case
1
Open the ribbon cable cover of the power board assembly
with a flat-blade screwdriver, and disconnect the wire
harness.
2
Use a Phillips screwdriver to remove the screws holding the
power board and transformer case to the unit.
3
Use a Phillips screwdriver to remove the screws holding the
power board and transformer case together.
4
Inside the power board and transformer case, disconnect
the wire harnesses from the power board.
5
Remove the power board from the unit.
Hold-Down
Screws
Case
Screws
Ribbon Cable
Cover
Case
Screws
POWER BOARD AND TRANSFORMER CASE INSTALLATION
Install the Power Board and Transformer Case
1
Connect the wire harnesses to the power board.
2
Use a Phillips screwdriver to install the four screws holding
the power board and transformer case together.
3
Use a Phillips screwdriver to install the two screws holding
the power board and transformer case to the unit.
4
Connect the wire harness, and close the wire harness cover.
Install the Filter
1
Set the filter in the filter opening, back of the filter first.
2
Push the plastic tab on the front end of the filter toward the
back of the filter.
3
Rotate the filter upward into place, and release the plastic
tab.
TRANSFORMER REMOVAL
To remove the transformer, first uninstall the unit and remove
the filters. Then, remove the power board and transformer case.
Uninstall the Unit
1
Turn off the power to the unit.
2
Remove the unit from the installation.
TIP: Removing the internal blower first may make uninstalling
the unit easier.
Remove the Filter
1
Push the plastic tab on the front end of the filter toward the
rear of the hood, and pull down.
2
Pull the filter forward, and remove it from the unit.
Ceiling-Mounted Hood
Remove the Filter (continued)
service.subzero.com
828149 REV. A
9


