background image

12

13

General Information

This lawn mower is intended for the care of grass and lawns in 

private gardens. Because of the physical hazard to the operator 

the lawn mower may not be used:

-  to trim shrubs, hedges and bushes,


-  for cutting climbing plants, 

-  for mowing lawns in roof gardens, 

-  for trimming plants in balcony boxes,

-  for cleaning pavements or other paved areas (vacuuming 

- blowing away - removing snow),

-  for shredding and cutting up tree and hedge cuttings

-  as a tractor device (for self-propelled mowers) 

-  for lawn turning devices, spreading devices, trailers e.g. for pas-

sengers, transporting cuttings (except in the grass collection box 

provided).

•  Never mow your lawn if persons, particularly children, or ani-

mals are in the vicinity.

•  Mow only in daylight or with appropriate artificial lighting.

Before Mowing

•  Never mow without wearing sturdy footwear and long trou-

sers: Never mow barefoot or in open sandals.

•  Attach the baffle provided and/or grass box. Make certain that 

it is firmly fitted. Operation without or with damaged protective 

equipment is forbidden. 

•  Examine the area on which the machine is to be used and 

remove all objects which are capable of being contacted or 

thrown by the mower or its blade.

•  Check the machine to make certain that all fasteners, bolts & 

nuts are tightly fitted; check also for signs of damage or seri-

ous wear.

•  Observe the installation instructions when replacing parts - if 

in doubt always refer to your WOLF Service Centre.

•  Examine the grass box regularly for wear or damage - 

replace as necessary.

•  Mowers fitted with four-stroke engines must be provided with 

engine oil before the first start-up (see „Filling Oil”).

•  Check the oil level before each use.

WARNING - petrol is highly inflammable! Do not smoke. Do 

not refuel in any area where there may be a naked flame.

•  Keep fuel only in purpose-designed containers.

•  Only refuel outdoors.

•  Pour in fuel (REGULAR GRADE FUEL) before starting the 

engine.

•  Always firmly tighten petrol filler cap.

•  Do not refuel or remove the tank filler cap while the engine is 

running or when the machine is hot.

•  Do not attempt to start the engine if gasoline spills out. 

Instead, the machine should be removed from the area where 

the petrol was spilled. Any attempt to start the mower should 

be delayed until the fuel vapours have evaporated.

•  Replace the engine exhaust silencer if defective. 

Safety instructions

•  Before use a visual inspection should also be made in order to 

determine whether the blade, fasteners and the mower deck are 

worn or damaged. In order to avoid damaging vibration caused by 

imbalance, worn out or damaged blades and fittings must only be 

replaced as a set.

•  For safety reasons the fuel filler cap must be replaced when dam-

aged.

•  Check the fuel line connections, air filter fittings, etc. for tightness.

When starting the engine

•  Only start the engine if your hands and feet are at safe dis-

tance from the mower deck and blade.

•  Before you start the engine, disengage the drive.

•  When starting or switching on the engine the lawn mower must 

not be tilted, unless the lawn mower must be raised for the pro-

cedure. In this case, you tilt it only so far as is absolutely nec-

essary and only raise the side turned away from the operator.

•  Do not let the engine run in closed areas in which dangerous 

carbon monoxide may accumulate.

•  Start the mower on an even surface, not in tall grass.

•  Do not start the engine if you are standing in front of the dis-

charge channel.

When Mowing

•  WARNING, DANGER! Rotating blade!

•  Do not attempt to touch the blade when it is running.

•  Observe the safety distance provided by the handlebars and bail 

arms.

•  Only start the engine if your feet are at a safe distance from the 

blade.

•  Make certain that you have a secure foothold, particularly on 

slopes. Never run, always walk calmly.

•  Always mow slopes along the contours, not up and down the 

slope.

•  Particular care is required on slopes as you change direction.

•  Be particularly careful when you turn the mower and pull it towards 

you.

•  Switch off the mower, if you tilt it, run it dry or when transporting it.

•  Never use the lawn mower with damaged protection guards, 

safety devices or grilles or without the protection devices 

attached, e.g. baffle plates and/or grass box.

•  Do not change the governor adjustment of the engine or 

attempt to adjust it.

•  The blade must be stopped if the lawn mower is moved off the 

lawn.

•  Before you raise or carry the mower switch off the engine off 

and wait until the blade has come to a complete stop.

•  Adjust the cutting height only with the engine switched off and 

with the blade at a standstill.

•  Never open the protection flap if the engine is still running.

•  Before removing the grass box: Turn off the engine and wait 

for the blade to stop. Carefully refit the grass box after empty-

ing.

•  Never drive over gravel with the engine running - stones can 

be thrown by contact with the blade!

•  Where possible, do not mow in wet grass. If the mower 

appears to have blocked, turn off the engine, remove the spark 

plug lead and wait until the blade comes to a standstill if, for 

example:

-  to free a blockage in the ejection channel

-  to examine or clean the mower

-  if a foreign body is encountered. Check whether mower 

deck or blade have been damaged. Then correct or repair  

the damage before recommencing  mowing.

-  if the mower strongly vibrates from imbalance (then switch 

off immediately and look for the cause). 

•  NOTE: Danger when grass box equipment is inappropriately handled.

•  If the mower is a self-propelled version then release the drive 

clutch bail before you switch on the engine. Do not touch 

engine or exhaust during or shortly after operation. Hot parts 

can lead to burns or provoke frightened movements which may 

lead to injuries.

•  Turn the engine off if you the leave the lawn mower unat-

tended and before you refuel.

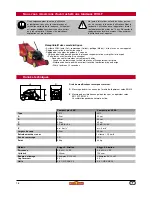
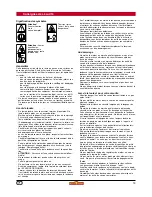
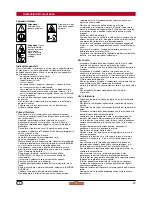
Meaning of the symbols

Sharp blades

 - 

Beware of cutting 

fingers or toes 

- Remove spark 

plug lead before 

maintenance.

Keep bystanders 

away!

Attention!

Read Instruction 

manual before 

use!

Содержание Compact plus 40 B

Страница 1: ...Compact plus 40 B Compact plus 40 BA ...

Страница 2: ...3 2 A B C D E ...

Страница 3: ...3 1 2 3 F OIL ADD MIN FULL MAX 1 2 H 1 2 J N M L O Q P 2 c m 1 2 S 17 mm 13 mm R G K ...

Страница 4: ...Regolazione l atezza di taglio 14 Indicator dell altezza 1 Drive clutch bail arm Compact plus 40 BA 2 Recoil starter 3 Assembly of handlebar 4 Filling indicator 5 Catcher bag 6 Deflector plate 7 Petrol filter cap 8 Primer 9 Air cleaner 10 Throttle lever 11 Operator presence bail arm 12 Engine oil check fill 13 Cutting height adjustment 14 Indicator of cutting height 1 Etrier du mécanisme d entrain...

Страница 5: ...Mähen in 30 Sekunden Lesen Sie die Gebrauchsanweisung sorgfältig und machen Sie sich mit den Bedienungselementen und dem richtigen Gebrauch des Gerätes vertraut Der Benutzer ist verantwortlich für Unfälle mit anderen Personen oder deren Eigentum Beachten Sie die Hinweise Erläuterungen und Vorschriften Lassen Sie nie Kinder oder andere Personen die die Gebrauchsanweisung nicht kennen den Rasenmäher...

Страница 6: ...n den Schneidwerkzeugen sind Bevor Sie den Motor starten kuppeln Sie das Schneidwerkzeug und den Antrieb aus Beim Starten oder Anlassen des Motors darf der Rasenmäher nicht gekippt werden es sei denn der Rasenmäher muss bei dem Vorgang angehoben werden In diesem Fall kippen Sie ihn nur so weit wie es unbedingt erforderlich ist und heben Sie nur die vom Benutzer abgewandte Seite hoch Lassen Sie den...

Страница 7: ...rbeiten am Gerät sowie das Abnehmen der Schutzeinrichtung dürfen nur bei stillgesetztem Motor und abgezogenem Zündkerzenstecker und falls vorhanden Startschlüssel vorgenommen werden Vor Reinigungsarbeiten und Ölwechsel Hinweis auf dem Chassis beachten Sorgen Sie dafür dass alle Muttern Bolzen und Schrauben fest angezogen sind und das Gerät in einem sicheren Arbeitszustand ist Um Brandgefahr zu ver...

Страница 8: ... Schnitthöhe einrasten lassen 2 Schnitthöhe Graszustand Mähen Sie möglichst trockenen Rasen um die Grasnarbe zu schonen Bei feuchtem und hohem Rasen eventuell mit höherer Schnitthöhe mähen In der Regel stellt man eine Schnitthöhe von 4 0 5 0 cm ein Kraftstoff einfüllen Nicht rauchen kein offenes Feuer Nicht bei laufendem Motor tanken Bei warmem Motor keinen Kraftstoff verspritzen Verwenden Sie ble...

Страница 9: ...e reinigen Verschmutzte Zündkerzen vermindern die Motorleistung Zündkerze reinigen und auf richtigen Elektrodenabstand prüfen 0 76 mm Luftfilter reinigen Siehe Betriebsanleitung des Motorenherstellers beiliegend Messerwechsel R Vor allen Wartungs und Reinigungsarbeiten Zündkerzenstecker ziehen Vorsicht Nicht an laufende Schneiden greifen Messerwechsel immer von einer Fachwerkstatt durchführen lass...

Страница 10: ...tung hinausgehende Ansprüche sind ausgeschlossen Ein Anspruch auf Ersatzlieferung besteht nicht Etwaige Transportschäden sind nicht uns sondern dem zuständigen Transportträger zu melden da sonst die Ersatzansprüche an diese Unternehmen verloren gehen WOLF Garten Austria Ges m b H Businesspark Wien Süd Campus 21 Liebermannstraße F02 402 2345 Brunn am Gebirge Tel 43 1 8 66 70 2 25 30 Fax 43 1 8 66 7...

Страница 11: ...ations may specify the minimum legal age of the operator A quick guide to features CCM System Cut Collect Mulch all with one machine Central cutting height setting Dual position height adjustable handle Fold down handle for space saving storage and easy transport Cutter bar with interchangeable blades Ball bearing comfort wheels Easily emptied capacious catchment bag with level indicator High qual...

Страница 12: ... mower deck and blade Before you start the engine disengage the drive When starting or switching on the engine the lawn mower must not be tilted unless the lawn mower must be raised for the pro cedure In this case you tilt it only so far as is absolutely nec essary and only raise the side turned away from the operator Do not let the engine run in closed areas in which dangerous carbon monoxide may...

Страница 13: ...ed with the engine stopped and the spark plug lead and if available the starting key removed Note information on the chassis before cleaning and oil change Make certain that all nuts pins and screws are firmly tight ened and that the unit is in a safe operating condition In order to avoid the risk of fire keep the engine exhaust battery box and the area around the fuel tank free of grass leaves or...

Страница 14: ... up to the marking Full on dipstick Capacity approx 0 6 litre Lift mower slightly on the oil filter side whilst pouring oil slowly Filling with Petrol Do not smoke no naked flames Switch off engine Avoid spilling petrol when engine is warm Use low octane petrol do not use Super Plus Avoid petrol spillage Do not inhale vapour Use of height adjustment J Only when mower is stationary and rotating bla...

Страница 15: ...plug gap as required 0 76 mm Cleaning of air filter Refer to the engine manufacturer s handbook supplied Winter storage Drain fuel tank Drain carburettor start engine keep it running until it stops from fuel Starvation Clean the whole machine thoroughly Change oil 4 stroke engine Prepare engine for winter storage as follows Remove spark plug Poor one teaspoon full of engine oil into spark plug hol...

Страница 16: ...ual which forms part of our guarantee terms Observance of the prescribed maintenance intervals No unauthorised alteration of the design Installation of original WOLF replacement parts accessories Presentation of the completed guarantee card and or proof of pur chase This guarantee does not extend to normal wear and tear on blades blade mounting components or friction disks V belts toothed belts ru...

Страница 17: ...t appareil Récapitulatif des caractéristiques Système CCM tonte Cut ramassage Collect paillage Mulch et tout avec un seul appareil Réglage central de la hauteur de coupe Réglage de la hauteur du guidon à 2 niveaux Poignée rabattable pour gagner de la place au rangement et pour simplifier le transport Porte lames avec lames qui se changent Roues de confort montées sur roulement à billes Grand sac d...

Страница 18: ... usure ou l en dommagement des outils de coupe des boulons de fixation et de l unité de coupe dans son ensemble Afin d éviter tout déséquilibre vous devez remplacer les outils de coupe et les boulons de fixation usés ou endommagés par jeu complet uni quement Par mesure de sécurité remplacer complément le réservoir essence en cas d endommagement Au démarrage Ne mettre le moteur en marche que lorsqu...

Страница 19: ...oteur est l arrêt moteur refroidi et cosse de bougie débranchée Lors du pliage du guidon de la tondeuse décrocher le câble de démarrage et prendre soin de ne pas plier les câbles Bowden Toujours vidanger l huile du moteur le réservoir d essence vide le bouchon refermé et le moteur chaud Maintenance Vérifier régulièrement l assise de toutes les vis de fixation et de tous les écrous visibles en part...

Страница 20: ... un feu ouvert Ne faites pas le plein lorsque le moteur tourne et faites attention quand le moteur est chaud Utilisez de l Essence à faible degré d octane pas de Super Plus Eviter de renverser de l essence Ne pas respirer les vapeurs Réglage de hauteur de coupe J Uniquement après arrêt du moteur et de la lame Passez les doigts dans la poignée et appuyez sur le bouton avec le pouce Placez le châssi...

Страница 21: ...3 sur envi ron 2 cm 2 Dévisser le contre écrou S 1 3 Tourner la vis de réglage S 2 vers la gauche jusqu à ce que les roues motrices se bloquent lorsque la tondeuse est tirée vers l arrière 4 Revisser le contre écrou S 1 Vidange de l huile moteur doit toujours être faite quand le moteur est chaud et le réservoir vide Première vidange après 5 heures de travail Ensuite toutes les 25 heures de travail...

Страница 22: ...nance Pas de modification arbitraire de la construction Montage de pièces détachées accessoires WOLF originaux Présentation de la carte de garantie remplie et ou de la preuve d achat La garantie ne s applique pas à l usure normale des dents ni aux pièces de fixation de ces dents telles que les disques de friction les courroies trapézoïdales dentées les roues pneus le s filtre s à air les bougies c...

Страница 23: ...stiche della dotazione in sintesi Sistema CCM tagliare Cut raccogliere Collect sminuzzare finemente Mulch tutto con un ap parecchio regolazione centralizzata dell altezza di taglio regolazione in altezza dell impugnatura in 2 posizioni impugnatura pieghevole per un deposito con minimo ingombro e trasporto semplificato barra di taglio con lame alternate ruote confortevoli montate su cuscinetti a sf...

Страница 24: ...na si sono dileguati Sostituire i silenziatori difettati Prima dell uso con un controllo a vista verificare sempre che gli attrezzi da taglio i perni di fissaggio e l intera unità per tagliare non presentino tracce di usura o danneggiamento Per evitare uno squilibrio gli attrezzi da taglio danneggiati od usurati e i perni di fissaggio possono essere sostituiti solo per serie Per motivi di sicurezz...

Страница 25: ...appuccio delle candele di accensione staccato Nel rimettere a posto l apparecchio sganciare la fune di avviamento e fare attenzione che i cavi Bowden non vengano piegati Eseguire il cambio del motore sempre a serbatoio vuoto e chiuso e con motore caldo Manutenzione Controllare regolarmente che tutte le viti di fissaggio e i dadi visibili in particolar modo quelli della lama siano fissi ed eventual...

Страница 26: ... con 0 6 l olio SAE 30 sino al contrassegno Full dell asta di livelo rispettivamente sino all orlo del bocchettone Per il controllo non avvitare l asta di livello Rifornimento di carburante Non fumante niente fuochi Non fare benzina mentre il motore è in moto A motore caldo non schizzare benzina Usare solo benzina basso numero di ottano Evitare di versare benzina Non respirare i vapori Regolato l ...

Страница 27: ...a frizione F S 1 Sollevare la staffa di azionamento F 3 di ca 2 cm e bloccare 2 Allentare il controdado S 1 3 Girare a sinistra la vite di regolazione S 2 in modo che le ruote motrici si blocchino durante l arretramento della trebbiatrice 4 Serrare di nuovo a fondo il controdado S 1 Cambio d olio Quando il motore è nuovo l olio deve essere cambiato dopo 5 ore de funzio namento in seguito ogni 25 o...

Страница 28: ...prescritti Nessuna variazione della costruzione su propria iniziativa Montaggio delle parti di ricambio originali accessori della WOLF Presentazione del documento di garanzia compilato e o del certificato d acquisto La garanzia non si estende alla normale usura delle lame alle parti di fissaggio delle lame come ruote di frizione cinghie trapezoidali e cinghie dentate ruote portanti pneumatici filt...

Страница 29: ... de zestien is het gebruik van het apparaat verboden Typische kenmerken in het kort CCM systeem Maaien Cut Vangen Collect Mulchen Mulch alles met één machine centrale instelling van de maaihoogte Duwboomhoogte instelling 2 voudig inklapbare duwboom voor ruimtebesparend opbergen en eenvoudig vervoeren messenbalk met verwisselbare messen kogelgelagerde comfort wielen makkellijk te legen ruime opvang...

Страница 30: ...oorkoming van onbalans mogen versleten Uit veiligheidsoogpunt moet een beschadigde tankafsluiting worden vervangen Aansluitingen van benzineleidingen luchtfilters etc op juiste bevestiging controleren Bij het starten Motor alleen inschakelen als uw handen en voeten zich op een veilige afstand van de snijgereedschappen bevinden Snijgereedschap en aandrijving uitschakelen voordat u de motor start Bi...

Страница 31: ...ten en moeren vooral die van de messenbalk moeten regelmatig op juiste bevestiging worden gecontroleerd en worden aangehaald Er mogen alleen onderhouds en reinigingswerkzaamheden aan de maaier worden uitgevoerd en de beschermingsvoorziening mag alleen worden verwijderd als de motor stilstaat en de bougiestekker is verwijderd Er moet worden gecontroleerd of alle moeren pennen en bouten stevig vastz...

Страница 32: ...ntrole niet te worden ingeschroefd Vullen met benzine Niet roken en geen open vuur in de direkte omgeving Niet met lopende motor tanken Bij een warme motor geen benzine morsen Gbruik octaan arme benzine geen super plus Geen benzine morsen Dampen niet inademen Instellen van de maaihoogte J Alleen bij uitgeschakelde moter en stilstaand mes Ut stelt de gewenste maaihoogte in door de knop naast de han...

Страница 33: ...en 2 Snijhoogte in de hoogste stand zetten 3 Bij reinigingswerkzaamheden en bij het vervangen van het mes de maaier zoals afgebeeld naar achteren duwen Mes wisselen R Eerst de bougiedop van de bougie trekken Het verwisselen van messen altijd door een gespecialiseerde werksplaats laten verrichten Draag handschoenen tijdens alle werk zaamheden aan het mes verwijder de contactsleutel en trek de bougi...

Страница 34: ...chijven V riemen tandriemen loopwielen banden luchtfilters ontstekingskaarsen en bougiestekkers In geval van een eigenmachtige reparatie komt iedere garantieclaim automatisch te vervallen Fouten en gebreken die zich voordoen en waarvan de oorzaken aan materiaal of fabricagefouten te wijten zijn worden uitsluitend door onze contractueel gebonden werkplaatsen in uw buurt of indien deze dichterbij ge...

Страница 35: ...onformitetsprosess använt konformitetsförfarande Anhang VI Name und Anschrift der beteiligten benannten Stelle name and address of the notified body involved le nom et l organisme notifé nome ed indirizzo dell ufficio competente citato naam en adres van de bevoegde benoemde dienst navn og adresse på den myndighed som er involveret tarvittaessa osallistujan nimi ja osoite navn og adresse til den de...

Страница 36: ...www WOLF Garten com Teil Nr 0054 471 TB ...

Отзывы: