5
Setup for a Secondary Receiver
After completing the setup on the main receiver, power on
the secondary receiver. If using a new receiver, you will be
guided through the setup by the Installation Wizard; follow the
on-screen steps to complete the setup. If using a receiver that
is currently active or has been used previously, you will need
to complete the setup by doing a Check Switch test. To access
the receiver menu for running a Check Switch test, follow the
steps under “Accessing the Receiver Menu.”
Accessing the Receiver Menu
If you need to access the receiver menu after initial setup,
follow the steps below to reach the receiver menu.
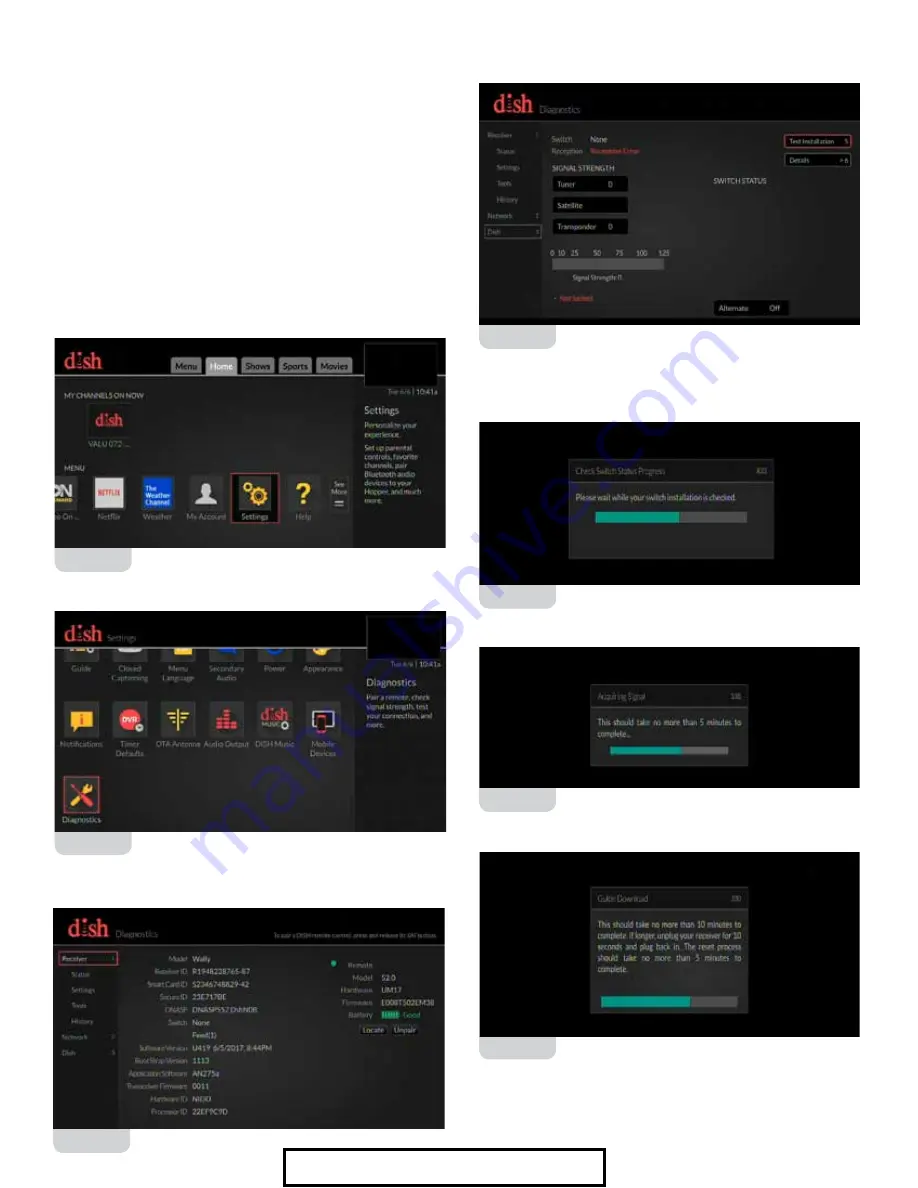
Press Home button twice on your remote. On the “Home” tab,
select “Settings” (figure 12).
Within the “Settings” menu, select “Diagnostics” (figure 13).
Within the “Diagnostics” menu, select “DISH” on the left side
(figure 14).
Press “Test Installation 5” to start the Check Switch test (figure 15).
The “Check Switch Status” screen will show the progress
(figure 16) . Press the Back button three times once the Check
Switch test is complete.
The receiver will aquire the signal (figure 17).
Lastly, the receiver will download the Program Guide (figure 18).
Figure 12
Figure 13
Figure 14
Figure 15
Figure 18
Figure 17
Figure 16
For Sales Information Please Contact RoadTrucker Inc (www.RoadTrucker.com)
8312 Sidbury Rd.; Wilmington, NC 28411 - (800) 507-0482 / (910) 686-4281


